1. Installing and Starting FileZilla
First, install FileZilla (choose the Download FileZilla Client option, not the server option). Once installed, start the application. You should see something like this when it loads:
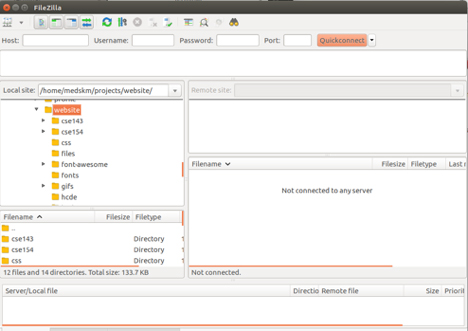
The easiest way to upload files to your students web space is by using a SFTP client like Filezilla (others like CyberDuck and WinSCP). We will demonstrate with FileZilla since it is a free program for Mac, Windows, and Linux which that will allow you to easily upload and transfer local files to the internet.
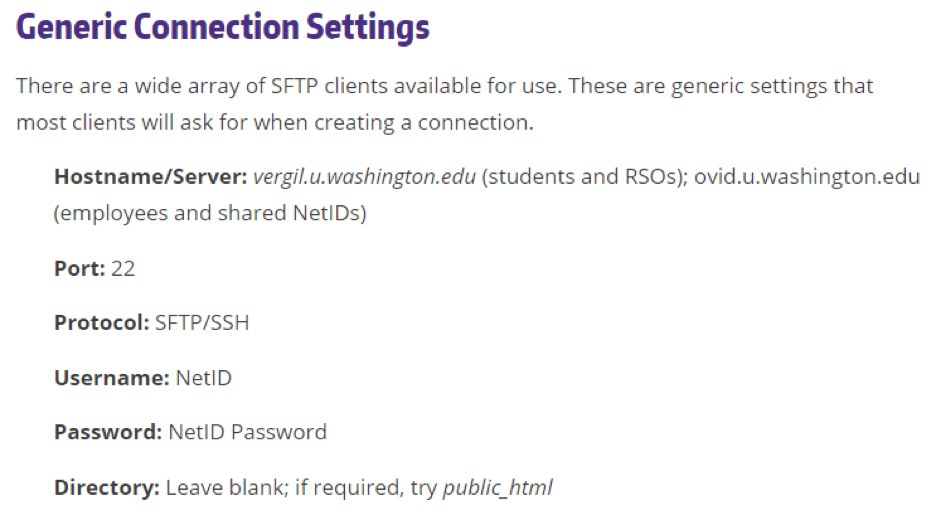
As of writing these slides, UW students will need to use vergil as the server name for logging into your website. You will be logging into your student webspace with your uwnetid and password.
First, install FileZilla (choose the Download FileZilla Client option, not the server option). Once installed, start the application. You should see something like this when it loads:
Use the information provided on the Generic Connect Settings page to connect to your student webspace (vergil) in FileZilla:

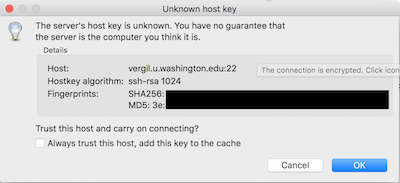
The first time you do this you may see a dialog box that looks like the one below. This is perfectly normal, it is just setting up a secure connection between your machine and the server. Click the radio button next to "Always trust this host, add this key to the cache" and press the OK button.
Once you have connected successfully, you will see a directory structure on the right column of FileZilla:
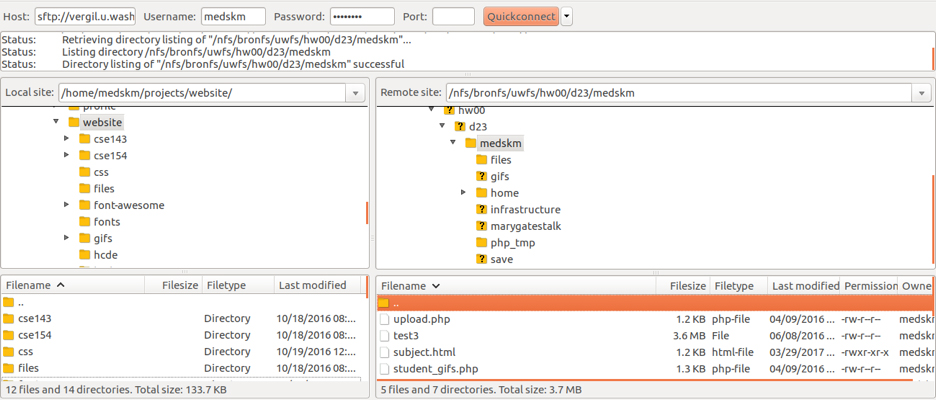
The left (with a "Local site" dropdown) shows all of your files on your local computer, and the right (with a "Remote site" dropdown) shows all of your files on your student webspace.
Note: you may also have a student_html folder, which will exist if you are a student employee of the university as well. Please see this page for more information on what to do in this case.
To publish files to your public student url, simply drag and drop folders/files from local to remote.
Make sure any files you want to be accessible by the public are put in the public_html folder - if you are also an employee of UW (e.g. a TA) you can activate both Student Web Publishing and the employee Web Publishing services, but you'll then use student_html for your student webspace and public_html for your employee one (more information on the differences between these two folders here ).
NOTE: Do not delete your public_html folder!!!
Check that your files are now accessible by going to:
https://students.washington.edu/netid
replacing "netid" with your UW student netid. For example:
https://students.washington.edu/medskm