Week 9 Lab: PHP & SQL Connection
Bricker and Morter Store (Part II: Handling POST Requests)
Bricker and Morter Store (Part II: Handling POST Requests)
Reminder: Web Security Exploration Session Today!
Details: 5PM (MGH 241)
Now that you've learned how to write both client- and server-side code on your website (and publish it!) have you considered what vulnerabilities might exist for malicious users to exploit?
Come learn about different themes and issues in web security, from browser security and "XSS attacks" (JS) to SQL injection, as well as what tools you can use to protect against different attacks in your own websites!
Lab Overview
In this lab, you will build off of this week's section exercise with the bmstore database and get practice with handling POST requests in PHP to modify your MySQL database.
You will also have a chance to learn about Postman, a tool to easily test POST requests to your PHP web service without needing JS.
Recall: Executing SQL Queries with PDO: query vs. prepare/execute
We've seen we can get SQL rows from a SQL query using
$db->query(querystring). But whenever you are using
variables taken from client input in
your query string, you should instead use the prepare and
execute functions, which add an extra layer of security to avoid
SQL injection.
$qry = "INSERT INTO Potluck (name, dish, serves, temperature, comment)
        VALUES (:name, :dish, :serves, :temp, :comment );";
$stmt = $db->prepare($qry);
$params = array("name" => $_POST["name"],
                "dish" => $_POST["dish"],
                "serves" => $_POST["serves"],
                "temp" => $_POST["temperature"],
                "comment" => $_POST["comment"]);
$stmt->execute($params);
$rows = $stmt->fetchAll(); # we can now do a foreach loop over $rows!
PHP (example from lecture)
Monday's reading on PDO is a fantastic resource for how/when to use PDO functions!
Lab Agenda
We will build off of what you did in section this week to add POST requests to modify the bmstore database. This lab will prioritize Exercises 4/5, but you are encouraged to review Exercise 1-3 if you would find it helpful. Feel free to start with Exercise X if you'd like to get Postman set up first (an optional tool for testing POST requests).
- (Review) Exercise 1: Create a new SQL database for our store and importing an provided setup.sql to create a single table called Inventory.
- (Review) Exercise 2: Implement a few PHP GET requests using this table data and SQL SELECT queries with the PDO object, returning plain text and JSON response types.
- (Review) Exercise 3:
Design and CREATE a new SQL table called MyCart in a new
.sqlsetup file. - Exercise 4: INSERT, UPDATE, and DELETE products in MyCart based on products found from the Inventory table to create a "cart" for a customer of the Bricker and Morter e-commerce store.
- Exercise 5: Add PHP POST parameter endpoints to make a functioning PHP web service with our SQL database!
- Exercise X: Learn how to use Postman to test PHP GET/POST requests.
Exercise 1: Creating/Importing Data
On Tuesday, your TA imported the provided .sql file of products for our fictional e-commerce store. If you didn't follow on your own computer, here are the steps:
- Create a new database called
bmstorein phpMyAdmin. - Download setup-inventory.sql and import it in this new database. You should see a number of "Query OK" messages appear.
Confirm that the Inventory table was successfully populated in your bmstore database using a SELECT query in the bottom SQL console of phpMyAdmin (you should see 119 rows in the result table upon success).
(Slides continued below)
Exercise 1: Finishing common.php
Use the provided a common.phps (save as
a .php file, not .phps) to get started with your own
value for the port number (which you can find on the MAMP home page).
Recall you can link to a common.php file using
include("common.php") in each PHP file you write (in the same directory) that uses it.
Exercise 2: Writing SQL SELECT Queries in PHP with PDO
In section, you practiced writing SQL SELECT Queries to handle GET requests in PHP using the PDO object. Recall that the first request (mode=prices) returns a JSON response for all name/price data of the Inventory table, and the second request (mode=itemdata&category=<categoryname>) returns JSON with more detailed information for each item in a provdied category.
You can find provided solution code to handle these two GET requests in bmstore.phps.
Exercise 3: Creating a New MyCart Table
In section, you also created a new .sql file to add a second SQL table to store data about a user's "shopping cart". You can find one possible solution to import in your bmstore database in setup-mycart.sql (if you did not create this already in section).
In the SQL console, test your new table by inserting your first row into the table with a product id and quantity of your choice (use an id from the Inventory table). You can then SELECT from the MyCart table to check that you have exactly one row. If this is successful, delete the row to empty the MyCart table again.
Exercise 4: Adding Items to MyCart Using PHP
Now you'll add a new PHP file to handle inserting items into the MyCart table. Write a
new file called update-mycart.php. Remember to include
common.php in this file so you have the get_PDO() function
available.
In this PHP file, write a function named add_product_to_cart that takes as
parameters $pid and $qty and gets the
corresponding row from Inventory based on $pid.
Remember that the pid corresponds to the unique id in the Inventory table.
If a row is found with the pid, insert the pid and qty
into the MyCart table with lastupdated assigned to
NOW() - add a new row if there is not yet a product with
the pid in the MyCart table, otherwise
update the qty value to add the
passed $qty to the current qty for that row in the table.
You should also update the lastupdated value to be NOW() to
reflect the recent quantity change for the product in the cart.
Exercise 4: Inserting Items to MyCart
Upon success, output the following JSON message:
{ "success" : "X of Y added to your shopping cart!" }
JSON
replacing "X" with $qty and "Y" with the name of the product added. Note
that since you don't have the name as an attribute in MyCart, you'll need to get this
information from a query the Inventory table - you will need to have already written a
query on Inventory to determine whether the pid was valid, so try to find a way to use
information from that query here.
Test your function by calling it with a pid and
qty of your choice so that when you open
update-mycart.php on your browser (with a local server running), your function is called
with those values and you see the JSON result printed.
Check the contents of your MyCart table to confirm that it is no longer empty.
Exercise 4: Deleting Items from MyCart
Next add a function called delete_product_from_cart that takes the same
parameters as add_product_to_cart but rather than adding $qty
of the product to MyCart, it removes that many. If the passed
If the $qty was less than the current quantity, update the
quantity in the row accordingly, and output the following JSON response:
{ "success" : "X of Y removed from your cart." }
JSON
where "X" is the quantity that was removed and "Y" is the name of the product corresponding to the pid. Make sure to also update the lastupdated attribute to be NOW().
(Continued on slides below)
Exercise 4: Deleting Items from MyCart
If $qty is greater than the current quantity of the
product, remove the row from the table and return the following JSON result:
              { "warning" : "Quantity was passed as a value greater than what was found
                             in your cart. Removed all Y from your cart." }
JSON
where "Y" is the name of the product corresponding to the pid. If instead the pid does not correspond to a product in MyCart, your function should output a 400 error with the plain text message, "Product not found in your cart."
Exercise 5: Adding POST parameters to update-mycart.php
Next, modify update-mycart.php to check for three (required) POST parameters:
mode, pid, and qty. If these are all passed to
your web service and mode is passed as add or
delete,
call the corresponding insert/delete functions you wrote in Exercise 4 with these values.
If MyCart was successfully updated with these values, return
a JSON "success" response as specified in Exercise 4. If any of the required POST
parameters are missing or an unrecognized mode value is passed, output a
400 error with a user-friendly plain text message.
Exercise 1-5 Solutions
Possible solutions are provided below:
Exercise X: Posting with Postman
Recall how you would need to make API calls:
For GET requests, you can directly visit the URL on your browser and see the result.
(i.e. Testing a GET request to httpbin.org/get with parameters rainbow=dash and twenty=percent-cooler
can be accomplished by simply visiting the following page: https://httpbin.org/get?rainbow=dash&twenty=percent-cooler)
For POST requests, that would be a bit more complicated. We've told
you to test your POSTs by creating fetch calls with
FormData. (See the slides below)
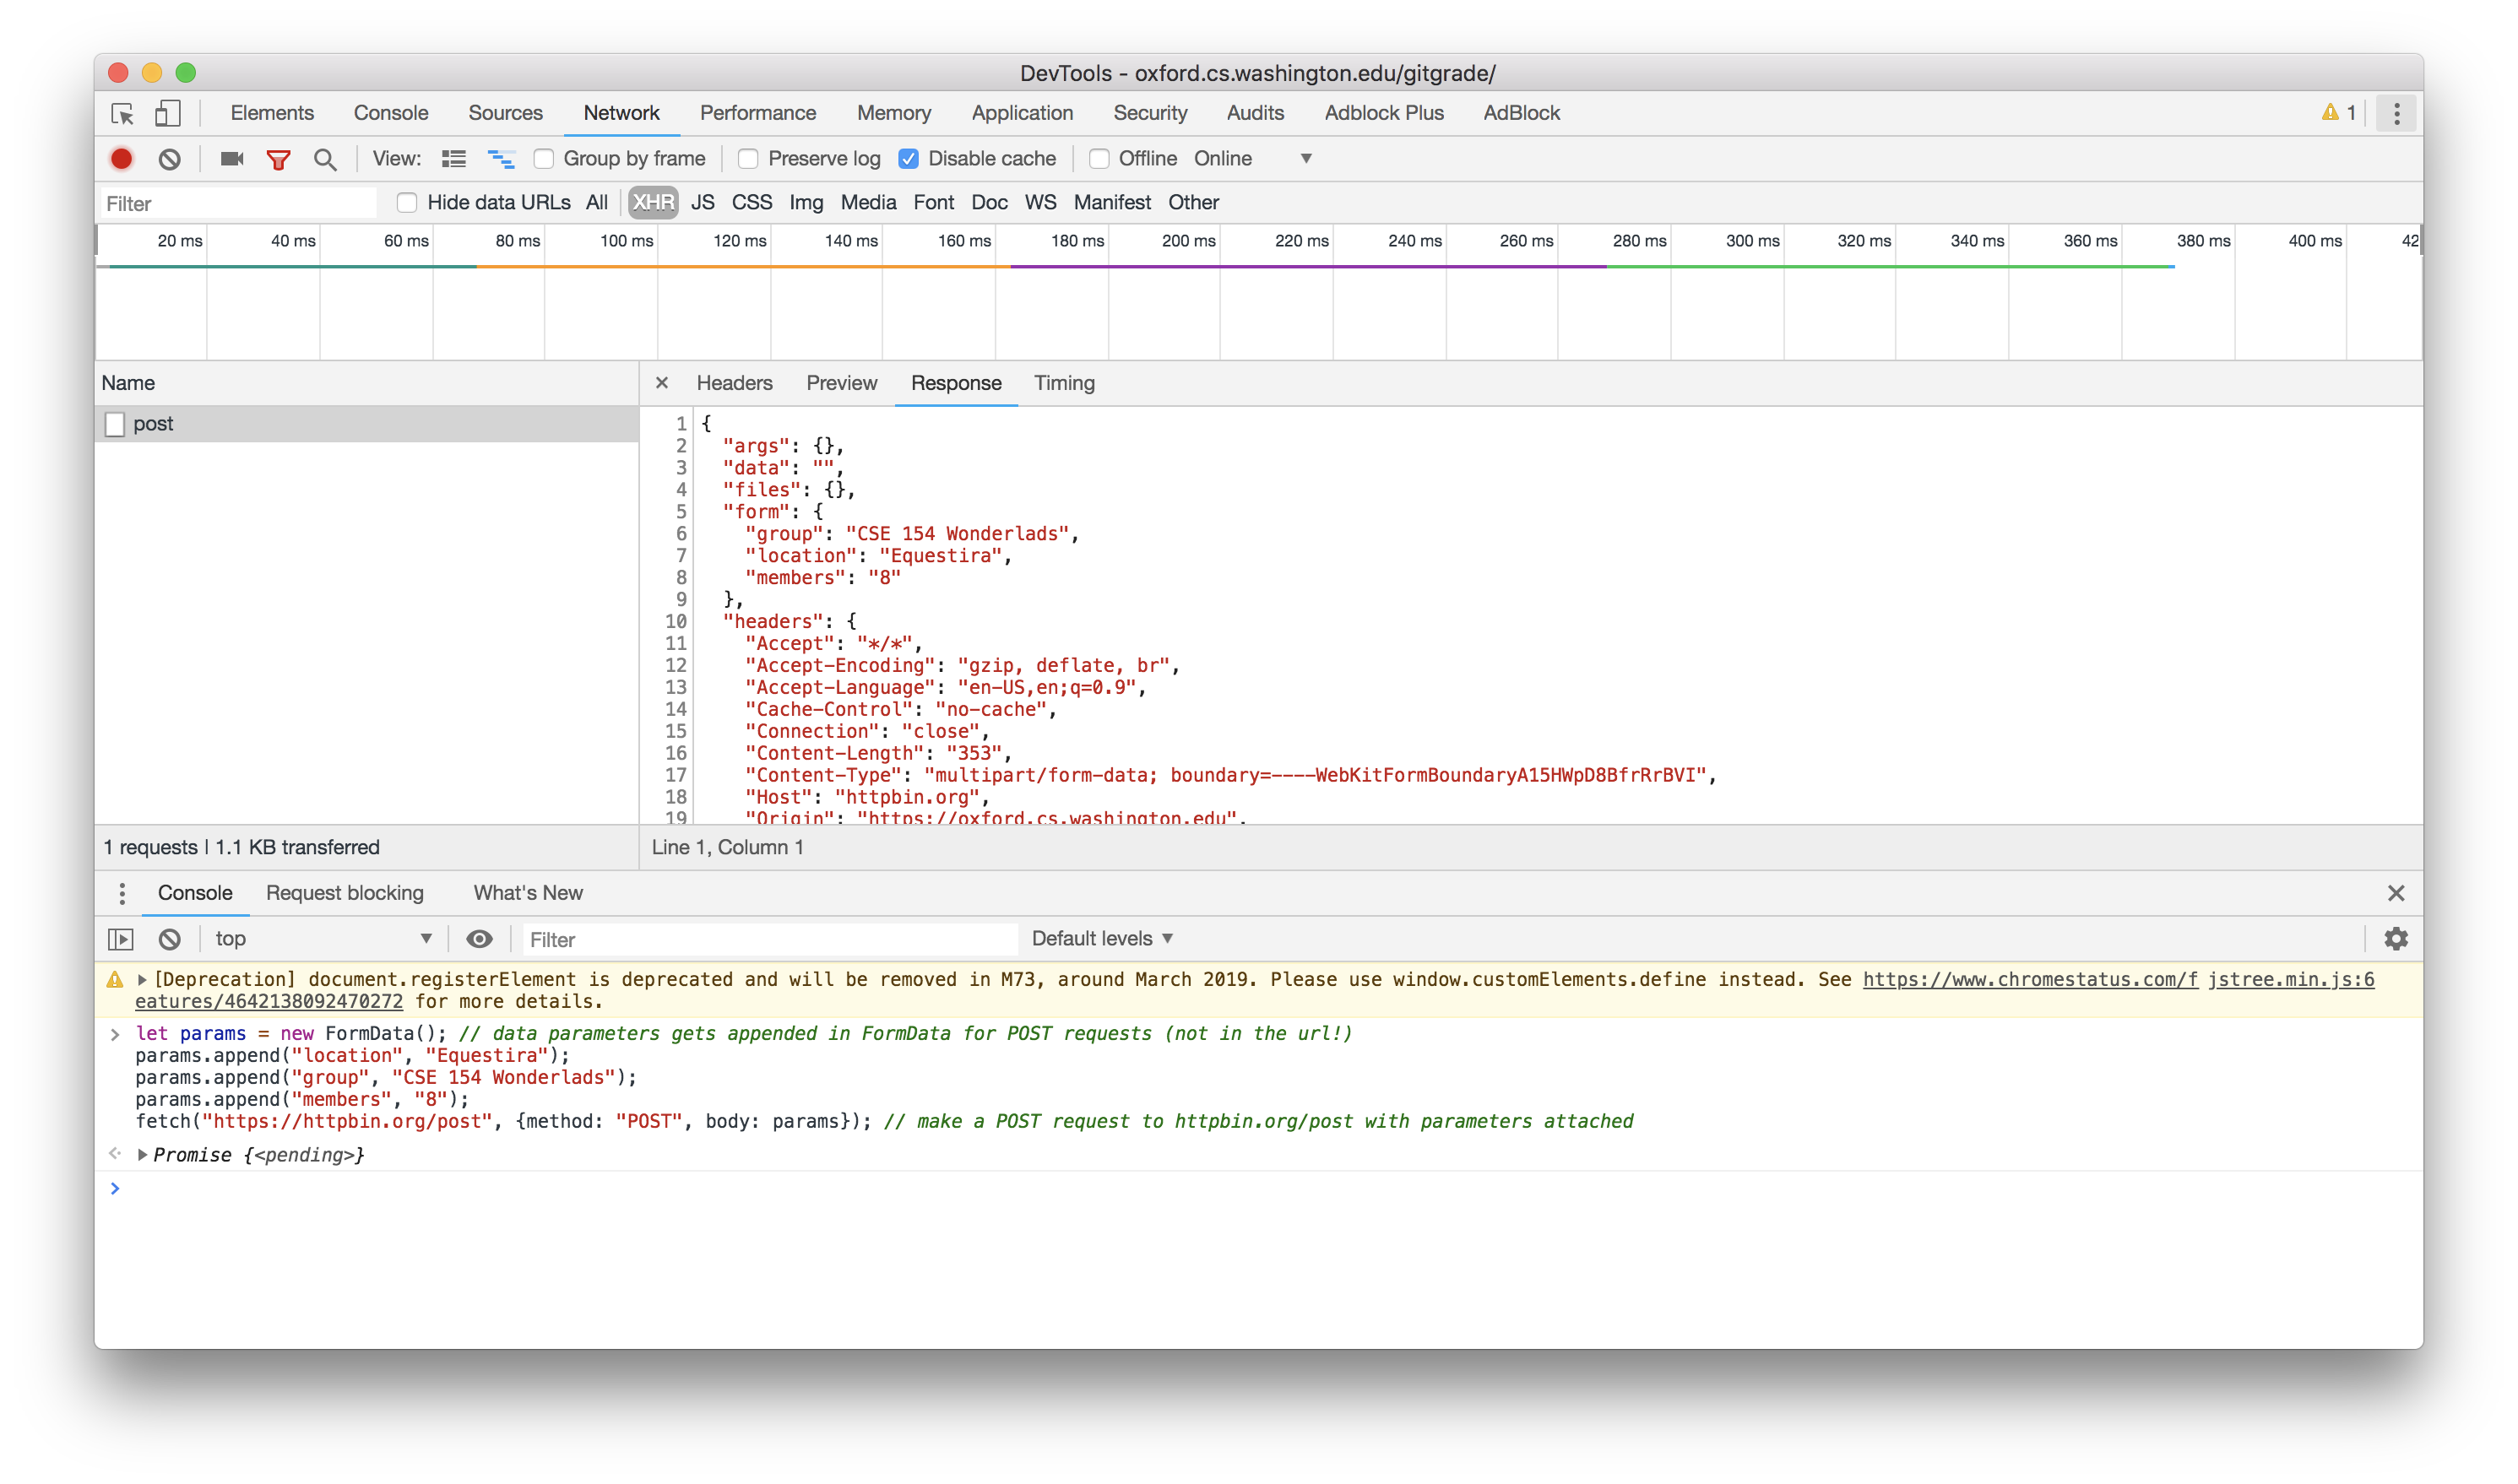
The following testing code is enough to make a POST request:
// data parameters gets appended in FormData for POST requests (not in the url!)
let params =  new FormData();
params.append("location", "Equestira");
params.append("group", "CSE 154 Wonderlads");
params.append("members", "8");
// make a POST request to httpbin.org/post with parameters attached
fetch("https://httpbin.org/post", {method: "POST", body: params});
JS
Running the code above in the Chrome Developer Tools console will yield a POST request.
You can view the server response under the Network tab (click the image to
the right for a larger view).
Now there is an another way to test your APIs. Instead of venturing with the Chrome Developer tools or experimenting the URLs (which can be error prone at times), we can make calls with a dedicated program. This can (and will) greatly aid your development of Homework 5.
Introducing... Postman!
Ready, Set, Postman!
- To download Postman, visit https://www.getpostman.com/ and click on Download the App button.
- Under your operating system, click on the Download button. Download will begin shortly.
- Depending on which operating system,
- For Macintosh: you will need to unzip the zip and drag Postman to your Applications folder. Key-combo Command + Space and type Postman. Select Postman from the list to launch.
- For Windows, you will need to double click the executable and follow the installation process.
-
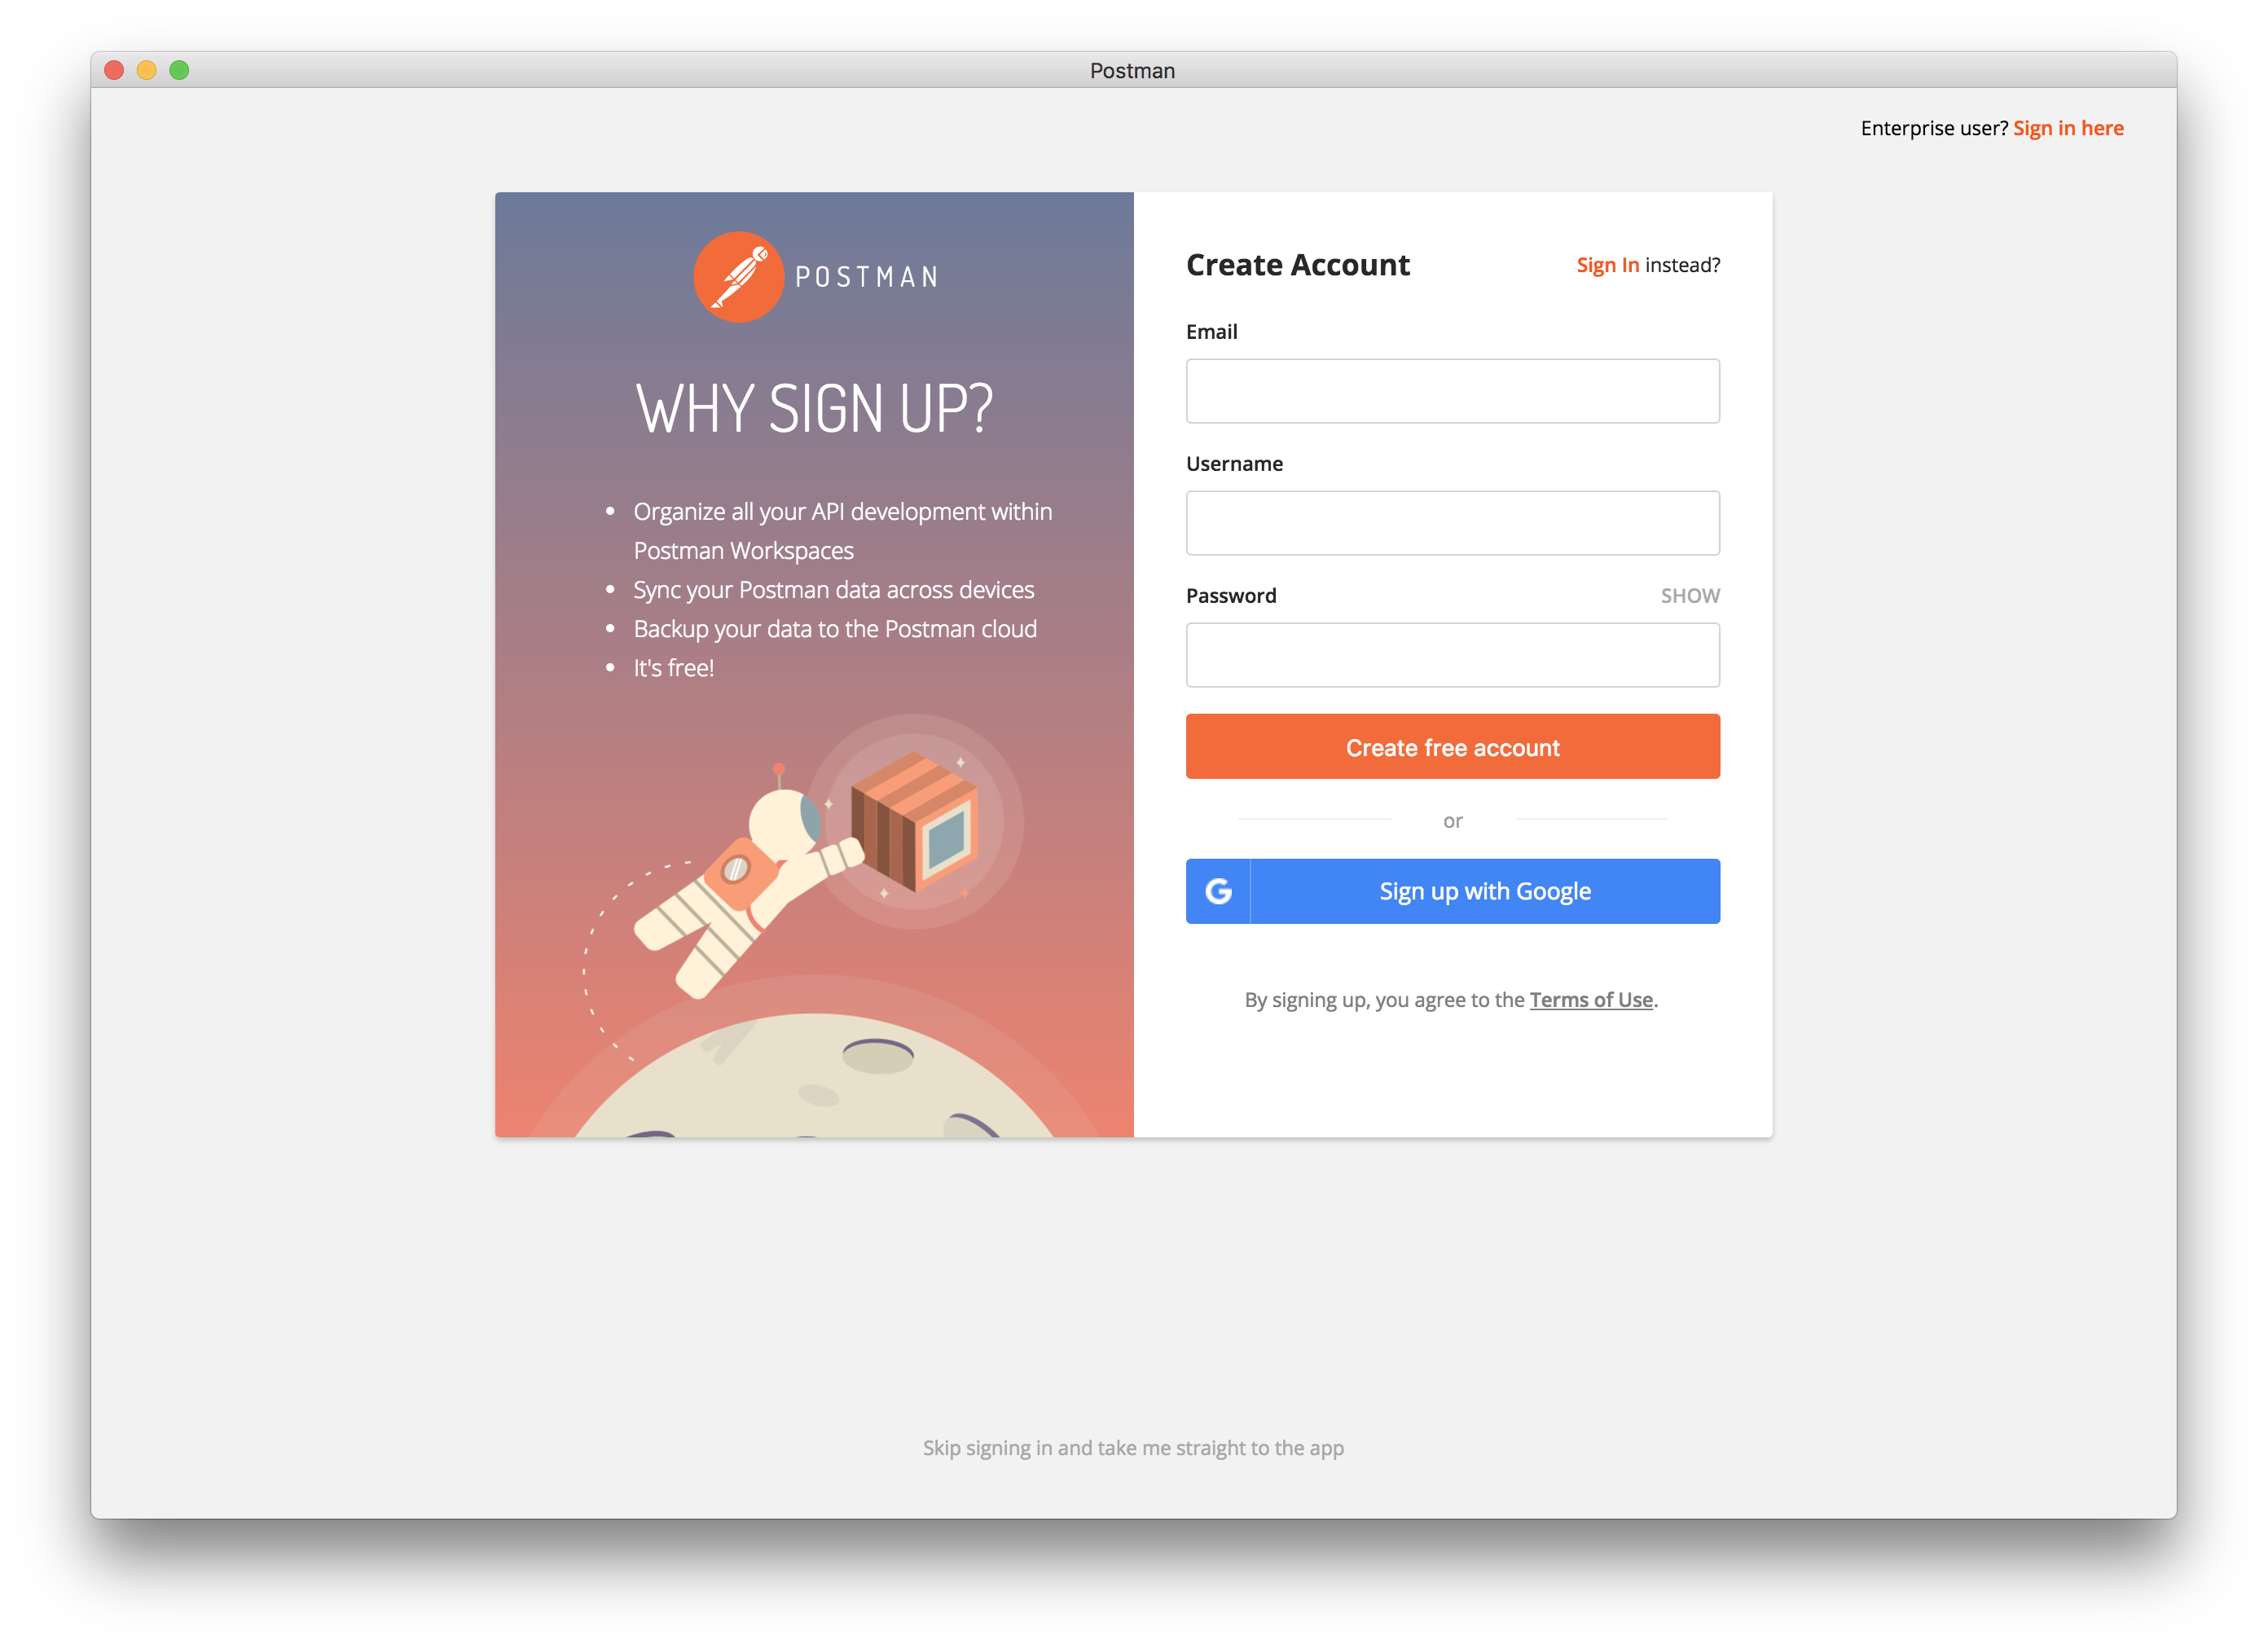
Once Postman is launched, you will need to skip signing in by clicking on the "Skip signing in and take me straight to the app" link at the bottom of the login form.
-
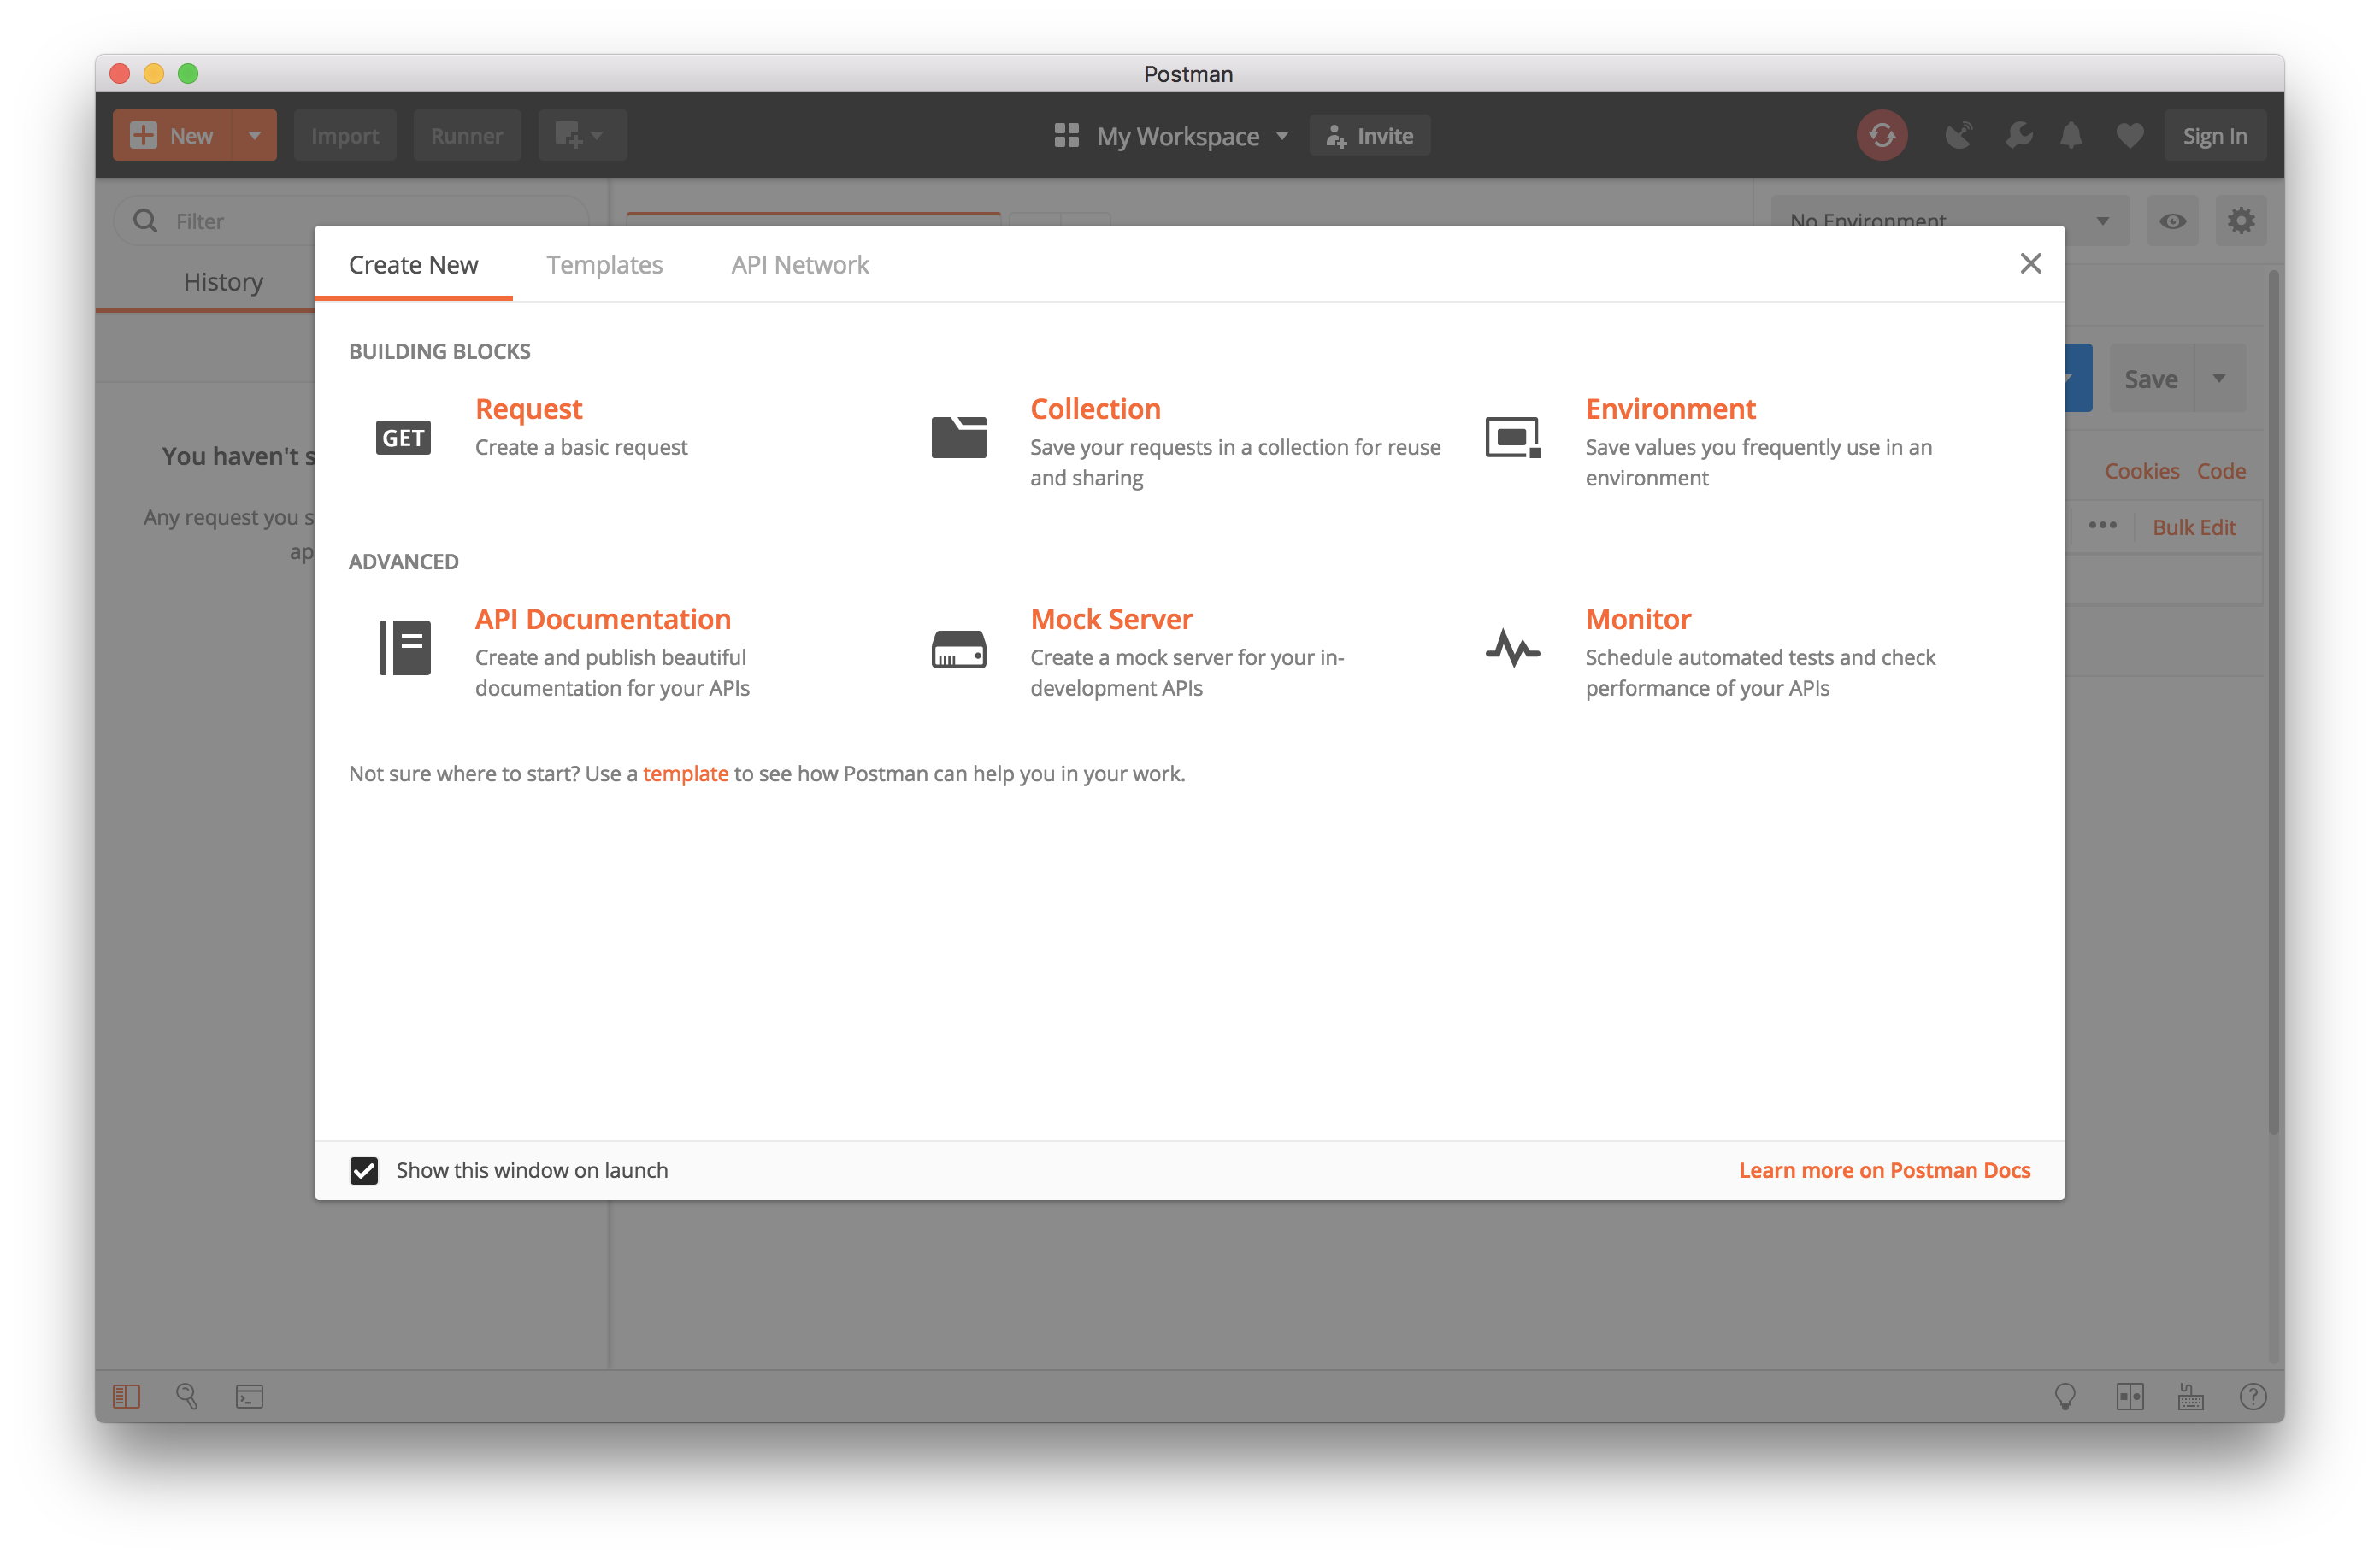
Close this welcome screen and you will be ready to make requests!
Making GET requests
The simplest of the request can be performed with Postman. By typing the URL into the bar and clicking on Send will make a GET request to the server.
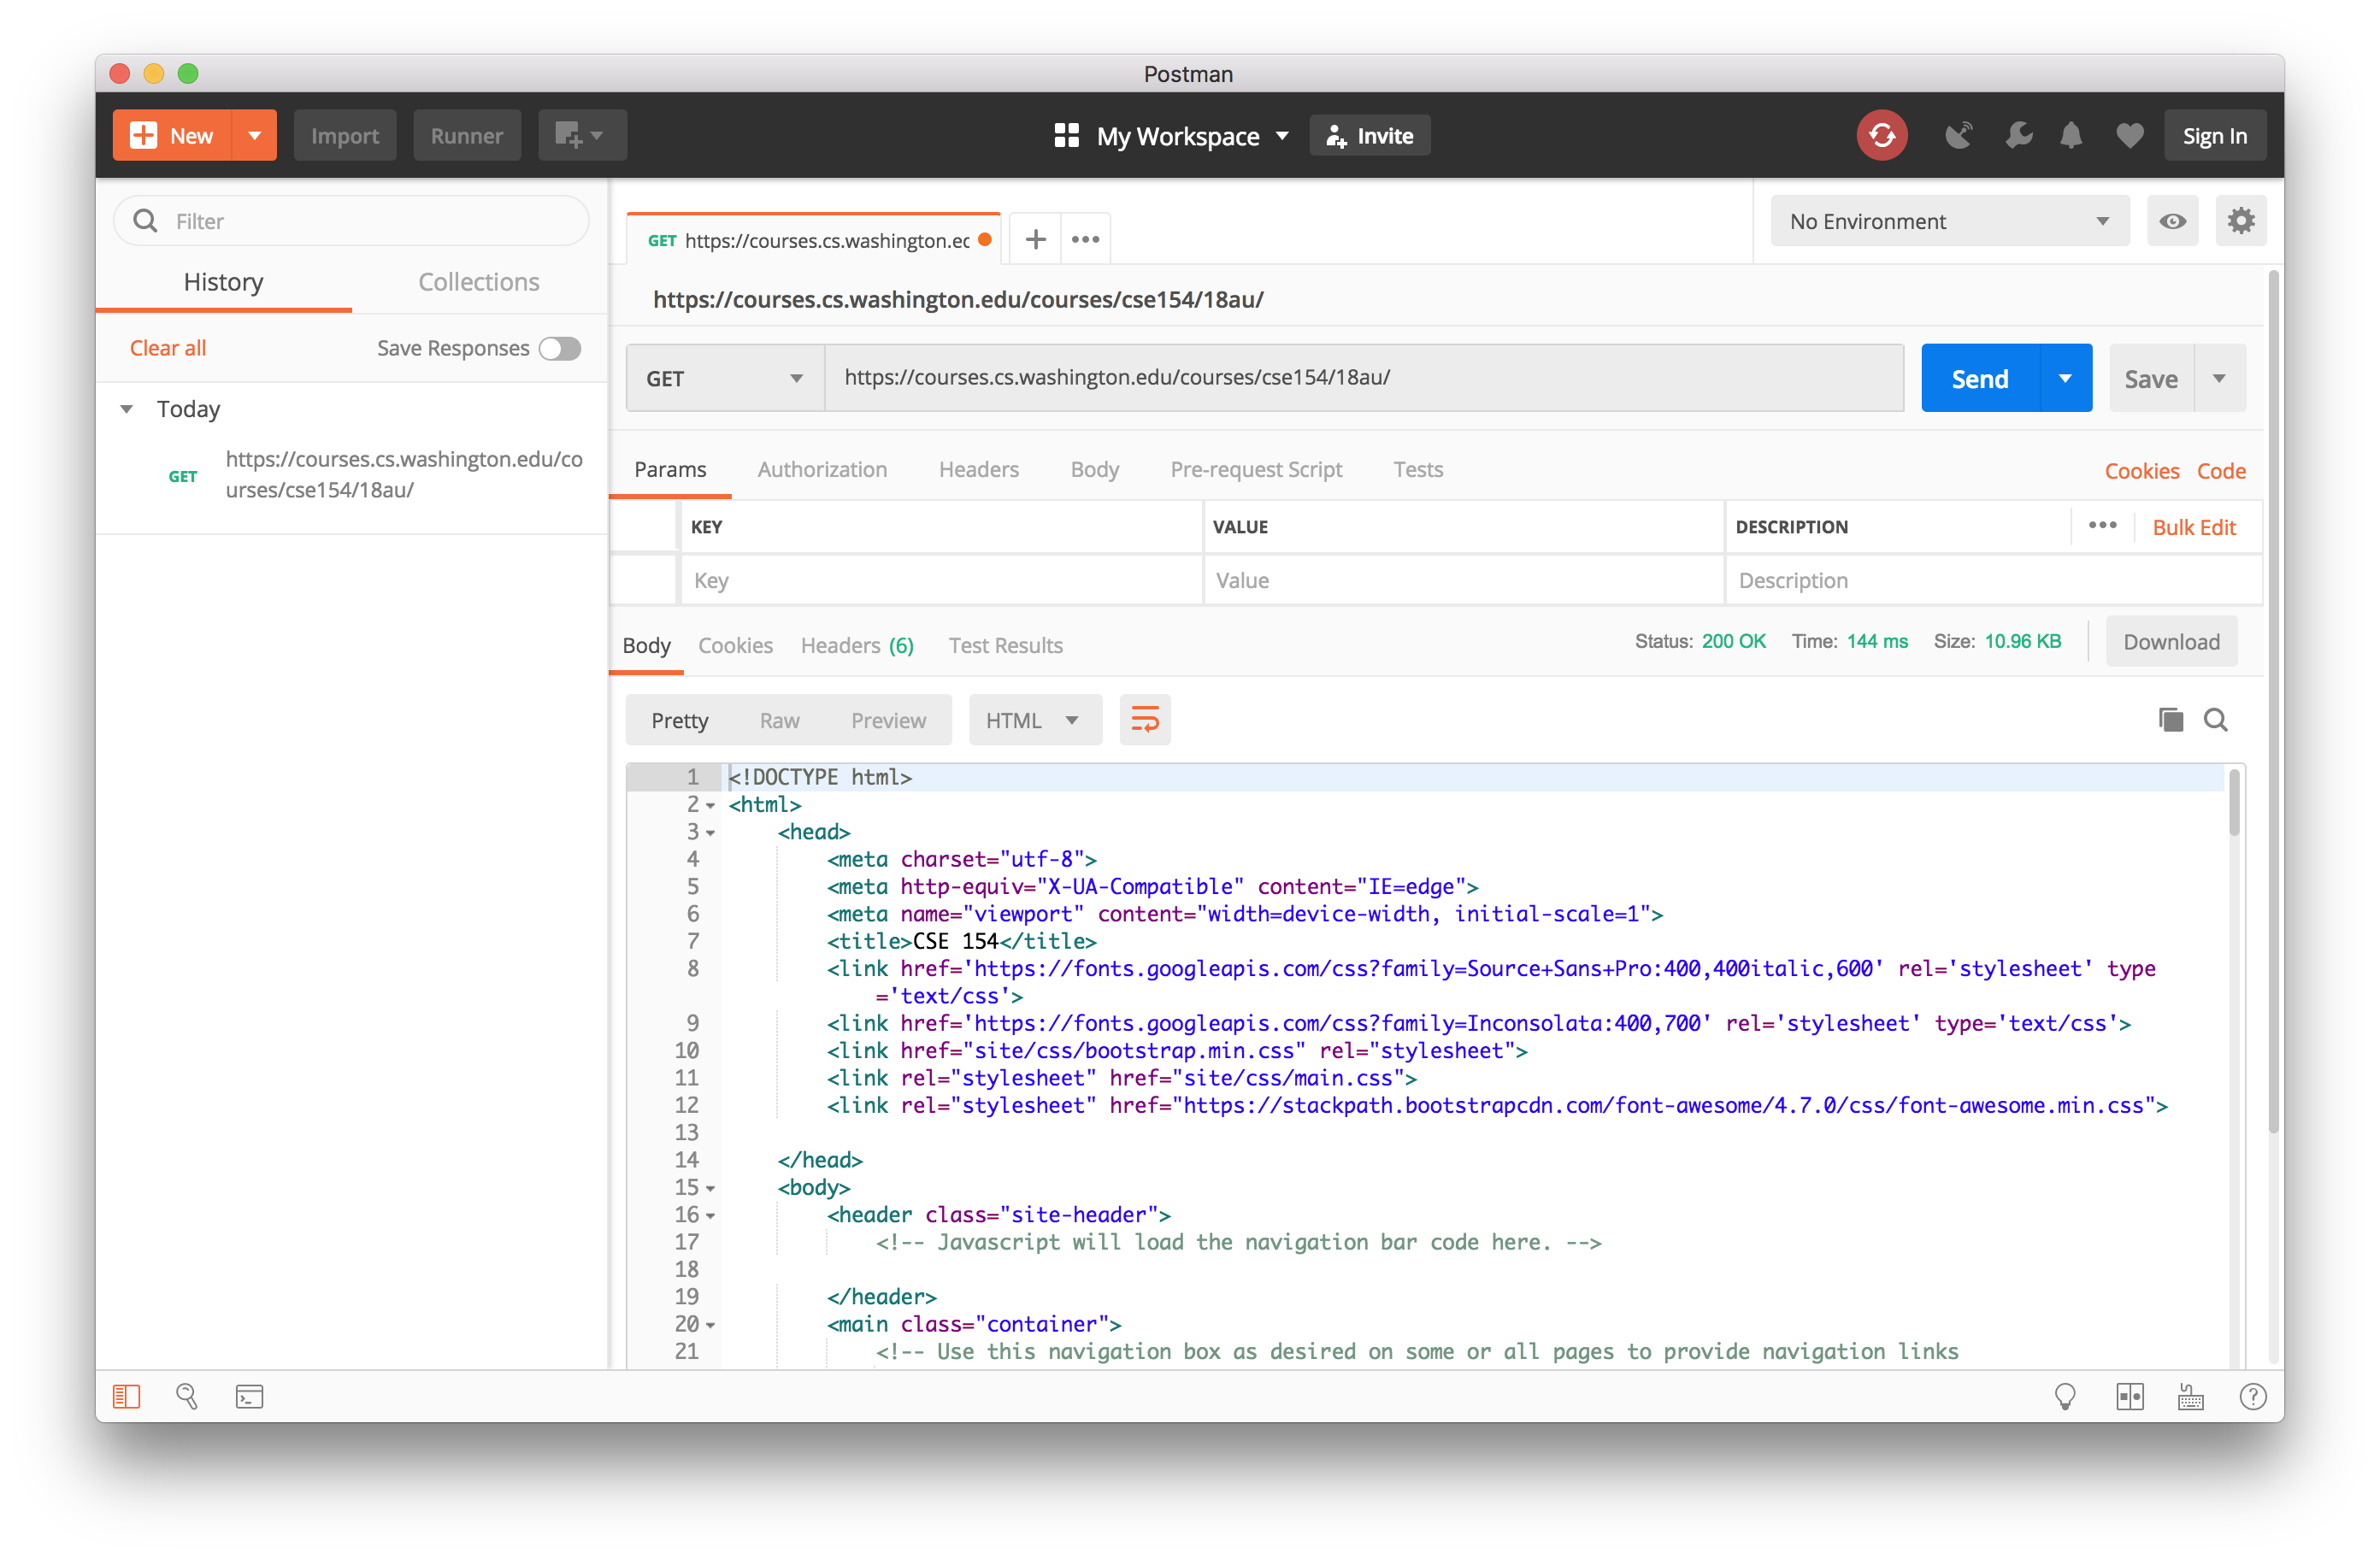
Example 1 - GET the course website (https://courses.cs.washington.edu/courses/cse154/18au/)
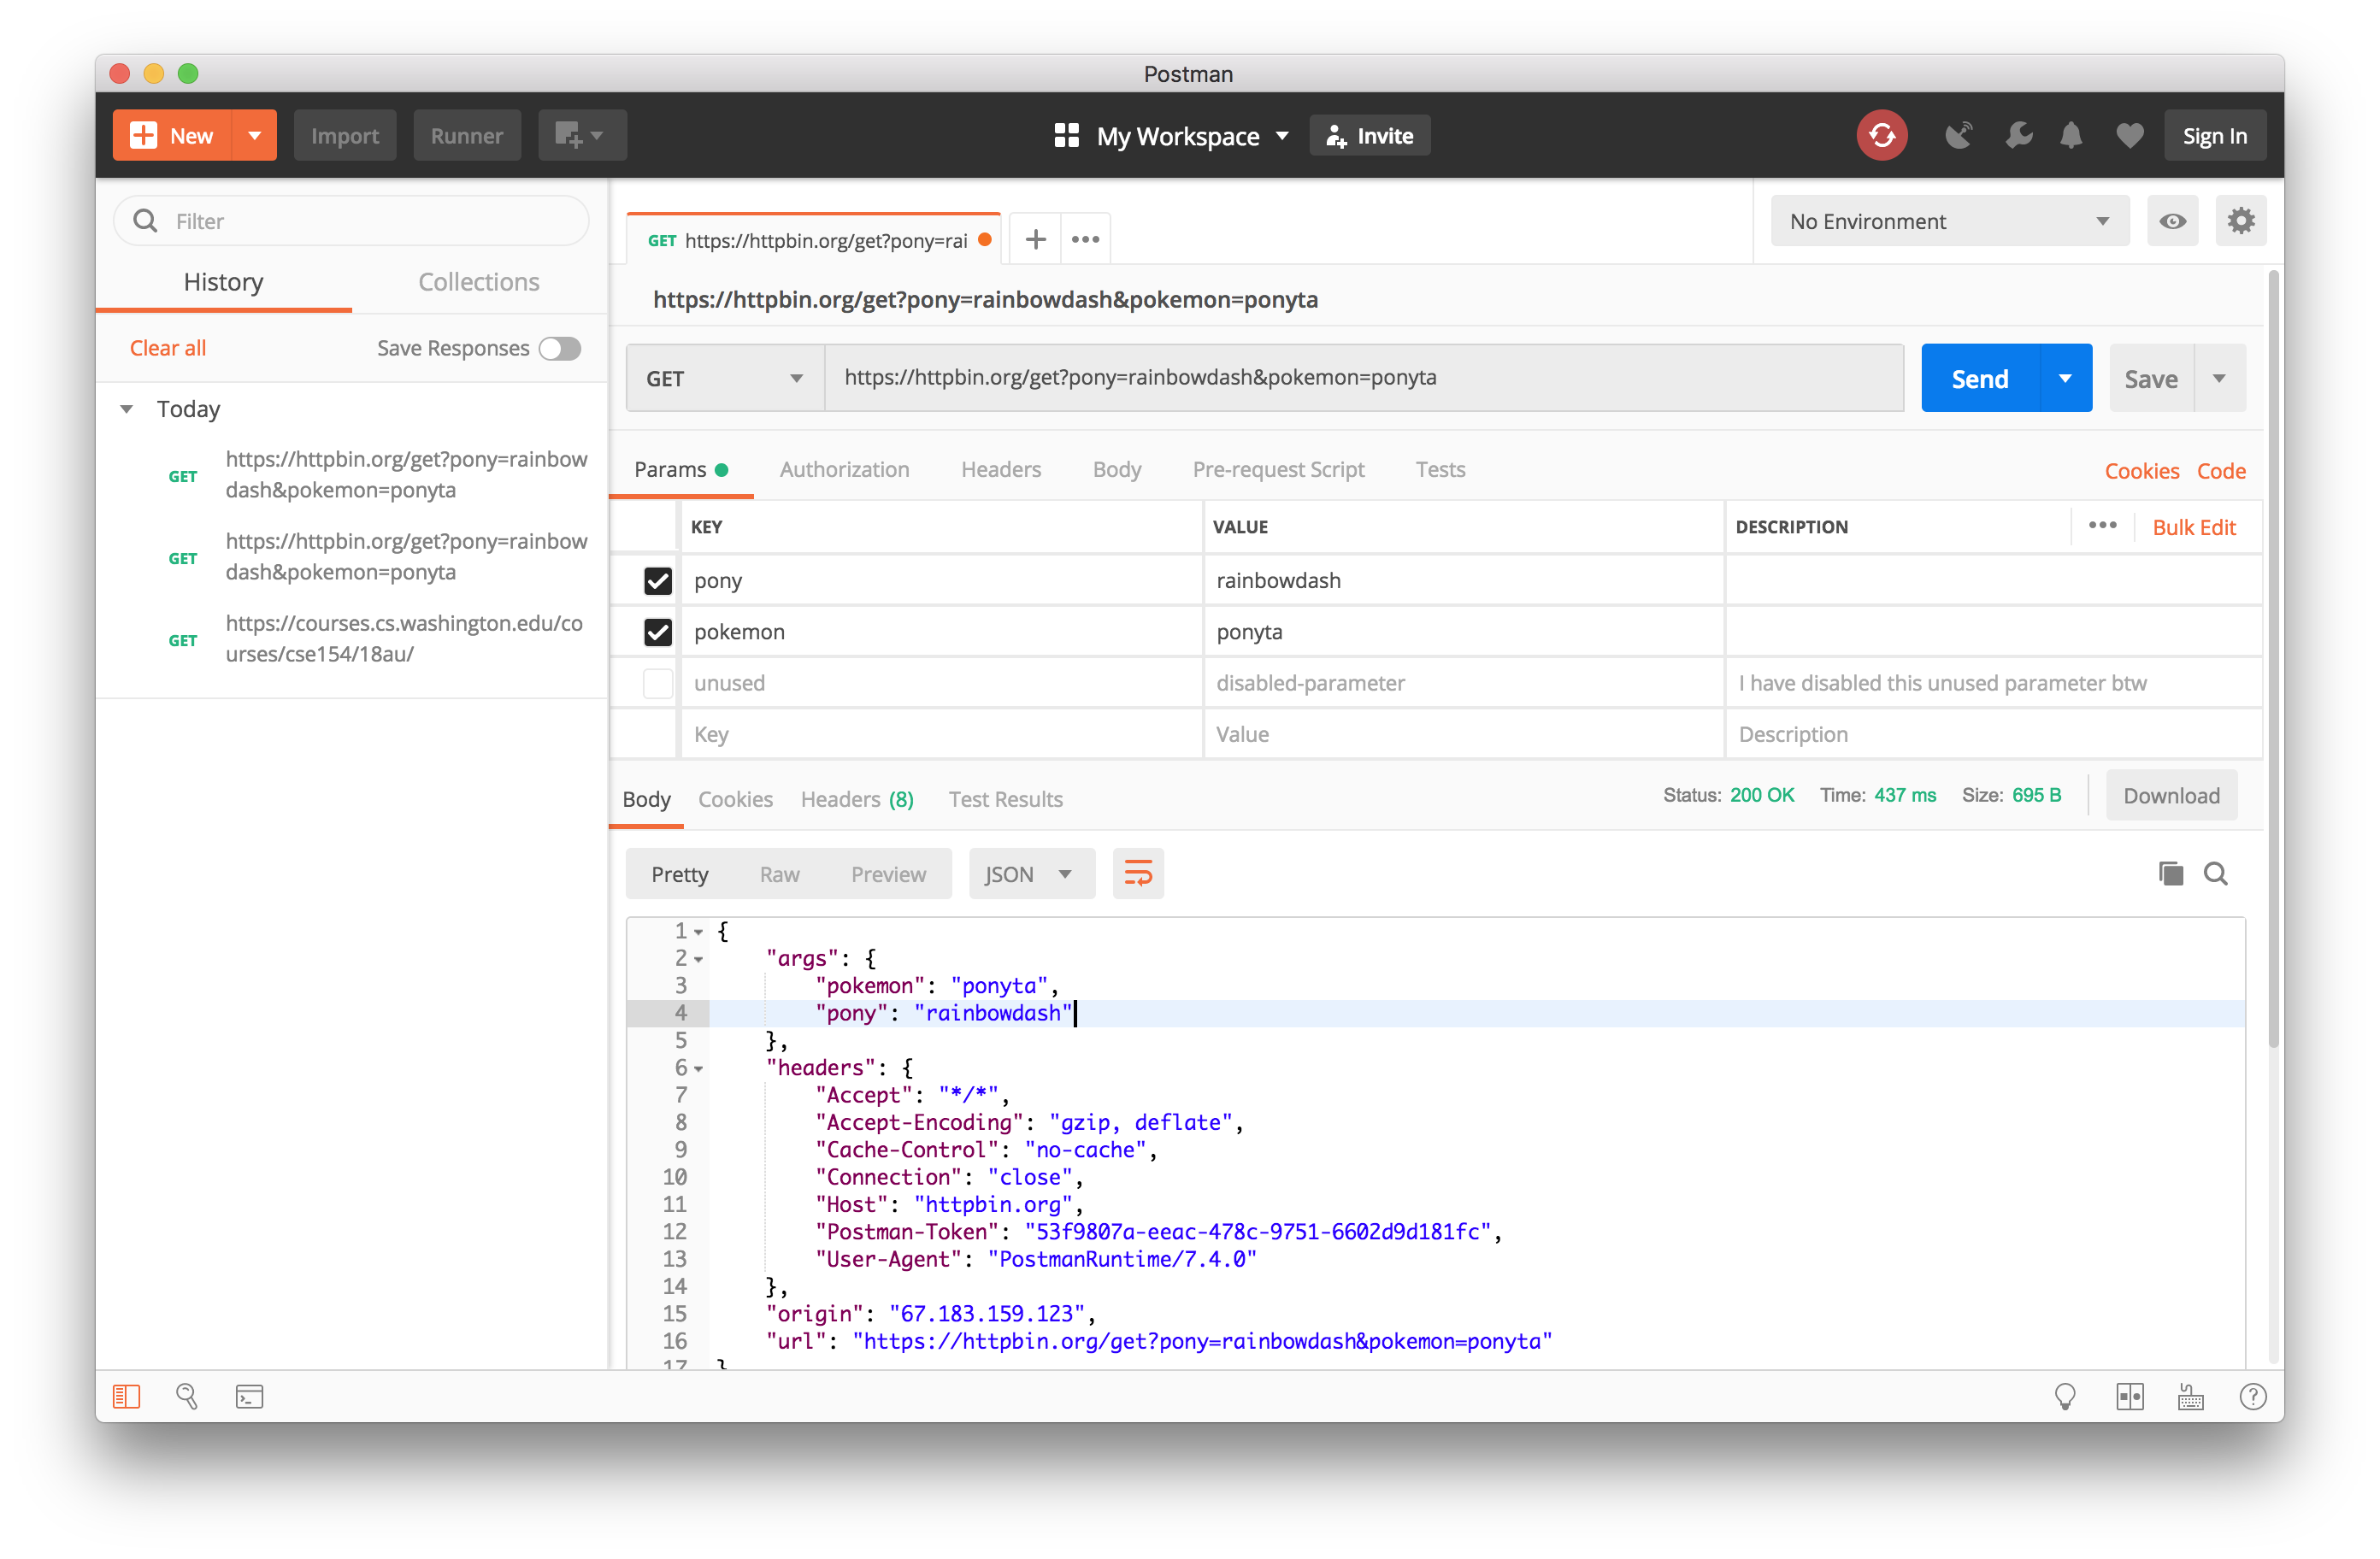
You can also insert query parameters (the stuff that goes after the url) to your GET request. They go into the Params input boxes.
Example 2 - GET https://httpbin.org/get w/ params: pony=rainbowdash and pokemon=ponyta
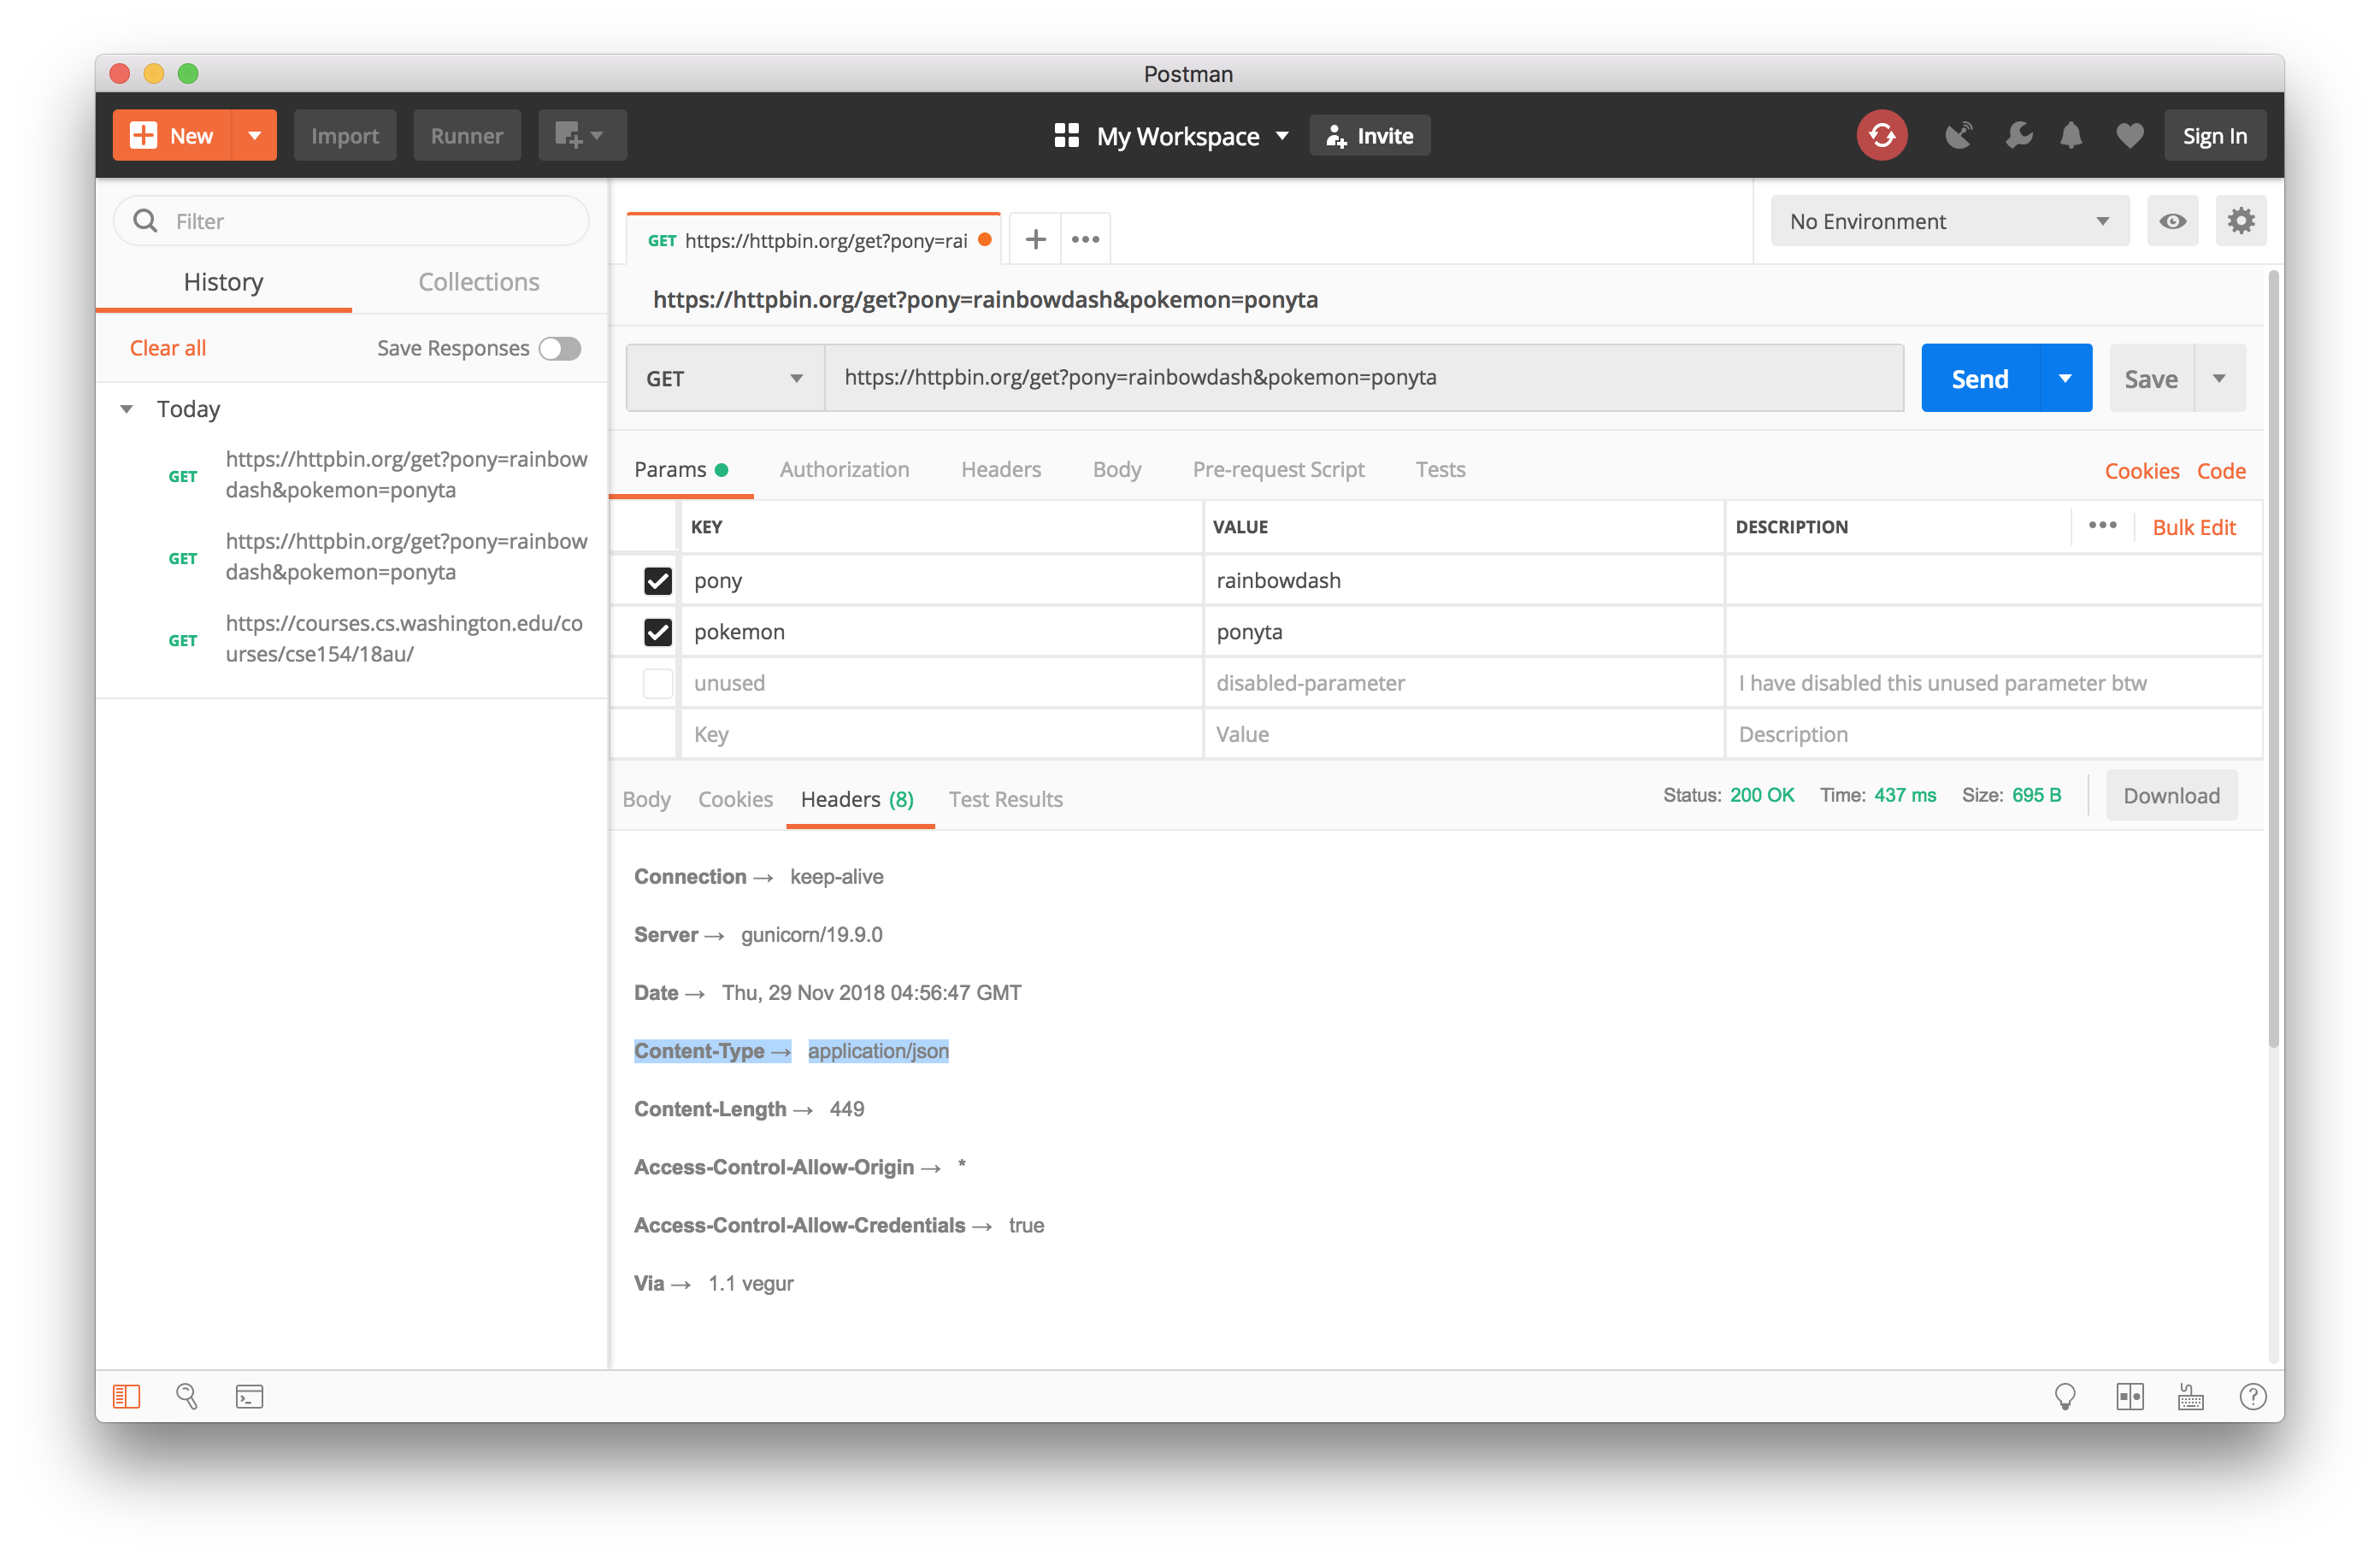
Most of the time you will be looking at the Body tab to see the output from the server. Occasionally you will need to see if the server is sending the correct Content-Type header. The headers can be accessed from the Headers tab.
Example 3 - Viewing headers
Practicing GET requests
Can you do the following?
- Send a request to GET your favorite site. (if you don't have an example,
go for
http://www.csszengarden.com/) Admire their HTML source. (Solution) - Send a request to GET
(Solution) - Send a request to GET
(Solution) - Looks like the server has rejected because we're missing parameters. Send a request with a
userparameter of the valueponyta. (Solution) - Oof so close! How about setting the user as
rainbowdash? (Solution)
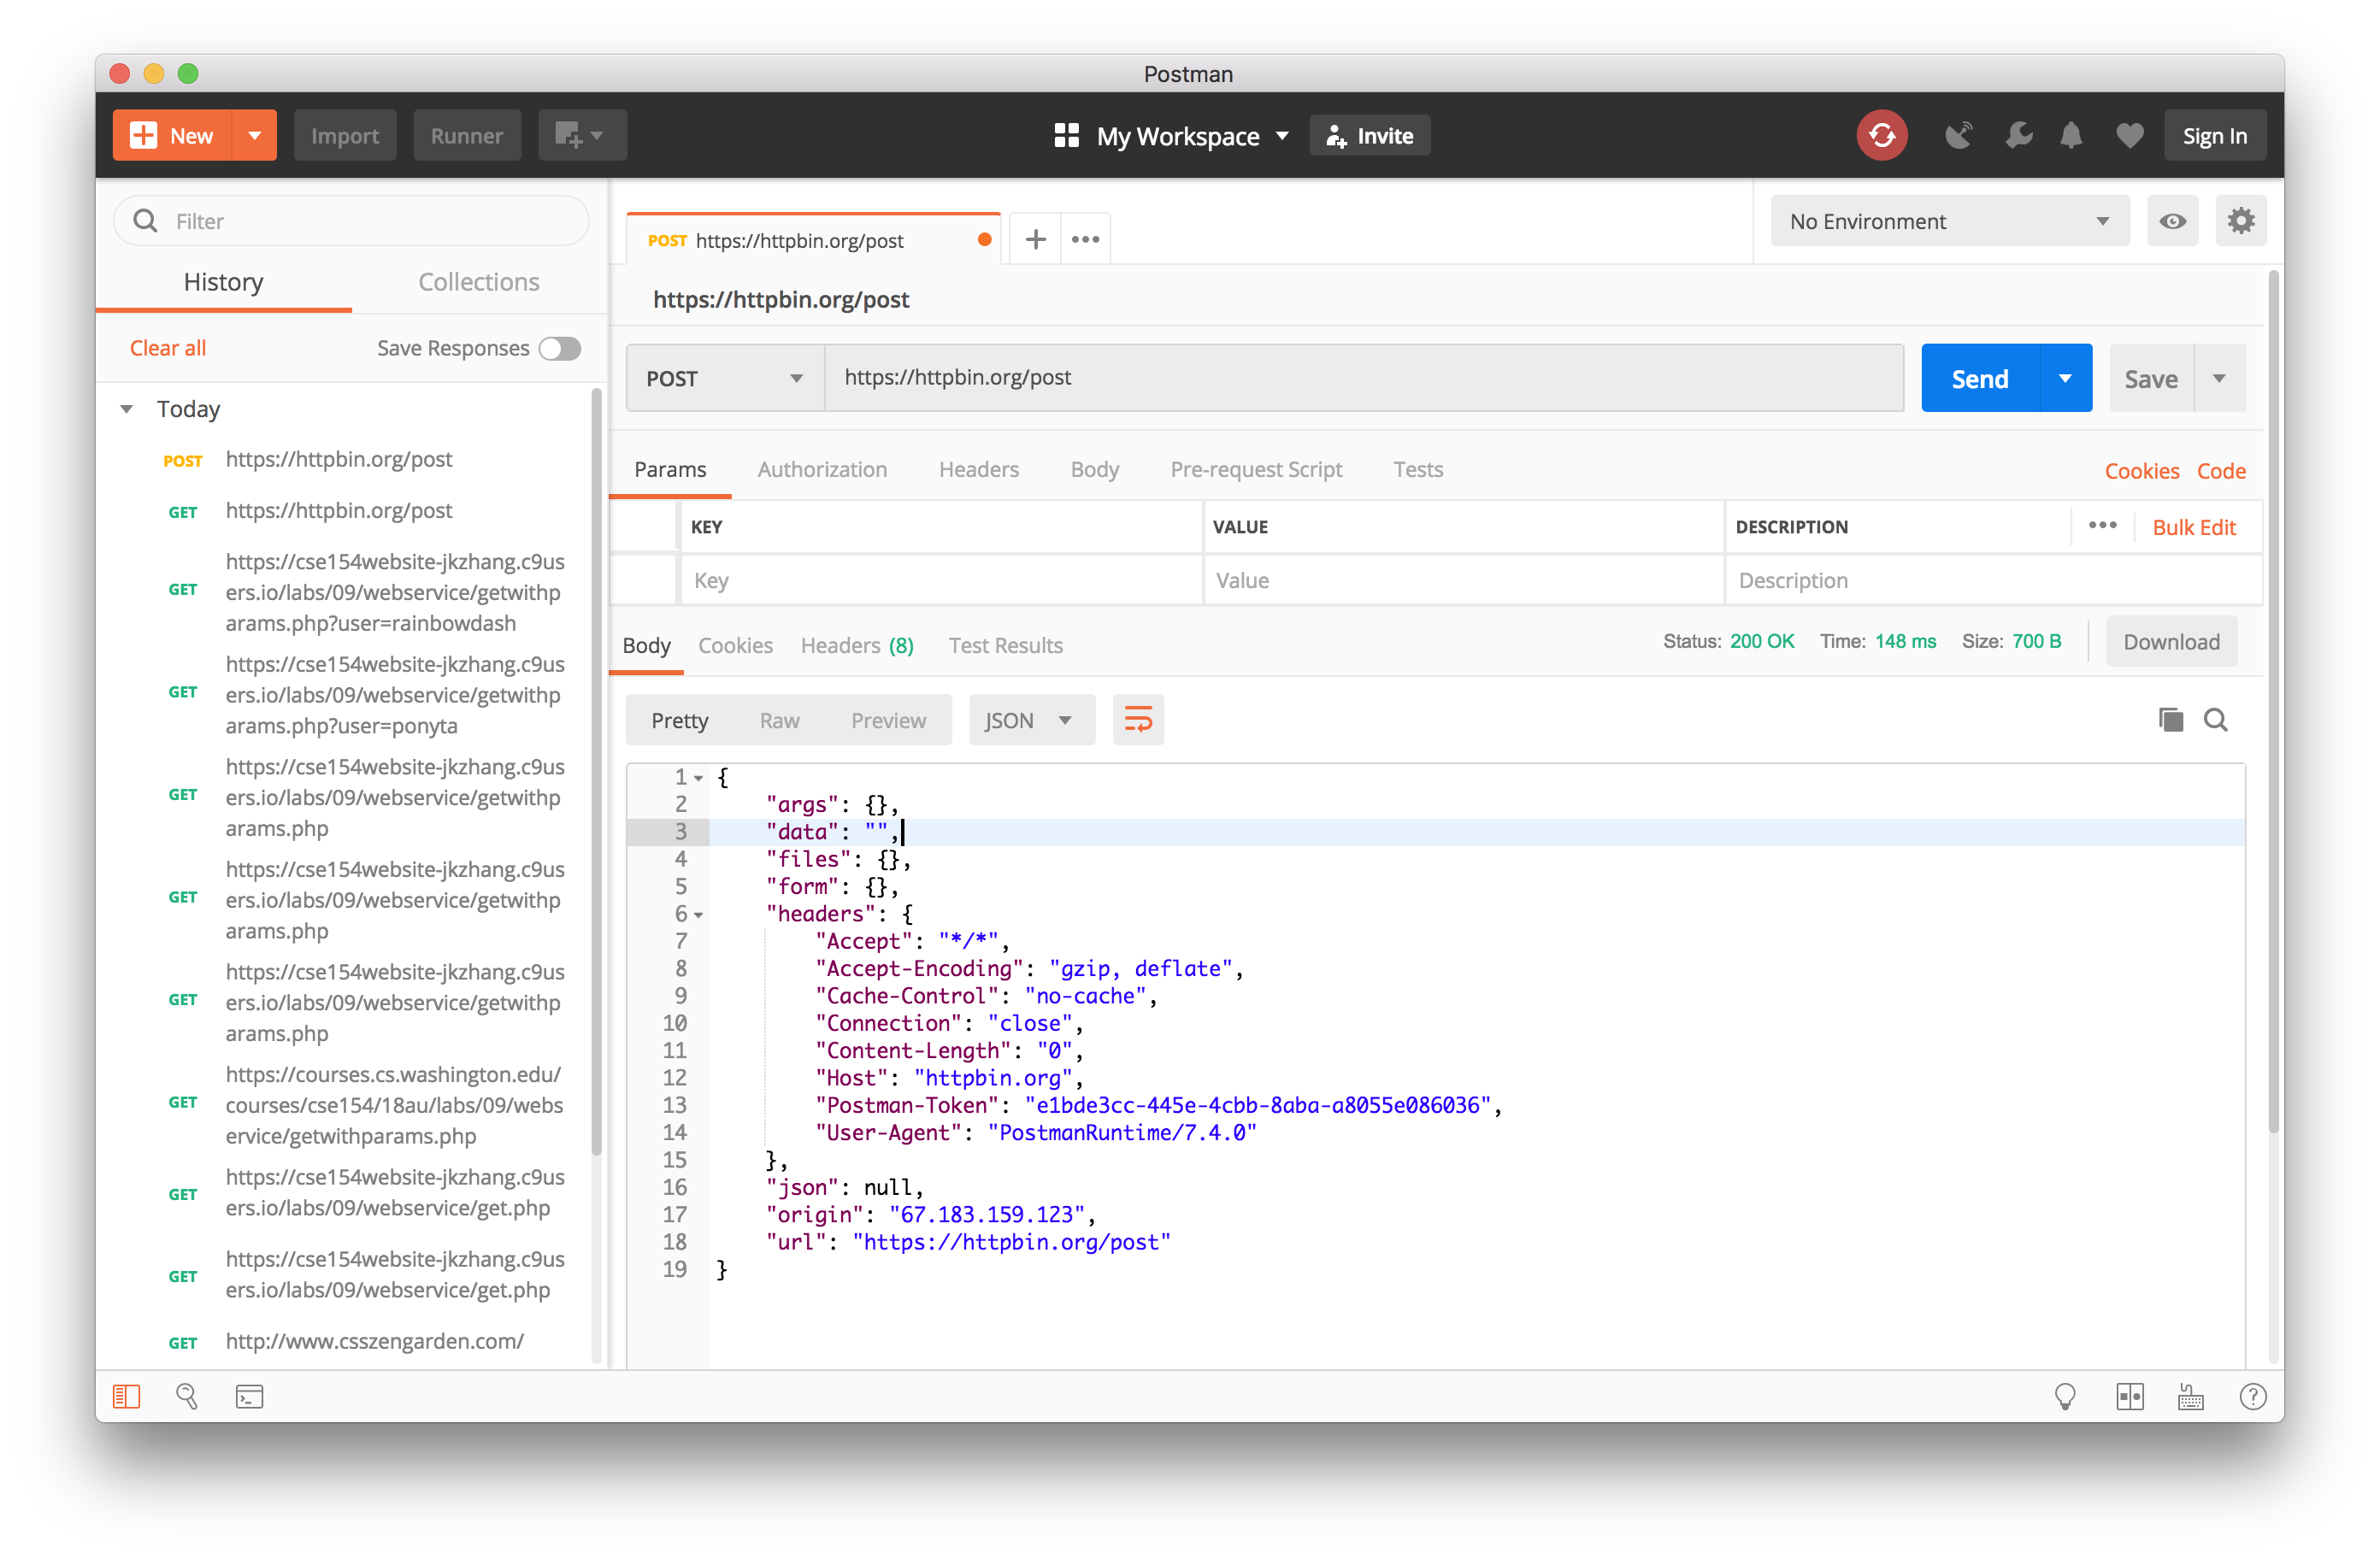
Making POST requests
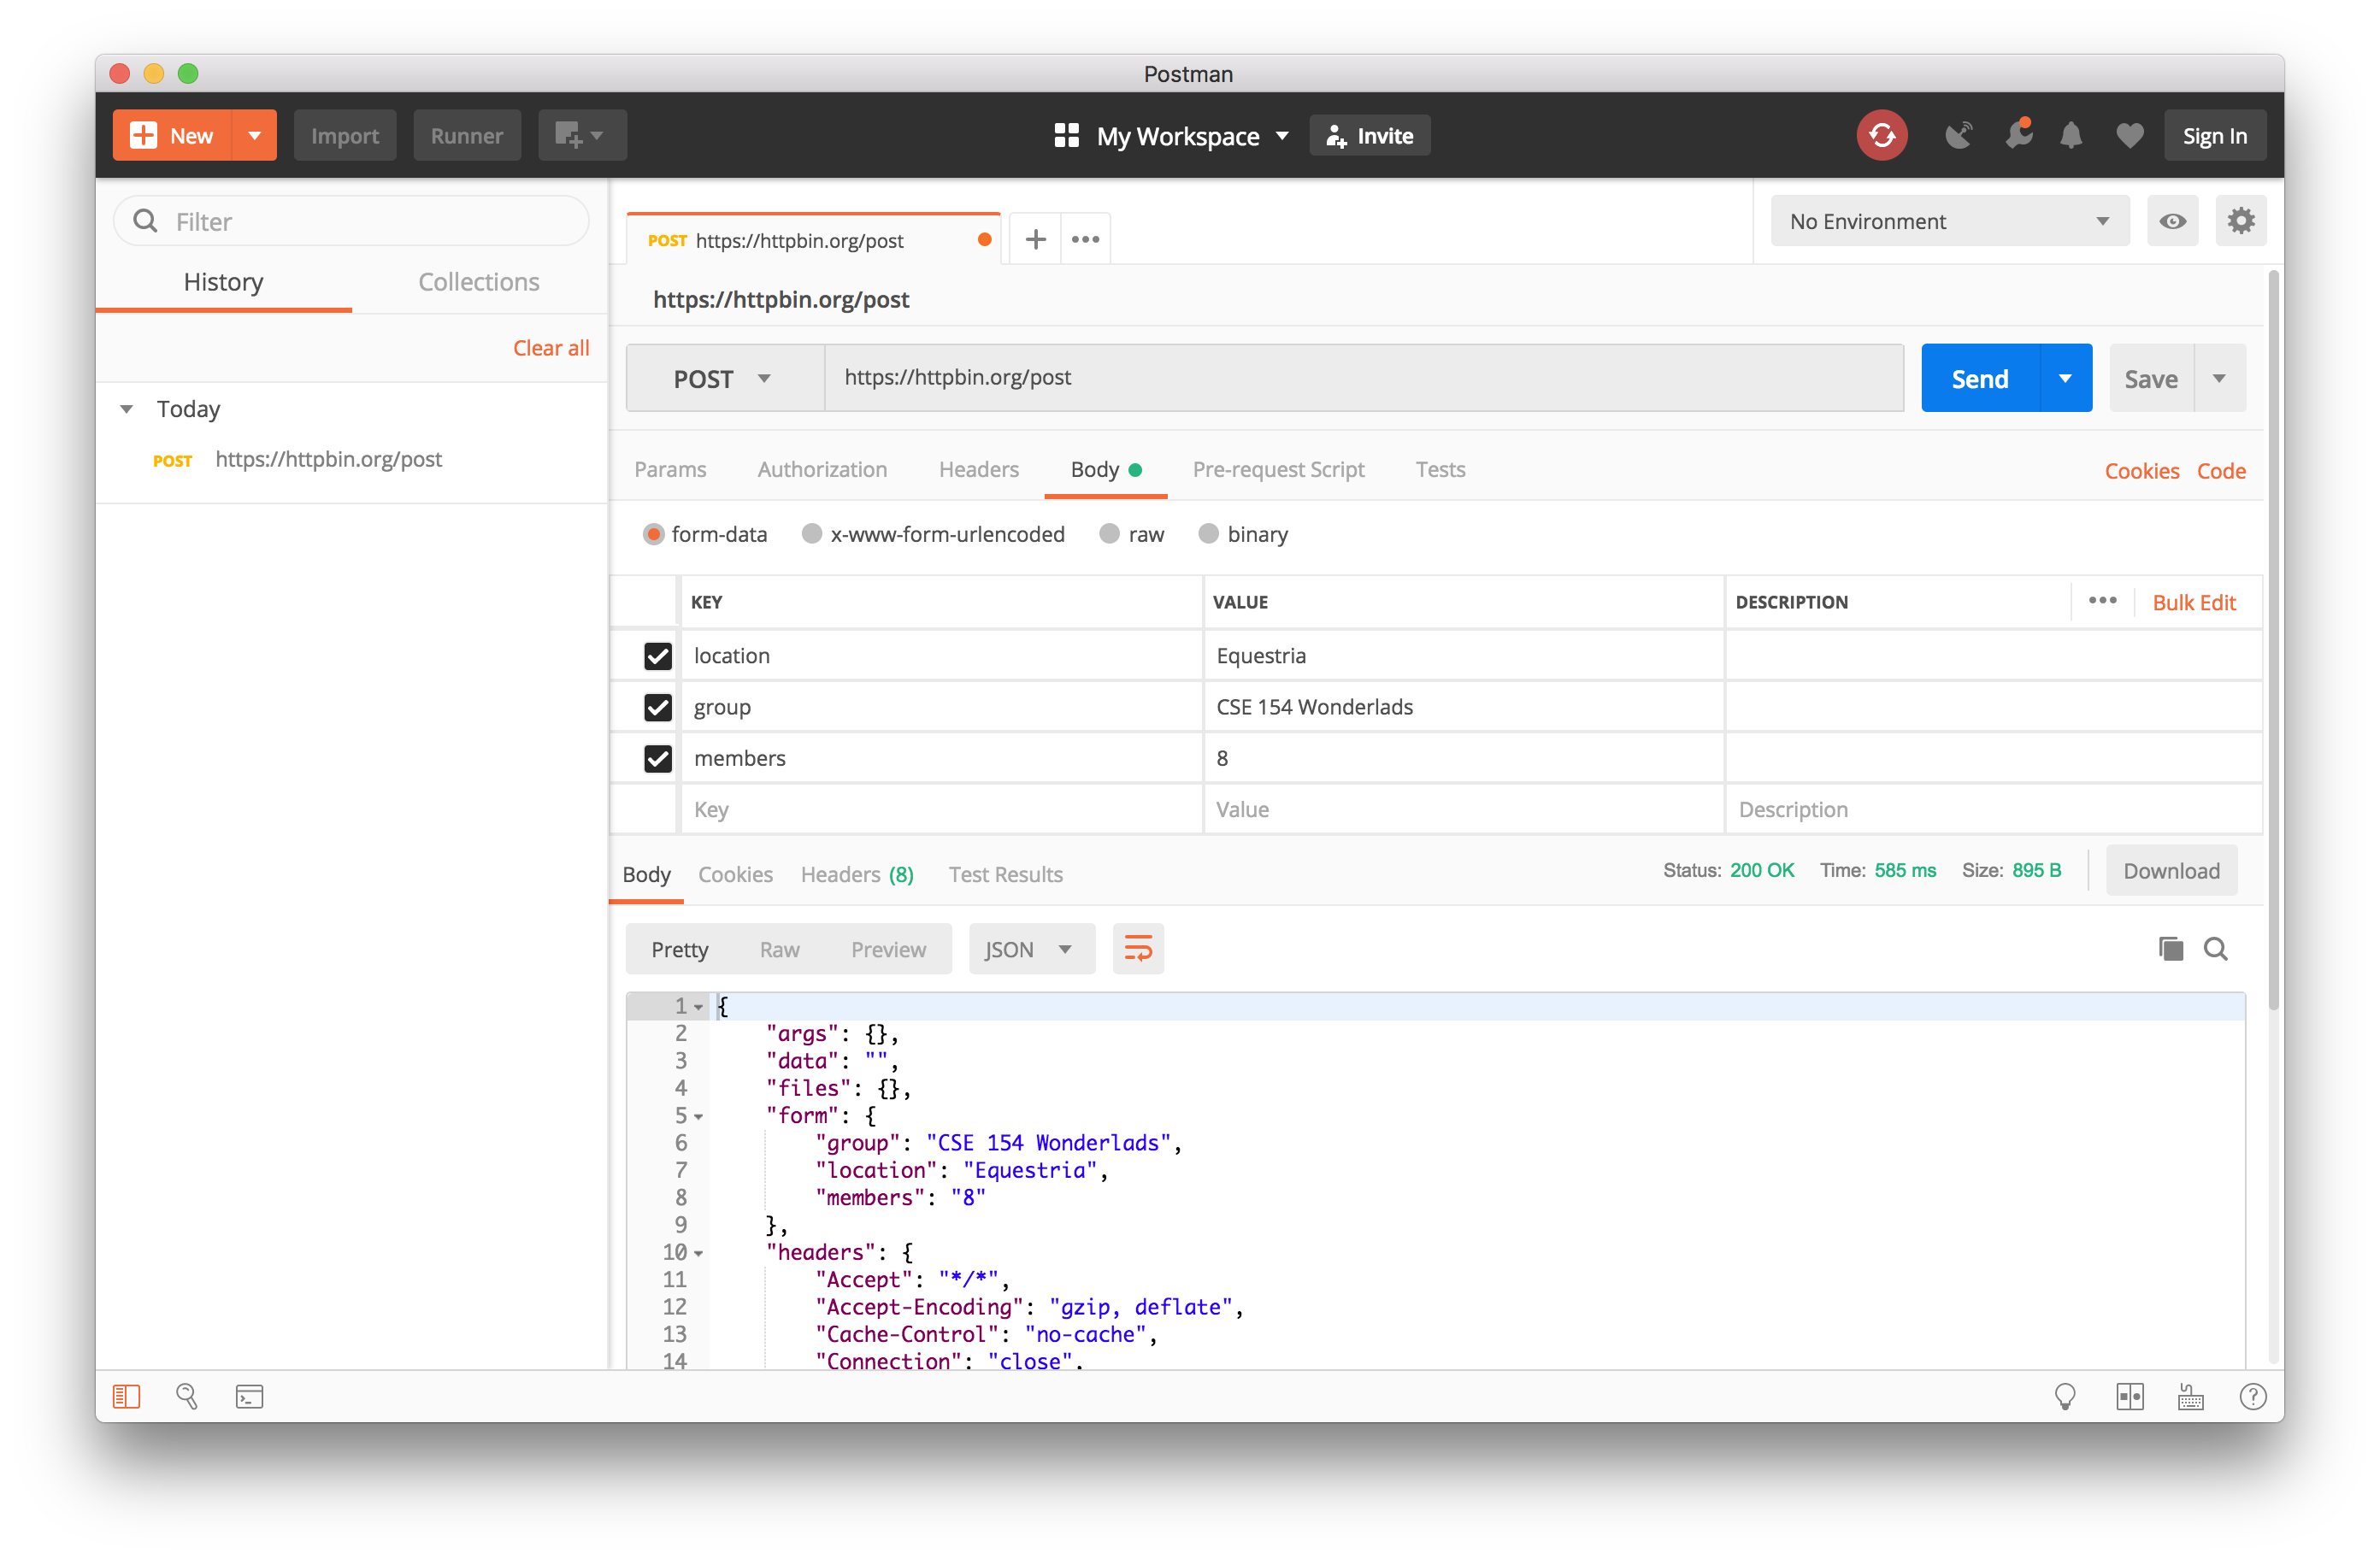
Building POST requests on Postman is no more difficult than creating GET requests. Select POST from the dropdown list to the left of the URL box. Enter a POST URL into the box and hit send. You've just made your first POST request on Postman!
Example 4 - Making a POST request to https://httpbin.org/post
Since POST requests uses FormData instead of query parameters, we need to switch to the body tab in Postman. Select form-data from the radio buttons and enter your parameters.
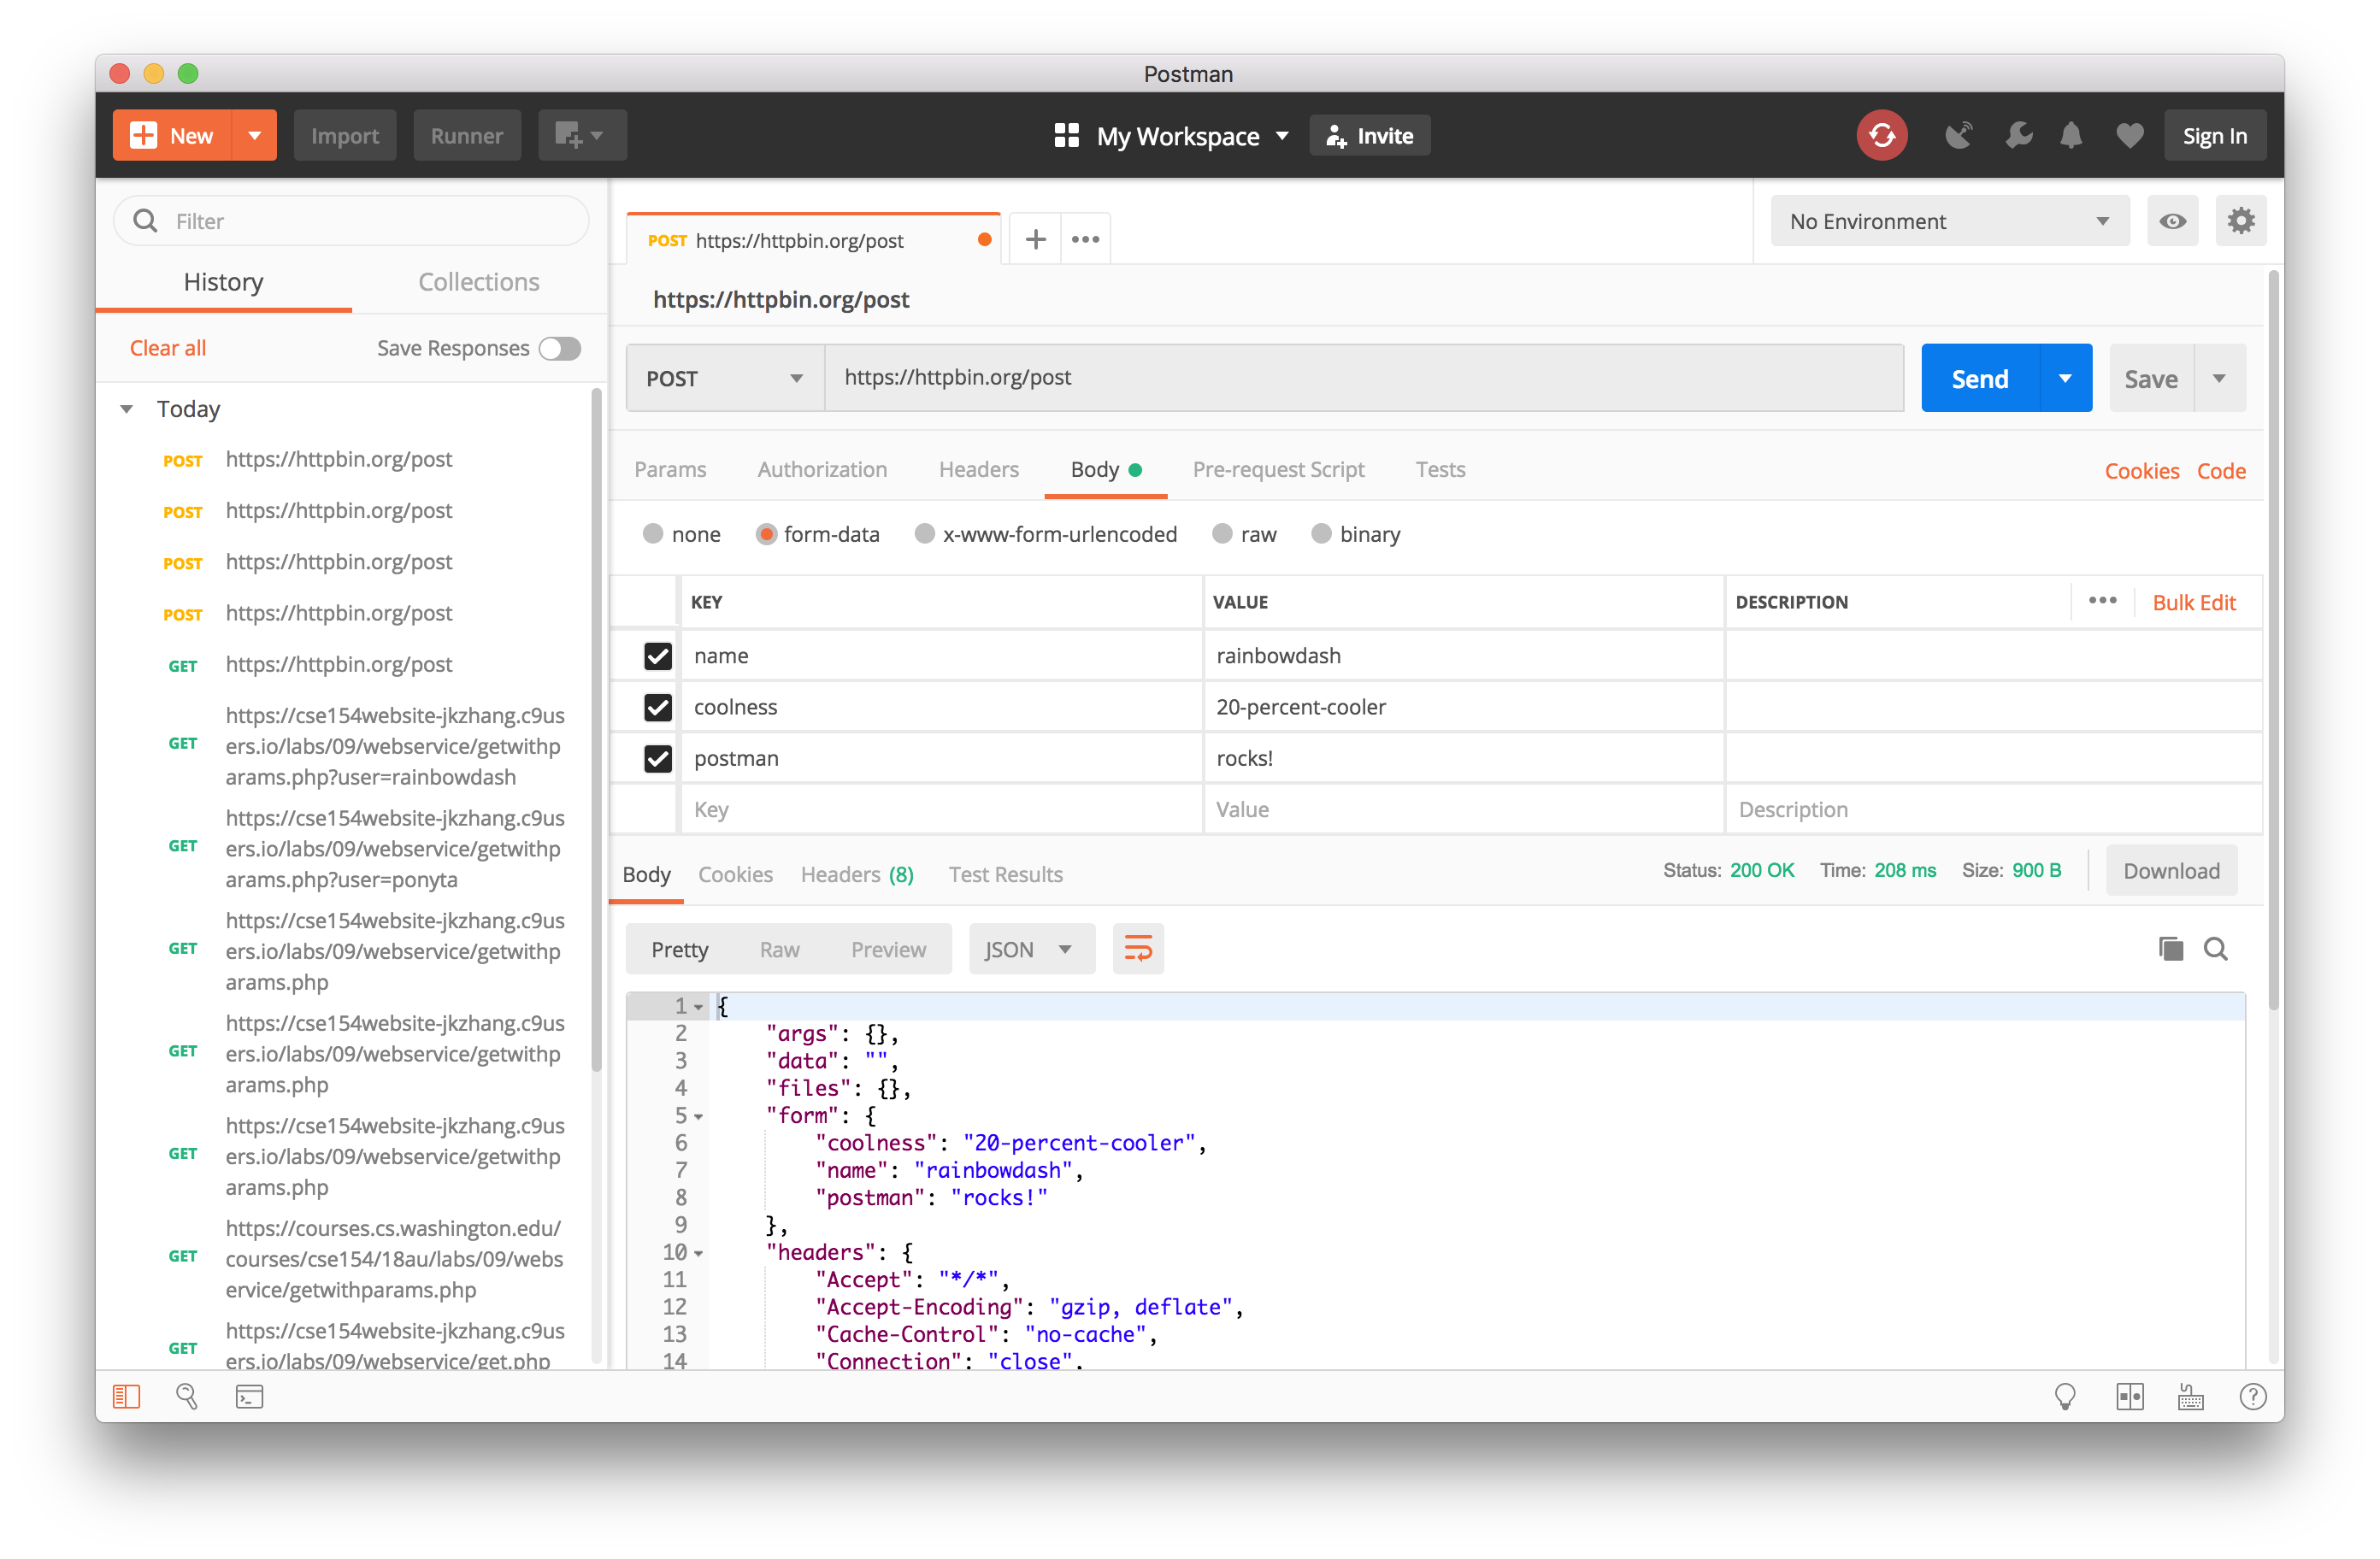
Example 5 - Making a POST request to https://httpbin.org/post with params: name=rainbowdash, coolness=20-percent-cooler, and postman=rocks!
Practicing POST requests
Can you do the following?
- Make a post request to
.
(Solution) - Make a post request to
.
(Solution) - Let's try logging in with
userasrainbowdash. (Solution) - Rainbow Dash has told me her password is
ponyta. Set thepasswordform data as ponyta. (Solution)
Extra Features to Try on Your Own
-
Add an optional POST parameter to
update-mycart.phpthat takes anameinstead ofpidand adds the product with the given name only if their is a product in Inventory with that name. -
Write a front-end (HTML/CSS/JS) that calls your
bmstore.phpweb service to populate a product list page for the website. Consider using a bulleted list or a table for displaying a products list. -
Add filtering UI elements to let a user filter products by the categories they want to see and use your
categoryparameter to return filtered results when a call is made tobmstore.php. - Add a view to the front-end to show a list of all of the products in MyCart. Consider using a bulleted list or a table for displaying a shopping cart.