Section 8: Full Stack Café!
Overview
In this section, you will get an opportunity to tackle your first full-stack web application, using everything you have learned since Day 1 in this class.
You will start with writing the webpage template from scratch using HTML/CSS, then populate it with provided JSON data using AJAX with JS and a small PHP web service. You will then design your own SQL tables to represent this JSON data in a SQL database. Next, you will use PHP to populate your SQL tables with the JSON data and return data to the client from your SQL tables rather than the JSON file. You will also get some practice with client-side form validation using JavaScript to ensure good user experience as well as preventing erroneous calls to the server. Finally, you will get to implement features to update your database based on what users submit by handling PHP POST requests and updating your tables accordingly.
Part I: HTML and CSS
Part I (HTML and CSS): The Scenario
Following your exciting (and sometimes challenging) quarter in CSE 154, you find your first web-dev opportunity in the real world. A new local café called Mowgli's Café is joining the online-delivery craze, aiming to provide customers with fresh coffee and breakfast at the click of a button. They've just hired you to create their website.
A designer with no web development background has created a PNG using Adobe Illustrator for the site design the manager wants. Your first task is to create a live web page using HTML and CSS, matching the PNG as closely as possible. You can ask the designer a few questions for clarifications (e.g., font styles, sizes, etc.), but note they have little idea of what a "tag" is. In this section, let's say your TA happens to be the designer on call.
This scenario is very similar to web projects done by developer "contractors" hired on a project-basis like this.
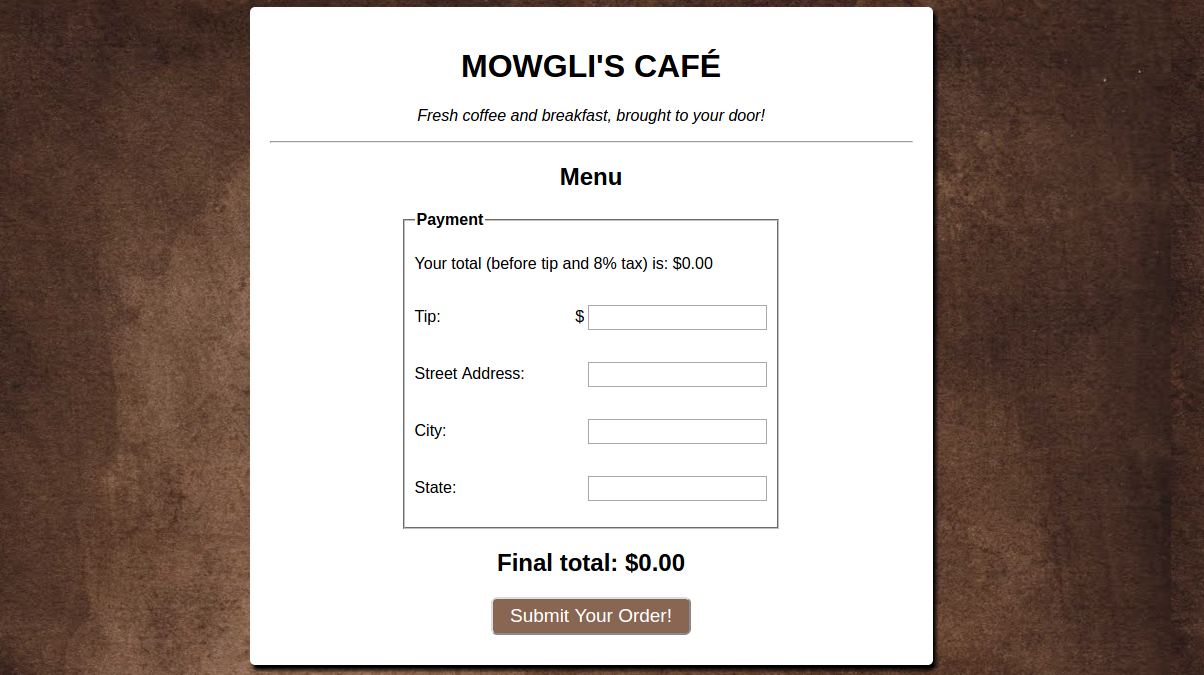
Part I (HTML and CSS): Screenshot
Part I (HTML and CSS): Instructions
You should try to match the screenshot provided above as closely as possible. Everything you have learned in this class will be sufficient for laying out the page and styling it. The designer has given you the background image to use (background.jpg).
The displayed page shows the menu and order form (it may look surprising bare - that's for you to fix in the next section). The submit button has a background color of #896652. Remember to include classes and ID's for elements on the page that represent shared information or important values that will need to be accessed later (e.g., form inputs).
Note that being resourceful is key to being a successful web developer. Feel free to review the slides or use the web to review different layout techniques (for example, you may find flex boxes useful to get the two-column layout). Once you feel confident that your manager would be satisfied with the page, you may move on to the next section.
Part II: AJAX with JS and PHP
Part II (AJAX with JS and PHP): Scenario
Now that you've impressed the manager and designer with your fancy HTML/CSS skills, the manager asks you to implement the menu, listing all of the current items offered by the café and their prices. They provide you this JSON file with all of the data you need to populate the menu.
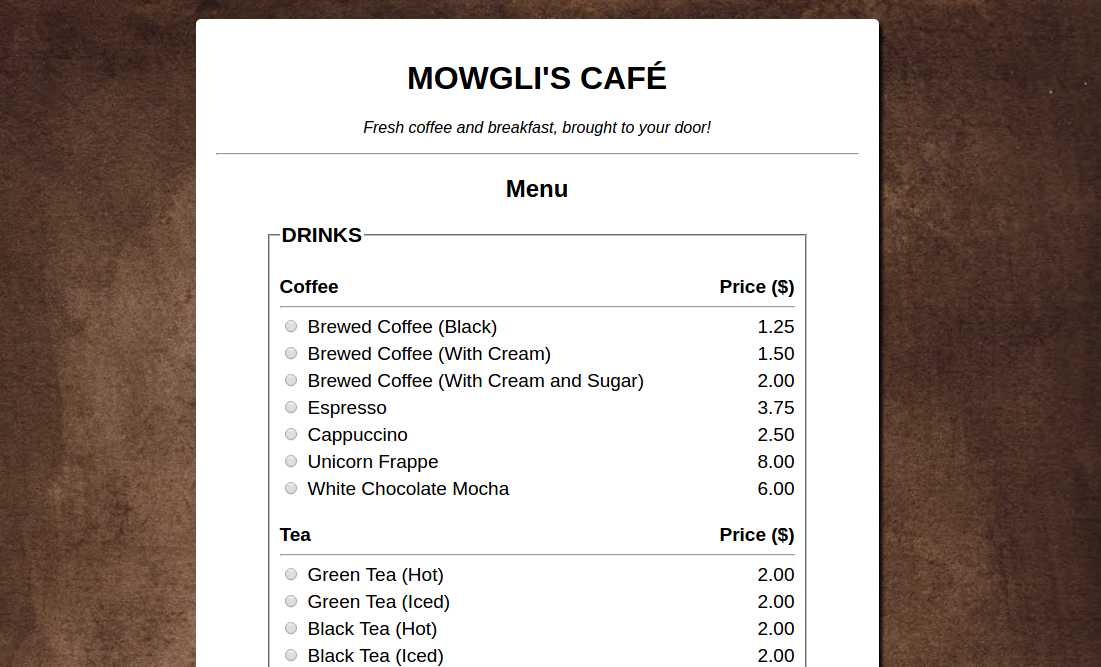
They ask that you maintain the organization in the JSON format as much as possible, grouping the different categories and subcategories nicely so that customers can easily navigate the menu page. The designer has provided you another set of screenshots to guide you, provided on the slide below. Additional instructions and hints are provided on following slides below.
Part II (AJAX with JS and PHP): Screenshot 1/3
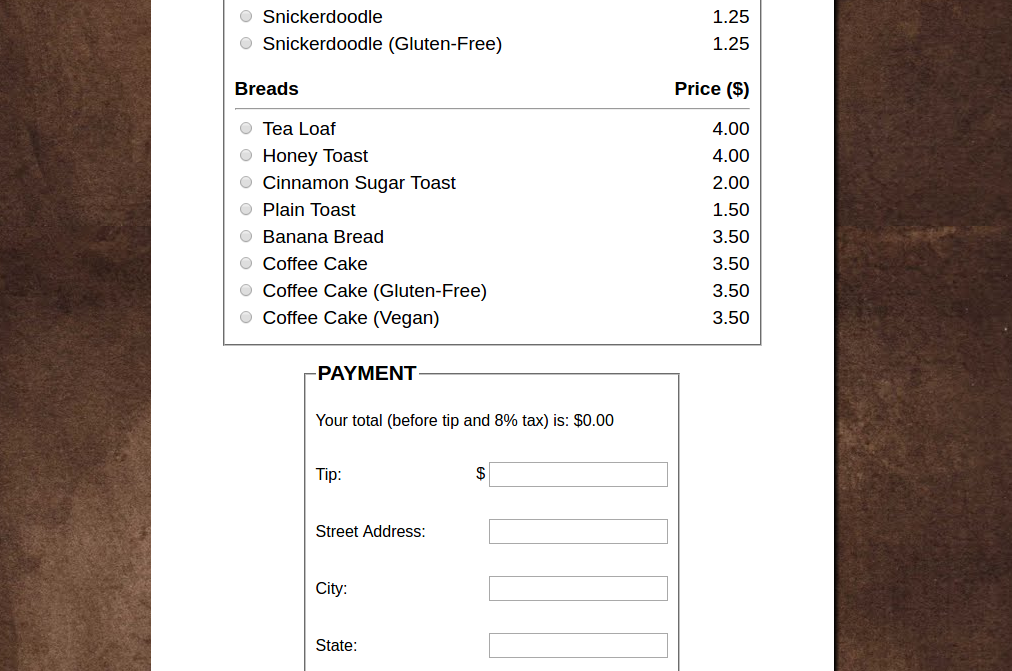
Part II (AJAX with JS and PHP): Screenshot 2/3

Part II (AJAX with JS and PHP): Screenshot 3/3
Part II (AJAX with JS and PHP): Instructions 1/2
There are a lot of pieces in this task, so taking the time to develop a clear plan-of-action will save you a great deal of hassle and debugging later on. First, note that the menu the manager provided you with via JSON will most likely be updated in the future depending on supply and demand. You should avoid hardcoding values in the HTML, but rather use JS to generate the menu when the page loads. This means that your HTML template you created in Part I will most likely not change at all here, apart from adding the script tag at the top.
You will almost certainly want to add more CSS classes, ID's, and styles though to get the desired output.
Part II (AJAX with JS and PHP): Instructions 2/2
Recall that you can use AJAX with JS to request data from the server and process/return the requested data with a PHP web service. Since the data is conveniently given to you in JSON format, this should be fairly straightforward. On the next slide, suggested development strategy is provided to help get you started.
Part II (AJAX with JS and PHP): Development Strategy
- Identify the key components of each category shown on the screenshots. What classes might you need to add and style in CSS? What layout techniques have you learned to achieve different layouts?
- Copy/paste the given JSON into a new JS file, and use this to populate your menu before worrying about the PHP. You will probably find it helpful to factor out common DOM creation methods in your JS.
- After you successfully populate your page using the JSON in JS, start a new PHP file and have it open and print
menu.json. Recall you can test this just by opening the PHP file in the browser on Cloud 9 and seeing the printed output on the page. -
Add a GET query parameter
menu=allto your PHP web service so that when passed the correct value, the entire menu JSON is returned as the response. - Now remove your JSON from your JS code and make an AJAX request to your PHP web service to fetch the JSON from the server.
Part III: SQL Database Setup
Part III (SQL Database Setup): Scenario
The manager is quite impressed that you've managed to get so much done with the website in so little time. While they're not a professional developer, they have some background in computer science, and know that SQL is a good choice for storing data about Menu items, Orders, Customers, etc.
For this task, the manager wants you to create a small SQL database to store data about the items on the menu. Later, they'd like you to include tables for Customers and Orders, but for now they just want the website's menu to rely on a database rather than a JSON file.
Part III (SQL Database Setup): Instructions 1/2
For this task, the manager asks that you create the Menu table in a new database such that it contains each menu item's name (e.g., "Espresso"), category (e.g., "Drinks"), subcategory (e.g., "Coffee"), quantity in stock (setting the default to 100 units for each menu item for now), price (e.g., 2.75), stock cost for the café (e.g., 1.55), and a unique ID (which serves as the PRIMARY KEY).
Create your Menu table in a database called "mowglis" and save the CREATE TABLE instructions in a .sql file. You may want to update the database and table schema later, so it's good to have it on hand.
For your column datatypes, recall that you can use VARCHAR(N) to represent strings of up to N characters in length, FLOAT to represent floats, and INTEGER to represent integers.
Part III (SQL Database Setup): Instructions 2/2
After creating the table and running the .sql file in your mysql terminal to make sure it works properly, populate the table using the data from menu.json. There are a few ways you can do this, and this is a good exercise to weigh the pros and cons of each.
One way is to write the INSERT statements manually, one at a time in the mysql terminal based on the information for each menu item. While this is fairly straightforward, it's tedious and prone to typing errors.
Another option is to write the INSERT statements in another .sql file and run the file using source statements.sql. However, this is still fairly tedious and hard to edit when changes are made to the menu later.
Perhaps the best option available based on what skills you've learned in this class is to populate the table using PHP and the PDO object. You can parse the JSON file (you already should be opening it for your API implementation in Part II) and insert each item based on its attributes and using the PDO query function. When you have successfully populated your Menu table, you may move on to the next part in the section.
Part IV: Using SQL in your API
Part IV (Using SQL in your API): Scenario
Your manager is very pleased that Mowgli's Café now has its data backed up in a SQL database. They know that this will make it much easier to save and process orders from customers later. Next, they ask you to have your PHP web service use your new Menu table for the menu query rather than using the menu.json file.
Part IV (Using SQL in your API): Instructions
This part should be fairly straightforward since you already have the AJAX set up and PHP code which processes and returns JSON and a SQL database table set up. You will find the PDO object helpful for this part when selecting and returning data from the table using PHP.
Part V: Processing User Input
Part V (Processing User Input): Scenario
The manager is very happy at the progress you've made and seeing everything start to come together. Now that you have a fairly solid foundation to populate the menu, it's time to work on processing user input on the page using JS.
Part V (Processing User Input): Instructions
Ensure that a customer may choose no more than 1 drink item and 1 bakery item (a customer may choose 1 of each). If the customer chooses a drink, the "sizes" section of the menu should have an option set to 12oz by default (otherwise no size should be checked if the user hasn't selected a drink item).
Whenever a change is made to the selected items on the menu, the price displayed at the bottom of the page, listed as "Your total (before tip and 8% tax)", should be updated. The value for the "final cost" displayed at the very bottom of the page should be equal to (price * 1.08 + tip), where "price" is the price before tip and tax.
For the user's order information at the bottom of the page, they should only be able to enter numbers for the tip, and shouldn't be able to enter negative values. The value they enter for "State" should be in the format of a 2-letter state code (e.g., WA for Washington).
Part VI: POSTing to your Web Service
Part VI (POSTing to your Web Service): Scenario
Your manager now asks you to implement a feature for taking the order data you retrieved in Part V and sending it to the server. They ask you to create a new table in your databased titled "Orders", containing information about the drink (if any), size of the drink (if a drink is chosen), baked good (if any), tip, and total cost.
Part VI (POSTing to your Web Service): Instructions
To reduce redundancy in the database, you should make the drink and baked good items in the new Orders table FOREIGN KEY's to the corresponding items in the Menu table. A suggested way to do this is to reference the ID attribute from the Menu table and store the drink and baked good data in Orders in the same ID value format.
In addition to making a new Orders table, you will want to implement POST handling in your PHP web service. Given a POST parameter mode=order, your PHP web service should insert the necessary data into the Orders table based on what data is sent from the client. The attributes in the Orders table will be good hints on what values you'll want to pass in the POST request from your JS file.
End of Section/Challenge Problems
If you make it through the first two parts of the section, you'll have made a lot of progress. We strongly recommend you finish the rest of this section at home to get more practice writing a full stack web application and also get practice for your last homework assignment and the final exam. If you finish the entirety of the section, stellar work! Here are a few features to add if you'd like to tackle some more challenges:
- Use cookies and/or sessions to remember the user's information when they reload the page
- Let the customer choose multiple drinks and baked goods in one order, as well as multiple units of the same type of item (e.g., two pices of coffee cake).
- Add your own menu items to your database!
- Add a feature to allow a customer to have different add-in options to their drinks. Many coffee shops have something like this, allowing customers to request extra espresso shots, cream, 2% milk, skim milk, soy milk, etc.