Overview
In today's lab, you will be getting more practice with DOM manipulation using JavaScript. This lab will be fairly useful practice for your next assignment, and hopefully you will also have fun with it!
What You'll Be Making

This is a nonogram puzzle (also called Pi-Cross, Hanjie, Number Grid, etc.). These are really neat little logic puzzles that are quick to learn and also to naturally-programmable. While you don't need to actually know how these work to complete this lab, you can find out how to solve them on the slide below.
How to Solve a Nonogram Puzzle
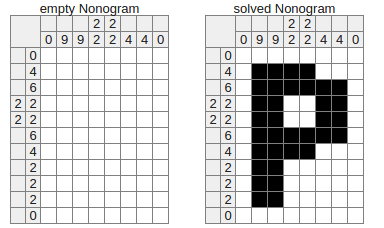
The rules of nonogram puzzles are actually quite simple. Each puzzle is a picture logic puzzle in which cells in the grid must be either filled or left blank according to numbers at the side of the grid to reveal a hidden picture. For example, a clue of "1 5 2" would mean that there are sets of 1, 5, and 2 filled squares, in that order, with at least one blank square between the successive groups.
Grids may be of various sizes, and don't necessarily need to be of squared dimensions (e.g., 5 columns x 5 rows), but we will be working on a small puzzle to start. Later, you'll have the opportunity to extend your JavaScript to larger grids.
To the right is an example of a small nonogram puzzle before and after being solved. In this lab, you will write code to help a user fill in different puzzles!
Provided Code
We have provided the HTML (nonograms.html) and CSS (nonograms.css) you will need for this lab.
You will only need to modify each of these files slightly for a few parts of the lab. Otherwise, you will be just writing JavaScript code in a new file called nonograms.js.
Note: We also have other nonogram puzzles of larger sizes (10x10, 15x15, 20x20) if you'd like to use these instead of the small one. These HTML files use the same CSS file.
The working solution can be found here.
Part I: Make an alert pop up when a user clicks a tile
First, we're going to practice attaching event-handlers to a collection of existing DOM elements. Write a JavaScript file nonograms.js that sets up event handlers when the page loads.
Specifically, it should attach a function to each tile in the grid (which has the class .box) so that when a user clicks on that tile, an alert pops up with the message, "You clicked a tile!".
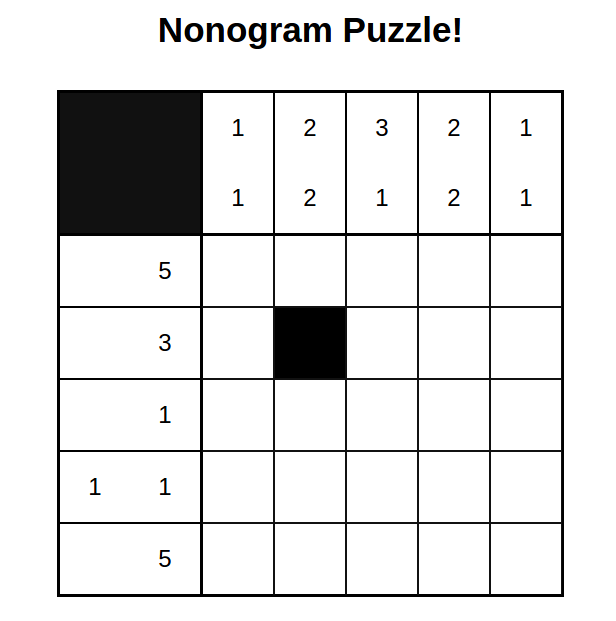
Part II: Make a single tile turn black when its clicked
The second task is to add functionality to the page so that a single tile is filled in when a user clicks on it. There is an existing class .filled that handles the styling for you in the CSS. You should add this class to the tile that is clicked to fill it in.
Part II: Expected Output
Below is an example of the second square in the second column having been filled in after a user has clicked it.
Part III: Implement Fill Toggling
Now that you have added functionality to fill individual squares on the
puzzle, modify your onclick event handler for each tile so that
when the user clicks a tile, it is filled if it is white,
otherwise it is cleared (turned white) if it is filled.
There is no specific class for "unfilled" tiles. You can clear
a filled tile simply by removing the .filled class.
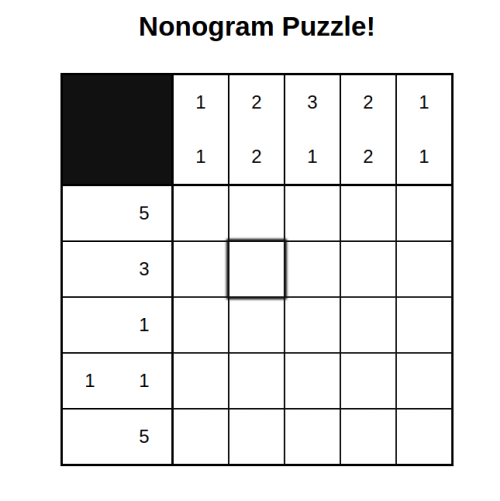
Part IV: Add Hover Effects
Now that you have made it so that a user can fill and clear each tile, add code that highlights the borders of each tile that is hovered.
Note that this actually doesn't require any JavaScript! CSS3 lets us add
pseudo-selectors to elements on the page.
:hover
is a particularly useful one here. Modify the CSS slightly so that any tile
(with the class box is hovered over, it has a
box-shadow
of 0px 0px 2px 2px #111111 (no horizontal/vertical distance but a 2px blur and 2px spread).
Part IV: Expected Output
Below is an example of the second square in the second column being highlighted with a box shadow as a user hovers their mouse over it.
Part V: Add a "Clear" Button to the Page
Sometimes, you just make a lot of mistakes and want to start completely over. It can
be a pain to manually click each filled tile (or refresh the page) to clear the puzzle.
Add a button to the nonograms.html with the label "Clear" that clears all
filled tiles by removing all .filled classes. If you'd like, you can add a
confirm
in this event handler so that a user has a chance to think twice before clearing
all their hard work!
Part VI: Drag and Fill
Now that you can fill multiple tiles, don't you want to optimize your solving speed?
Add functionality to the page so that when a user clicks on a tile, holds, and drags
across the tile-grid, the tile they click toggles the .filled class and
any square in their path is changed to have the same state as the clicked tile
(after it has been filled/cleared).
In other words, if the tile that was clicked was filled in, it should be cleared and then any tile that is passed while the user is dragging their mouse (until they lift their finger off of the mouse button) should also be cleared if it isn't already.
If the user clicks outside of the tile grid and then drags their mouse into the tile grid before letting go of the mouse button, no tiles should be changed.
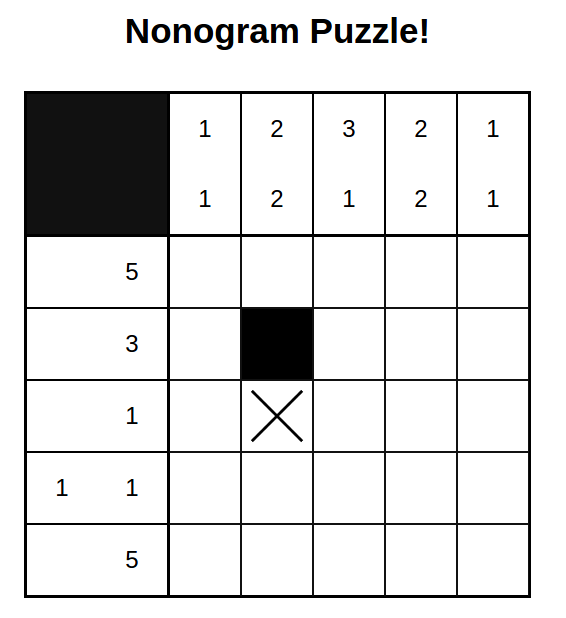
Part VII: Implement X-Filling
Many solvers of nonograms like to mark tiles that they know won't be filled with an "x". This makes it easier to quickly see what tiles are left that can be filled.
Add a class called crossed-out to small-grid.css that gives
an "X" as a background image to a filled tile whenever it is
clicked, using this background image url: https://courses.cs.washington.edu/courses/cse154/17sp/lab/dom/code/img/x.png. Note that the dimensions of this .png file are 256 x 256 pixels, so you should use the background-size value of 100% when setting the background image.
Part VII: Expected Output
Below is an example output after a user has clicked the third square in the
second column, resulting in it being crossed out with an x to indicate that the
square is not a filled square in the solution. Again, the x should appear in the background only if a tile that has the .filled class is clicked (where the .filled class should then be replaced with the .crossed-out class). Note that the square above it has
been filled in previously to indicate that the user has determined it should be
filled in the solution.
Challenge Problems
Good work! Now you have a fully-functional nonogram puzzle! There are a number of other features you can add to practice DOM manipulation, animations, styling, etc. Here are a few ideas if you're looking to get practice:
- Let a user drag "x's" across the page. That is, reproduce the dragging effect that you did for filling/clearing tiles, only toggle "x-filled" tiles when the user right-clicks instead of left-clicks.
- Let the user choose what color they want to fill tiles with, adding a drop-down menu to the page.
- Verify the puzzle! It turns out that there isn't much work to do for this. Add a "submit" button to the page so that when a user clicks it, a message appears on the page if they've successfully solved the puzzle.
- Write JavaScript functions that generate a nonogram grid from scratch! You have all of the classes you need in the
CSSfile. You may modify theCSSor add your own classes to generate a grid of the same size (15 x 15 tiles) or a different size (5 x 5, 10 x 10, 10 x 15, 25 x 25 etc.)