(Last updated September 23, 2020)
Visit the following page:
Under the "Java SE 15" heading, click the button labeled "JDK Download":
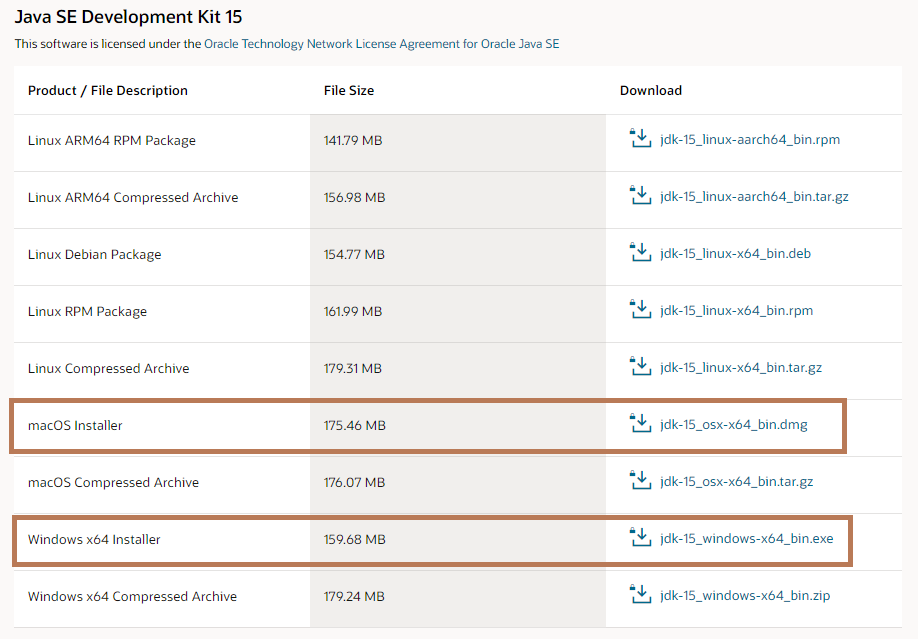
This takes you to a new page; scroll down to the section labeled "Java SE Development Kit 15" (note that the screenshots on this page may show an older version number). Choose the download appropriate for your operating system.
In the pop up window, click the box to the left of "I reviewed and accept...", then click the "Download jdk-..." button.
Save the file to your desktop or somewhere convenient.
A note for Windows users: In most cases, you will want to download the "Windows x64" version, unless you know you are running an older 32-bit version of Windows. We recommend trying the 64-bit ("x64") version first, and only attempting to install the 32-bit ("x86") version if that fails. Since Java no longer supports 32-bit you'll have to download the legacy Java SE Development Kit 8u201 x86 here. Consult this Microsoft knowledge base article to determine whether you have the 32-bit or 64-bit version of Windows.
A note for Linux users: We recommend installing the JDK via your Linux distribution‘s package manager. Skip this section and see below.
Open the .exe file you just downloaded. An installation wizard will open.
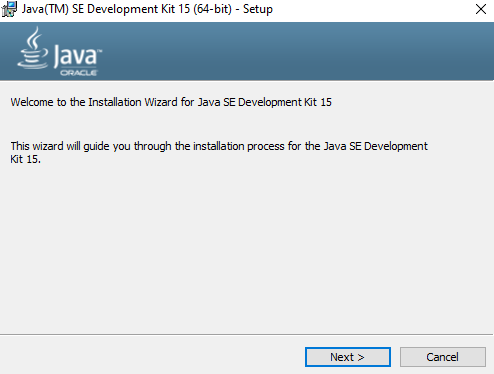
The default settings are reasonable for most users, and you can complete the installation by repeatedly clicking "Next".
At this point, the JDK should be installed.
If you‘d like, you can confirm this by holding down the Windows key and pressing R,
and typing cmd /K java -version into the window that opens.
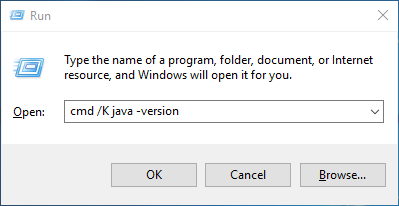
Press OK. If you see a message that looks like this:
java version "15" 2020-1-2 LTS
Java(TM) SE Runtime Environment 18.9 (build 12.0.1+13-LTS)
Java HotSpot(TM) 64-Bit Server VM 18.9 (build 12.0.1+13-LTS, mixed mode)
then you‘re done! However, if you see something like:
'java' is not recognized as an internal or external command,
operable program or batch file.
then the installation has failed. If you originally installed the x64 (64-bit) version, you may wish to try again with the x86 (32-bit) version.
Open the .dmg file you just downloaded. This window will appear:
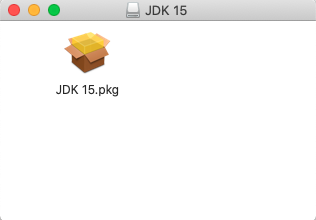
Double-click the .pkg file as directed. An installation wizard will open:
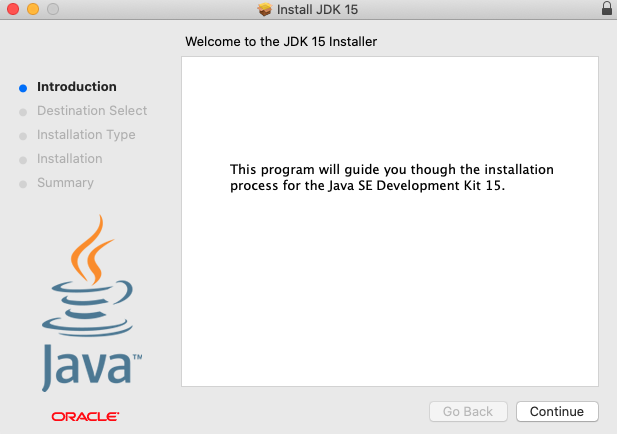
The default settings are reasonable for most users, and you can complete the installation by repeatedly clicking "Continue".
At this point, the JDK should be installed.
If you‘d like, you can confirm this by opening Terminal (Press Cmd+Space, type "Terminal", press Enter),
typing java -version, and pressing Enter.
If you see a message that looks like this:
java version "15"
Java(TM) SE Runtime Environment (build 1.8.0_102-b14)
Java HotSpot(TM) 64-Bit Server VM (build 25.102-b14, mixed mode)
then you‘re done! However, if you see something like:
-bash: java: command not found
then the installation has failed.
First, check that Java isn‘t already installed.
From a terminal, run java -version.
If you see a message that looks like this:
java version "1.8.0_102"
Java(TM) SE Runtime Environment (build 1.8.0_102-b14)
Java HotSpot(TM) 64-Bit Server VM (build 25.102-b14, mixed mode)
then Java is already installed, and you don‘t need to do anything further.
However, if it‘s not already installed, we‘ll install it using your Linux distribution‘s package manager.
For Ubuntu and other Debian-based distributions:
Run sudo apt-get update && sudo apt-get install default-jdk
For other distributions:
Consult your distribution‘s documentation. If you would like to contribute instructions for your particular distribution, email us and we will add them to this page.