All students enrolled in CSE 123 will receive free access to Ed. Ed comes with an online editor that lets you work on your assignment without having to download any software. However, we still ask that you complete some software setup on your computer since there are some downsides that result from relying on Ed as your primary editor.
- Ed requires internet access. You cannot work on your assignments on Ed if you don’t have a stable internet connection.
- Ed does not have a debugger. One of the skills we will be practicing this quarter is how to debug the programs we write. Without a debugger built-in to the software, debugging is much more difficult.
In addition to using Ed, we ask that you install IntelliJ as another option for working on your assignments. IntelliJ is a fully-featured Integrated Development Environment (IDE) that is widely used by professional software developers. The instructions below will explain how to install and set up IntelliJ for our course.
You can view a video walkthrough of these steps here. Additionally, to learn about the features IntelliJ provides and how to utilize them, you should check out this video.
Install Java
Following the instructions here to install Java on your computer.
If you already have Java installed, you may skip this step, but make sure you are using a version of Java 11 or greater.
Install IntelliJ
Install IntelliJ here for your operating system. We only need the Community Edition (which is free), but students are eligible to apply for free Ultimate licenses as well here.
On a Mac?
If you are on a Mac, you need to select which type of processor you have (Intel or Apple) in the installer type dropdown.
Once you have completed the installation, IntelliJ should open and we can continue the set up.
Set Up IntelliJ
Open IntelliJ for the first time. You can choose any customizations you might be comfortable with, but the defaults are usually good enough!
There are two plugins we will ask you to install. The first is the jGrasp plugin, which will improve the IntelliJ debugger. jGrasp is another IDE that has an amazing visual debugger. By installing this plugin, we can use jGrasp’s powerful visual debugger inside IntelliJ!
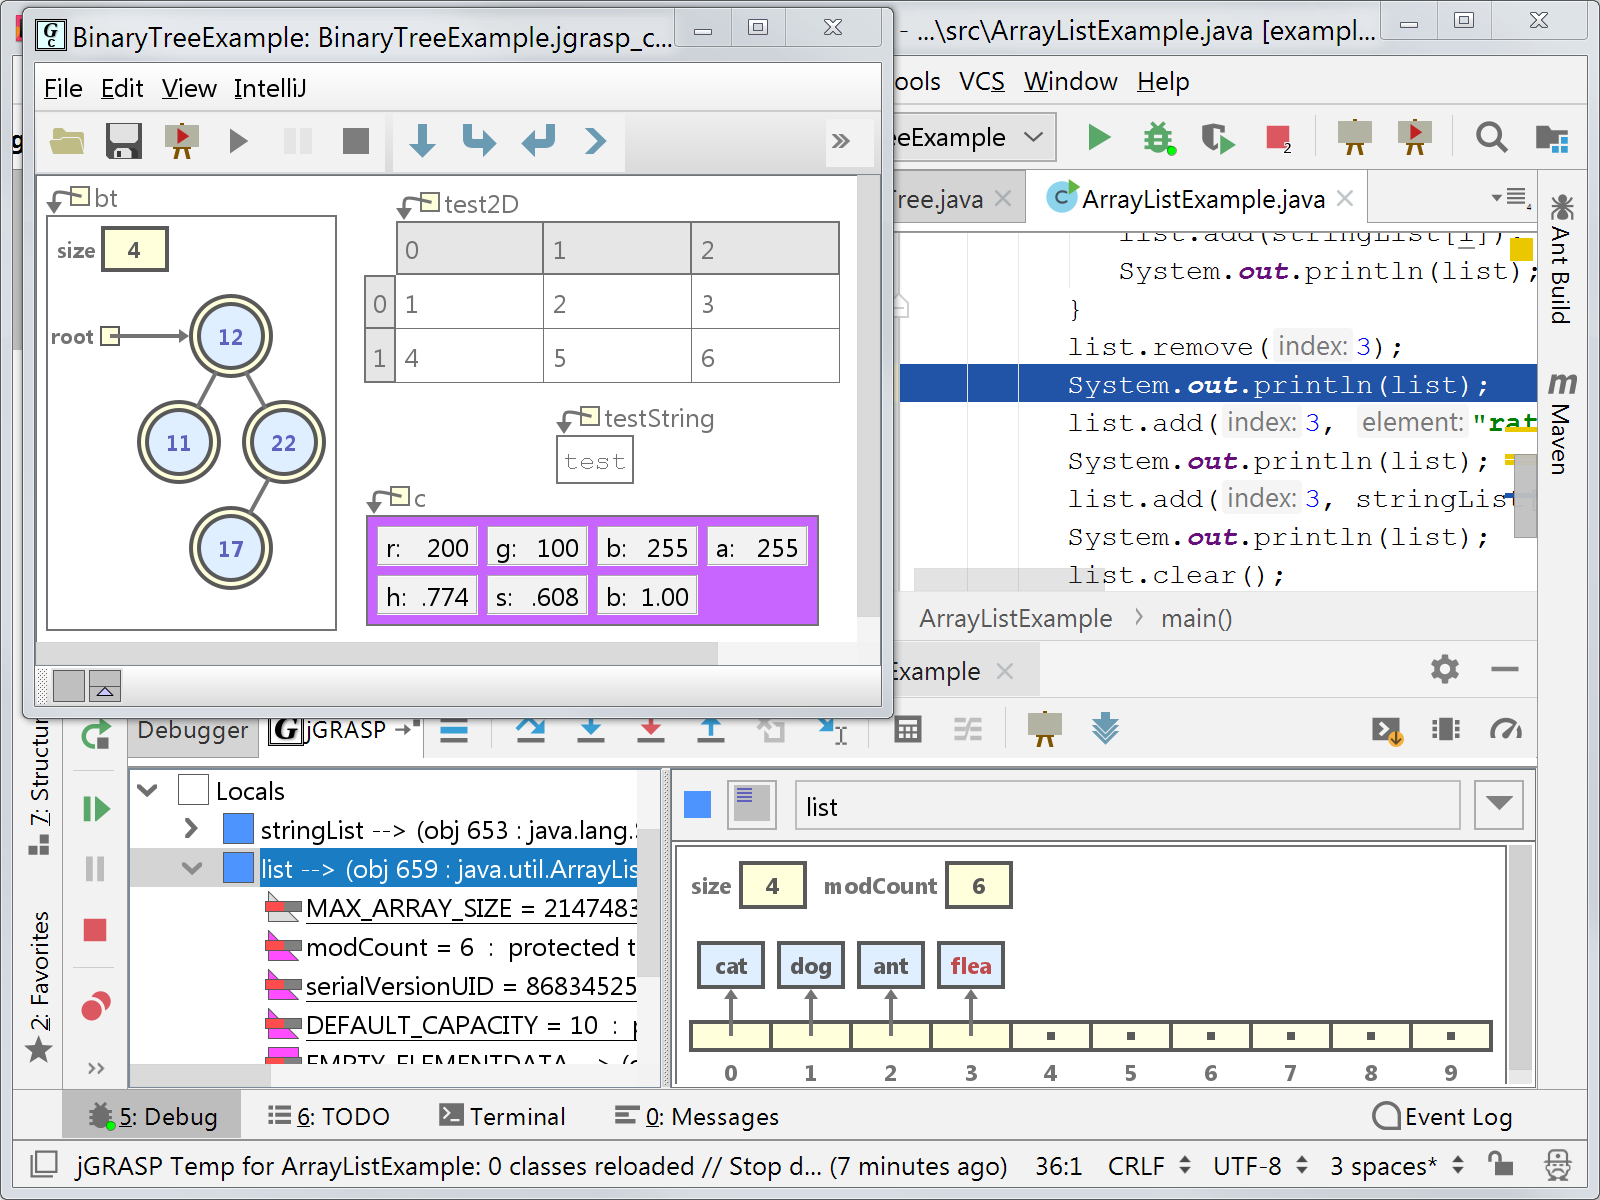
To install the jGrasp plugin, click the Plugins option from the IntelliJ setup. In the Marketplace that shows up, search for and install the jGrasp plugin. If you have already closed the first-time set up, you can also install plugins by opening up Preferences and then clicking Plugins from there.
The second plugin you should install is the CheckStyle-IDEA plugin. CheckStyle is a useful tool to check some style related issues that we grade on in 123. Follow the same steps as above to open the Plugins option if you have closed the menu. Then, search for and install the CheckStyle-IDEA plugin.
After installing the jGrasp and CheckStyle-IDEA plugins, your development environment should be good to go! If at any point IntelliJ prompts you to restart IntelliJ to load the plugins (or for any reason), please do so.
Complete IntelliJ Tour
IntelliJ comes with a great built-in tour to show off all of its core features. The tour teaches how to edit, run, and debug your project. To access the tour:
-
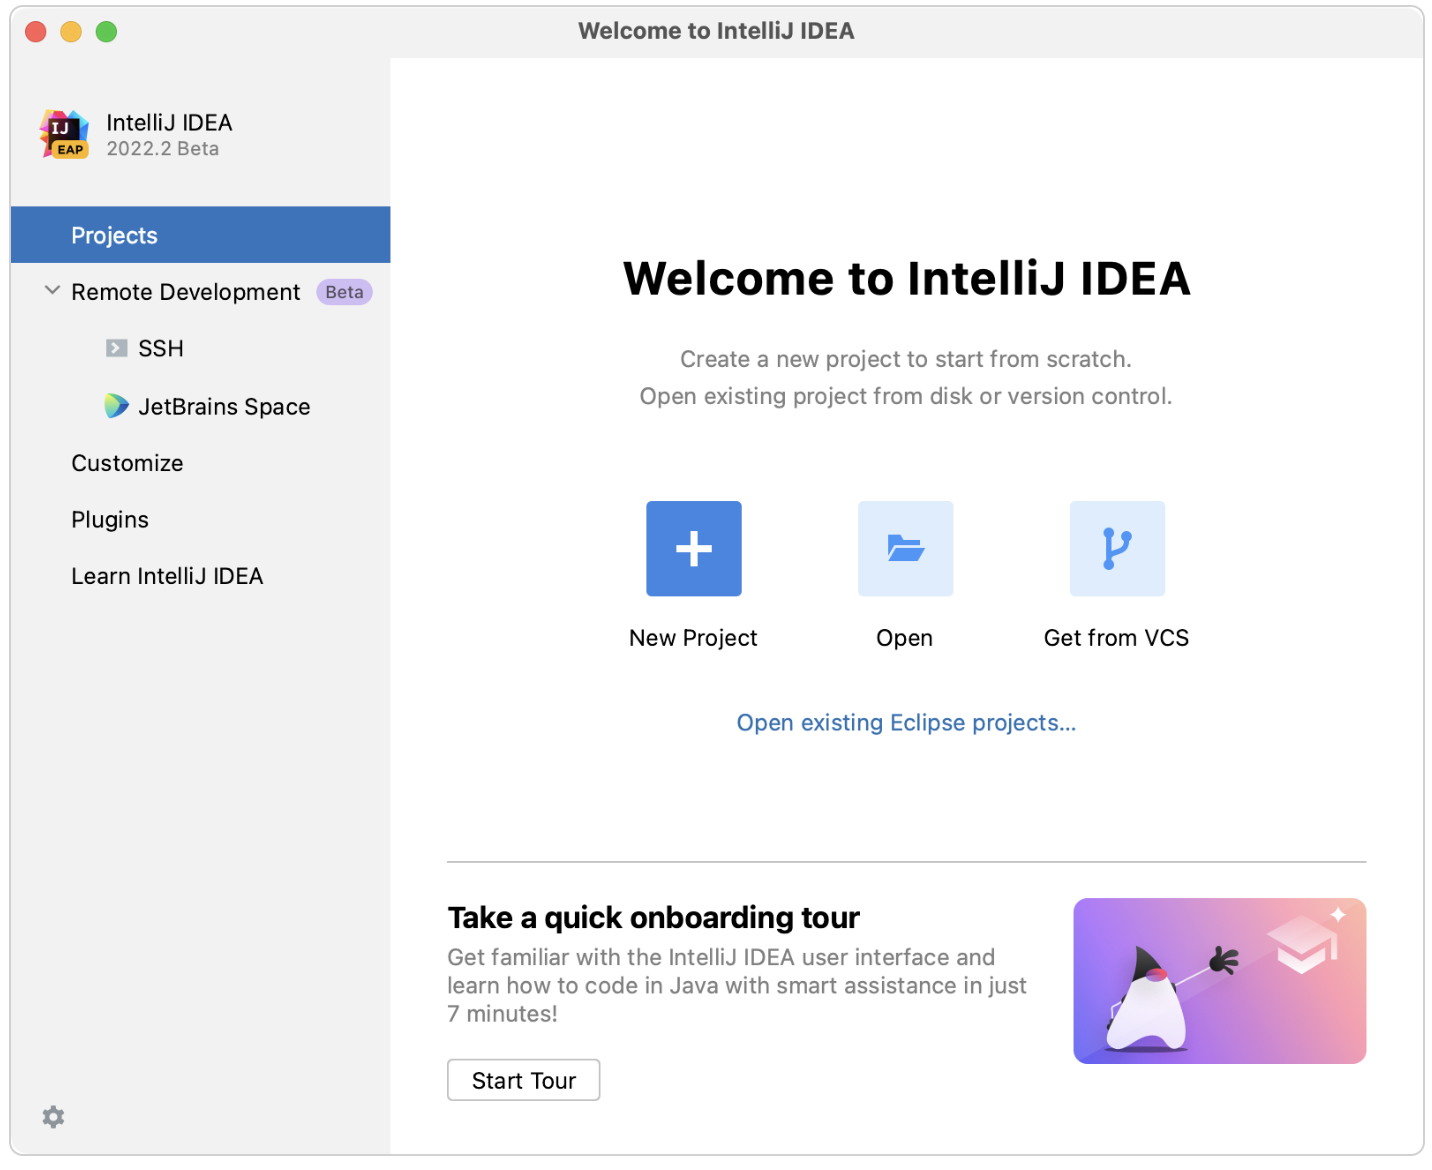
If this is your first time opening IntelliJ, you should see a button at the bottom of the window labeled “Start Tour”:
-
If you have already opened IntelliJ, you can activate the tour by using the top menu by selecting
Help > Learn IDE Features.
There are many chapters in the interactive tour, but you really only need to complete the first one titled “Onboarding Tour”. The other chapters are also very useful, but rely on features we don’t need in depth in 123.
Add 123 Workspace
We will provide a project template where you can work on assignments in IntelliJ before making final submissions on Ed. Remember that you must submit to Ed for work to be graded! To set up your project, complete the following steps:
- Download the workspace ZIP file from Ed.
- Unzip the file by double-clicking on it. Move the workspace to a folder where you want to store your 123 work.
- Open IntelliJ and open the workspace.
- If you have already opened IntelliJ, you can open the workspace by selecting
File > Open > <selecting the unzipped workspace folder>. - If this is your first time opening IntelliJ, click the “Open” button and then select the unzipped workspace folder.
- If you have already opened IntelliJ, you can open the workspace by selecting
- You should now have the workspace opened. You should see folders for each assignment in
assignments/src, likep0,c0,p1, etc. Thep0folder should already contain the files for P0. In the future, when an assignment is released you should copy the relevant assignment files over to the corresponding folder. Then you can work on the assignment and utilize all the benefits of a fully-fledged IDE!- To create a new file in an assignment folder, right click on the folder. Then, select
New > Java Classand fill in the class name correctly (you can also create text files by selectingFileinstead ofJava Class). - We also provide folders for you to work on lesson (
lessons/src) and section (sections/src) materials. Feel free to add files there as well!
- To create a new file in an assignment folder, right click on the folder. Then, select
- Remember to make your final submissions on Ed by copying your code over and hitting the
Markbutton!
Disable Intention Actions
IntelliJ’s Intention Actions tool attempts to determine ways to optimize your code and detect problems within it. However, oftentimes the fixes suggested by Intention Actions involve advanced material or are simply incorrect. While more seasoned programmers may know how to utilize this tool, it generally causes more problems than necessary for newer programmers. As a result, we highly recommend that you turn off this feature. To do so, open the IDE settings using either ⌘ Comma on Mac or Ctrl+Alt+S on Windows. Then, select Editor > General > Appearance and disable the “Show intention bulb” option, apply the changes, and close the dialog.
Configure Checkstyle
We provide Checkstyle warnings to catch basic style issues that you may run into while programming. These include issues such as long lines, naming conventions, and indentation. While Checkstyle is helpful to catch some issues, there are not guarantees about your grade on an assignment based on fixing these warnings. We will still manually grade your final submission on Quality as outlined in the course grading rubric and based on content in the Code Quality Guide. We recommend using Checkstyle to catch basic style issues, but do not expect it to catch every code quality issue and make sure to proofread your work as well!
- Open the Settings dialog (On macOS
IntelliJ IDEA | Preferences, otherwiseFile | Settings). - Navigate to
Tools | Checkstyle. - Make sure the
Checkstyle versionselected is 8.36.2 or greater. - Change the
Scan Scopedropdown in the top right toOnly Java sources (including tests). - Add the CSE 123 checkstyle configuration by clicking the + icon on the right side under the Configuration File section. In the window that appears, enter a description like “CSE 123 Checks”. Make sure
Use a local Checkstyle fileis selected and paste in the following path:(Enableassignments/config/checkstyle/checkstyle.xmlStore relative to project locationif you plan to ever move or rename the project directory; otherwise, it doesn’t matter whether this is enabled or not.) - Back in the Checkstyle settings, mark the checkbox next to “CSE 123 Checks” (or whatever name you chose) to enable it. This would also be a good time to hit Apply.
- To actually run Checkstyle, open the file you want to scan for issues. Then, click on the Checkstyle button in the bottom bar and click on the green “Check Current File” button. Once you do this, you should see any style issues in the file.