
Lip syncing is one of the final things you do in an animation. It's said to be the least creative of character animation tasks. You are basically following the frame-by-frame timing of a pre-recording. The audience is sensitive about lip movements matching the voice. There will probably be plug-ins in the near future that can run lip syncs for us, but in the mean time, you're on your own.
The first thing we'll need in order to do a lip sync is a recording we can work from. Earl is the only character that has lip movements available. Refer back to the Earl tutorial on how to use facial expressions.
Lip syncing the lips alone will not make for a good lip sync animation. Facial expressions, head movements, and body movements (if the body is seen) are essential when doing a lip sync. The audience is focusing primarily on the character's face. Pay close attention to people while you're having a conversation with them. Notice that they blink often. Their eyes are constantly shifting depending upon if they're thinking about something or if they are trying to intently tell you something. They can be smiling or frowning while they talk. Their head moves around a bit and can help to emphasize a point in the conversation. What is the rest of their body doing? Do they use their hands to help animate the conversation? Do their feet and weight shift around? Do they fidget or do something subconsciously (such as touch their hair or bite their lips)? Adding these in will give life to your character.
Review this on-line tutorial on the basics of lipsyncing.
To add a wave file to Maya, simply select the file from your desktop and drag onto the time slider. You can import in multiple sound files, but only one sound file can be displayed and played at a time. Because of this, if you have several sounds to import in, you need to change the offset times of when these different sound files begin. In order to view the animation with all the sounds, the only option is to do it in post-production (Adobe Premiere can do it easily).
You can right click the Time Slider for more sound options. You can set the length of the animation automatically by right clicking the time slider and selecting Set Range To...>Sound Length and the time slider will be adjusted automatically. Remember to set your time units to 30 fps (animation options) before you start your animation. You must also set your options to play the time slider
To delete an audio file, you have to options. Either select Edit < Delete < filename or use Edit < Delete All By Type < Sounds.
It may be easier to find the beginning of a sound by having the sound repeat until you drag the Current Time Indicator to the next time in the Time Slider. To enable this feature, open the Animation Preferences window and turn on the Repeat Sound option. In order to play the sound with the animation, you must set it in your timeline preference. (Settings and Preferences < Timeline). Under "Playback", change the Playback Speed" to "Normal [30 fps]".
When you animate your character talking, select Window < Animation Editors < Blend Shapes.

You have two options on how to approach this animation. One is to click on the "Select" button on the lower left of the Blend Shape Editor. What this will do is select the actual object blendShape1 which will appear on the channel box. From there, it will simply be similar to keying individual attribute by right clicking on the attribute name from the channel box and selecting "Key Selected". Be sure that you are on the correct time frame. The other option is to key it from the Blend Shape Editor (again, remember that you should be on the correct time frame) by adjusting the sliders and clicking on "key" when you're ready.
Don't forget to animate head movements, possibly body movements, and facial expressions.
You have a choice of using Earl or a fish to talk. The fish is such a simple character that you can animate its non-facial movements by keyframing the individual joints themselves. If you use the fish, you will have to animate its whole body (not too hard since, again, it's such a simple character). If you animate earl, you have to only animate his head really, but you may at times need to animate his body (rotating or translating) to get the effect you're trying to convey. If you do Earl, playblast out a view of only his head.
Here is an example of Earl done
while testing his facial expressions: 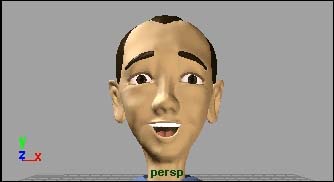
It's a bit stiff still and his head barely moves, only his jaws. Also, the mouth movements still need to be tweaked so it doesn't look so mechanical.
Here's an example of an excellent
lipsync:  Excellent. It was taken from the anibyte.com web site.
Here are the sound files to use for the animation. The file is "It's up to me to get things fixed." Choose a file from below to download and animate.
annoyed.wav
happy.wav
heroic.wav
ladiesman.wav
question.wav
realization.wav
serious.wav