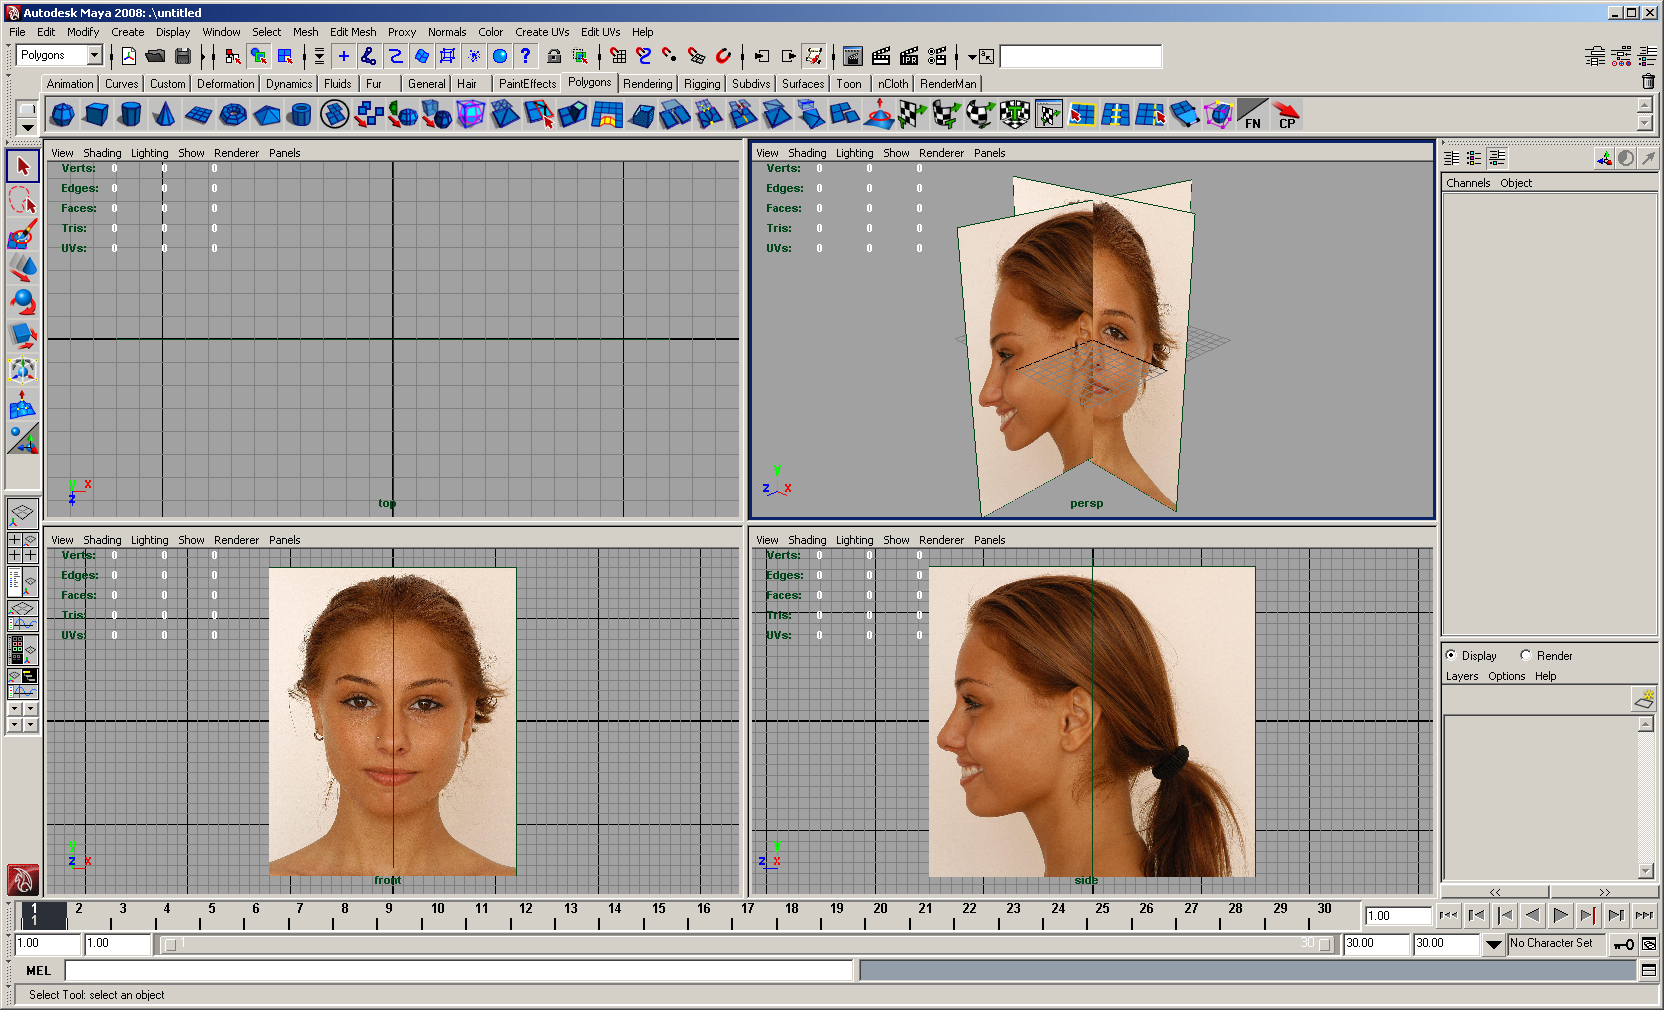
When modeling an object, it is extremely useful to use reference. Typically your reference will be an image, which requires another program besides Maya to view. Switching between Maya and the image will quickly become a hassle. However, it is possible to import an image directly into Maya, which allows you to use it as a guide for modeling. These images are called image planes because they appear as a plane in the camera view.
The first step to setting up image planes is making sure your reference images are aligned correctly. Most explicit modeling reference will include a front, side, and possibly top and back view. We will be using a front and side view in this exercise.
We will begin our alignment in Photoshop. First create a new image that is large enough to hold the two views (6000 x 2000 in this case). Copy the two images into the blank image and position them as shown below. Note that the top of the head and the chin do not line up yet. You can create helpful guidelines by clicking on a ruler at the top and side of the window and dragging down. If you do not see the rulers go to View &rarr Rulers (Ctrl-r). You can adjust the position of the guidelines by using the Move Tool (m). Drag them off the screen to remove them.

We need to adjust one of the heads so that they match. We will adjust the one on the right in this example. Scale the head so that the top of the head and bottom of the chin match the guidelines from the other image. You can scale an image by doing Edit → Free Transform (Ctrl-t) in the image's layer. Drag the corners of the control box to scale the image, but be sure to hold Shift when doing this to maintain the image's proportions.

Once the images are aligned, remove the guidelines and crop off any white space on the top and bottom of the image using the Crop Tool (c). We can now extract the properly aligned front and side views. Copy each head into a new image. The red lines in the image below give you a general idea where to select. Make sure that the height of the two new images are the same. Save these files as "side_view.jpg" and "front_view.jpg" and put them in a readily accessible location.

Open a new Maya file and go to the Four View. In the front camera's menu set go to View → Image Plane → Import Image.... Navigate to where you saved "front_view.jpg". Do the same in the side camera for "side_view.jpg". Your Four View should look something like below when you are done. Notice that the image planes are intersecting in the perspective view.

It is not very useful to have your image planes cluttering up your modeling area and so we will move them back a bit. To select an image plane, simply click on it in the perspective view or go to View → Image Plane → Image Plane Attributes → imagePlaneX. If you choose to click on it, make sure your Attribute Editor is open for this next part.
In the Attribute Editor, click on the tab at the top named "imagePlaneX", where X is some number. If you scroll down in the editor, you should see a section called Placement Extras. The "Center" attribute has three values associated with the X, Y, and Z position of the image plane. For the front view, change the Z location to -50. For the side view, change the X location to -50. Notice how the image planes move away from the center of the scene in the perspective view but stay in the same place in their respective orthographic views.

If your reference images are not perfectly square and the same size, then they will probably not end up the size imported as an image plane. If this is the case, then you will have to do some alignment in Maya as well. We do this in a similar way as Photoshop. For guidelines, create two cubes that touch certain reference points in one image. Notice that they do not match below. To compensate for the scale difference, increase the "Width" attribute in Placement Extras of the smaller image plane. Once the two images match, you are ready to start modeling.

If you want to delete an image plane, simply selecting it and hitting Delete will not work. To delete an image plane, go to your Outliner. In the Outliner menus, go to Display &rarr DAG Objects Only. This will display a whole bunch of hidden objects, including the image planes. Find the image planes in the Outliner and delete them. Turn on DAG Objects Only when you are done.
You now know how to create and align image planes. Continue on to the other exercises to learn more about the basics of Maya.