The destination folder is \\iinetsrv\<your group login>. Please check your group login at the Groups' page.
e.g. \\iinetsrv\cse444k
In Windows XP: (which is what Sieg machines have)
A. Click the Start button.
B. Right-click the My Computer menu item.
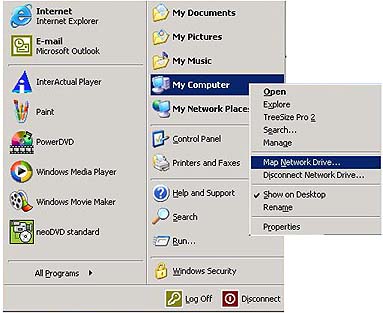
C. Select Map Network Drive; the Map Network Drive box will pop up

D. From the drive pull-down list, select the letter of the drive you are mapping to
E. In the folder box, type your destination folder as explained above
Once you've mapped your drive you should see a single folder named Calendar_x, where x is the letter from your team's login.
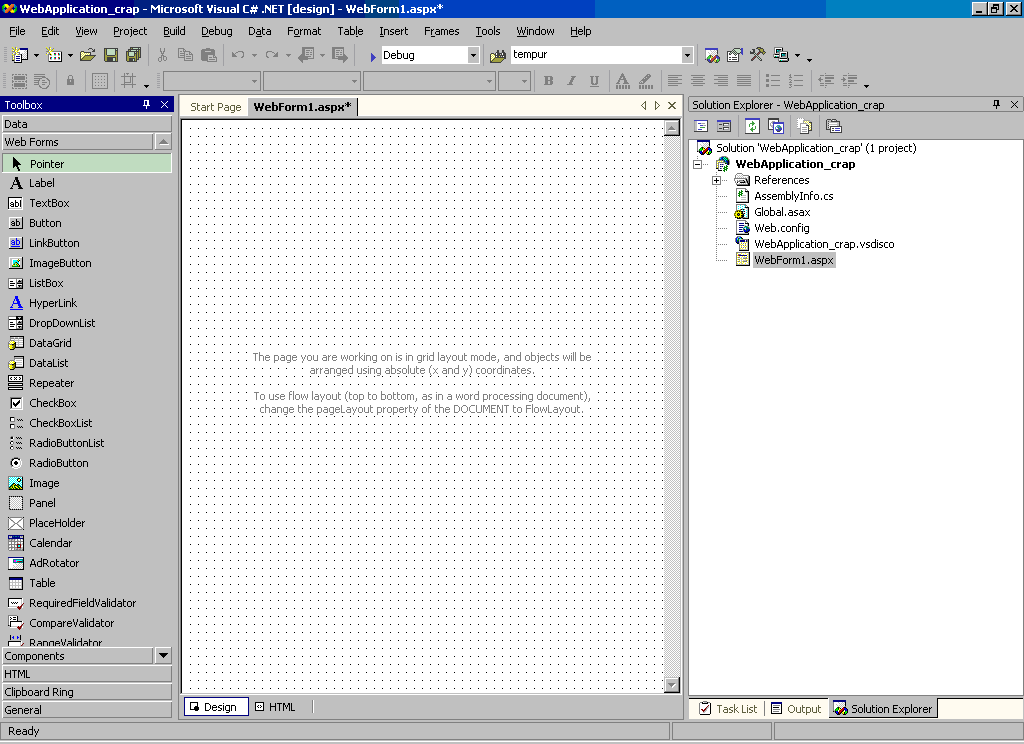
Double click that folder to open it. Now you will see a screen that looks like this:

Double click the solution file (the one I have highlighted in the picture). That should open your project.
Your project should look like this(the file/project names differ, of course):
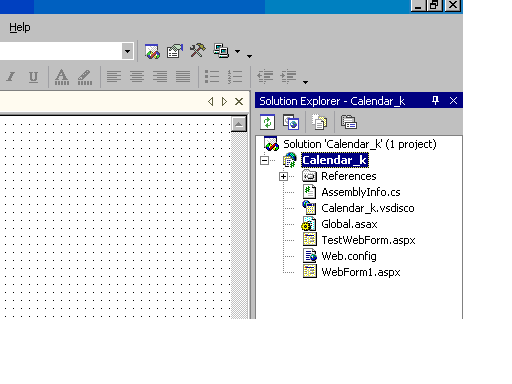
If you do not see the solution explorer or the toolbox, go to View on the toolbar, then select Solution Explorer and/or Toolbox.
In the solution explorer, right click on the Project file (the one highlighted in the image below)
 .
.
Click on Add Web Form. A new screen pops up and asks you for a file name. Give your page a name--it should now show up in the solution explorer. To start working on this page, double click it.
By default, you are presented with the Design view, but you can click on the tab at the bottom of the page to switch to HTML view and hand code whatever you wish.
Let's add a "Hello World" message. Click on the label in the toolbox. Now drag a rectangle over the grid. A rectangle appears on the grid (says Label1 on it). Right click that rectangle and go to Properties. The properties box appears on your screen (most likely right under the solution explorer). Go to the Text Property and change it to Hello World (just type it).

You are ready to view your page--one more step. In solution explorer, right click your page and click on "Set as a startup page". This way you designated your page as the first one to be served as a user accesses your site.
To compile and deploy your project, click on the little blue arrow in the toolbar
You can also access your page by pointing your Browser to:
http://iinetsrv.cs.washington.edu/cse444au02/<your_group_login>/Calendar_X/PageName
For example, the page for group cse44k is currently accessible at
http://iinetsrv.cs.washington.edu/cse444au02/cse444k/Calendar_k/WebForm1.aspx