| CSE 441 |
How Tos
Content
- Uploading files (e.g., Studio Designs) to your personal web space
- Uploading files to your project group web space
- Using Subversion for version control of your project files
Uploading files (e.g., Studio Designs) to your web space
Each student has been assigned an individual web directory. You can view these directories under the Studio Design section of the class website. You can access the content of your web directory from one of the CS lab machines (using Windows Explorer or SFTP), or from your own computer (using ssh).Using Windows Explorer from the CS lab machines
-
Log into one of the CS lab machines ("
Log on to:" should be set to "CSEPCLAB"), and open Windows Explorer.

-
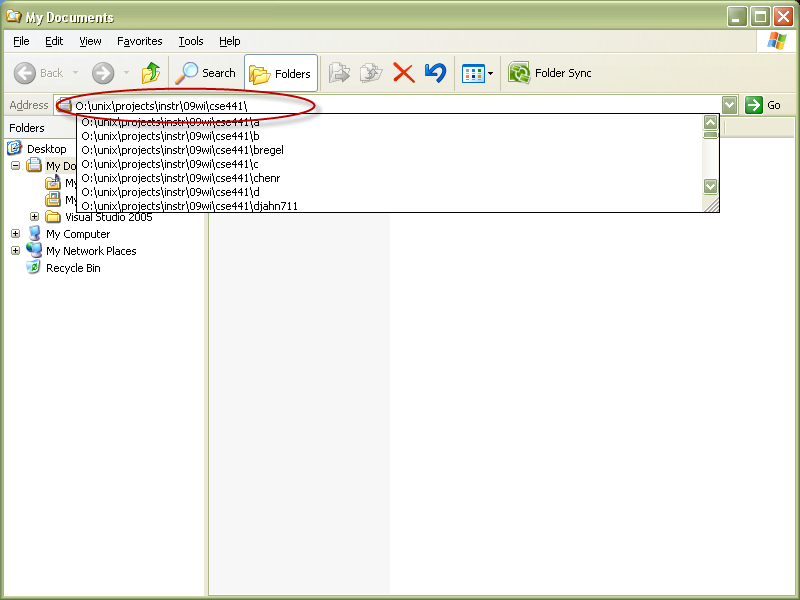
In the address bar of the Windows Explorer window, type
O:\unix\projects\instr\12sp\cse441\students\[username]where[username]is your CS Net ID, and hit Enter.
click to enlarge
-
You can now drag files/folders into here to structure your web page as you wish.
Make sure you have the
index.htmlfile set up to link to all of your relevant contents.
Using SFTP from the CS lab machines
-
Log into one of the CS lab machines ("
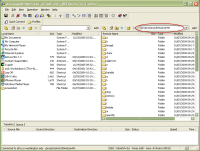
Log on to:" should be set to "CSEPCLAB"), and open an SFTP connection toattu.cs.washington.edu.

click to enlarge
-
Set the destination directory to
/projects/instr/12sp/cse441/students/[username]where[username]is your CS Net ID, and hit Enter.
click to enlarge
-
You can now drag files/folders into here to structure your web page as you wish.
Make sure you have the
index.htmlfile set up to link to all of your relevant contents.


Using SSH from your own computer
If you're usingssh from your own computer, you most likely know what you need to do.
sshtoattu.cs.washington.eduusing your CS Net ID and password.cdto/projects/instr/12sp/cse441/students/[username]where[username]is your CS Net ID.-
You can now edit files/folders in here to structure your web page as you wish.
Make sure you have the
index.htmlfile set up to link to all of your relevant contents.
Uploading files to your project group web space
Each project group has been assigned a web directory, similar to the individual
personal web directory described above. You can view these directories under the
Projects section of the class website.
You can access the content of your web directory from
one of the CS lab machines (using Windows Explorer or SFTP), or from your own computer (using ssh), as described above. The only difference will be that wherever you had "students/[username]", you would replace it with "projects/[projectname]" where [projectname] is the initial name that was given to your project.
***Make sure to follow the instructions in the section below to ensure your group members can access your files properly!***
Making sure your group members can modify your files
Each project group has been assigned a Unix group (e.g., cse441z), and all members of your project group has been added to be members of this group. You can find out which group you belong to by issuing the command "groups" in your Unix account.
Whenever one of your group member creates a file or a directory in the project web space, you have to ensure that the file/directory has the permission set to
"group writable" (and readable of course). You can check what the permission is for a particular file or a directory by issuing the command 'ls -l'
in a directory. Here's an example of what that might look like:
        attu1% ls -al

        total 2244

        drwxrwxr-x 5 harada  cse441z   4096 2009-02-07 14:27 .

        drwxr-xr-x 5 harada  cse441    4096 2009-02-04 10:42 ..

        -rw-r--r-- 1 thomsbg cse441z   9857 2009-02-08 18:24 GreenBean7.html

        -rw-r--r-- 1 thomsbg cse441z 909376 2009-02-03 09:41 GreenBean7.swf

        drwxr-xr-x 2 thomsbg cse441z   4096 2009-02-03 10:15 images

        -rw-rw-r-- 1 harada  cse441z   2039 2009-02-03 10:15 index.html

        -rw-r--r-- 1 thomsbg cse441z 878440 2009-02-03 10:15 Medium Fidelity Prototype.docx

        -rw-r--r-- 1 thomsbg cse441z 449920 2009-02-03 10:15 Medium_Fidelity_Prototype.pdf

        drwxrwxr-x 3 harada  cse441z   4096 2009-01-08 23:35 previous

        -rw-r--r-- 1 thomsbg cse441z   3298 2009-02-03 09:54 READ+ME.txt

        drwxr-xr-x 7 thomsbg cse441z   4096 2009-02-07 14:33 svn
The stuff on the left column show the permissions (e.g., "-rw-r--r--"). What you're looking for are the 5th and 6th characters in that string.
You want it to say "rw" instead of "r-". If the file or directory you created (which you can verify by looking at the 3rd column
and seeing your username there) shows "r-" for the 5th and 6th permission characters, you need to add the group write permission to it by issuing
the following command:
chmod g+w <filename or directory name>
Or alternatively, you can recursively set the group write permission on all the files you've created in the directory by issuing:
chmod -R g+w *
In order to make sure that future files that you create automatically have the group write permission set, you need to either issue the command
"umask 002" each time you log in, or add that command at the end of your .cshrc file in your home directory.
Using Subversion for version control of your project files
Thanks to Jim George, here's a starter for those wishing to use a version control system for their project files:
A bit of background, SVN stands for Subversion and it's one of a few popular Version Control systems. Version Control makes it easy to keep your source code safe and share it aTueg multiple people.
Read up more in the following links if you want more background:
- Wikipedia article on Subversion
- Wikipedia article on revision control
- Subversion homepage
- Subversion book (online documentation)
- TortoiseSVN (Windows graphical Subversion client) homepage
- TortoiseSVN online documentation
First thing to do is through a terminal log onto the attu server using SSH.
        $ ssh <username>@attu.cs.washington.edu

        <enter password>

        $ cd /projects/instr/12sp/cse441/projects/<yourprojectname>/

        $ mkdir svn
From here you can do step at step 2 through 5 of this tutorial, which has you create a repo, edit a few files, make user accounts, etc.
Step 6 will be a little different because we need to use svn+ssh to import the source (assuming it is on your local machine).
So run this command from your computer (requires SVN to be installed):
        $ cd /my/source/directory/

        $ svn import <local directory> svn+ssh://<csusername>@attu.cs.washington.edu/projects/instr/12sp/cse441/projects/<yourprojectname>/svn/<new remote directory name> -m "Initial Import"
If this is successful, you will see a bunch of lines starting with Adding <some file> and then at the end "committed revision 1".
From this point you and your team can all access the source by:
$ svn co svn+ssh://<csusername>@attu.cs.washington.edu/projects/instr/12sp/cse441/projects/<yourprojectname>/svn/<remote directory name>
And you're set!
Hope this helps somebody =)