Note: This assignment teaches new material, so you will need to consult the Processing Reference for full understanding.
Goals
- Understand the basics of images in Processing: display, loading pixels, and extracting RGB values.
Color Checker
Our plan is to display a .jpg image, and then program a Color Checker.
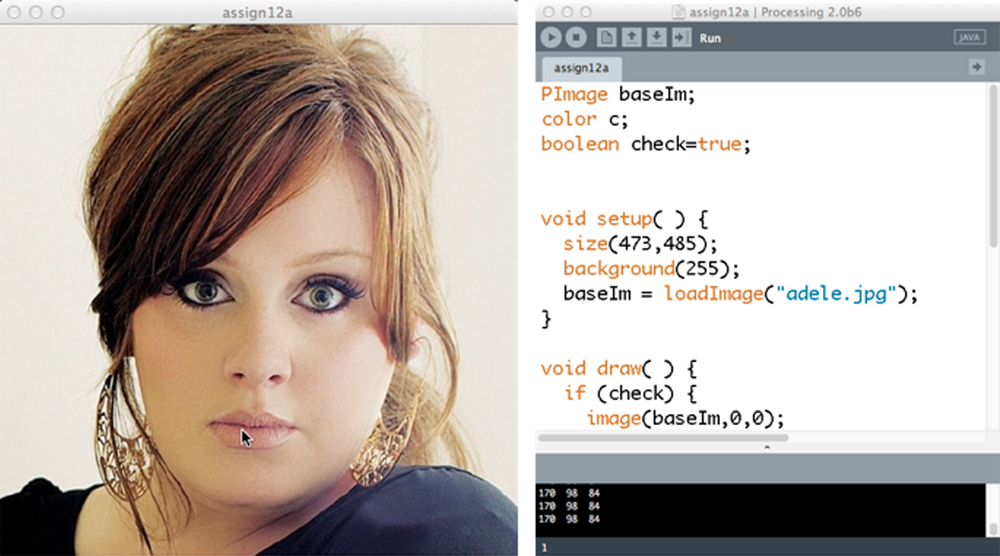
The user moves the mouse over the photo and the RGB colors of the pixels are displayed.

 As the user's mouse moves over Adele's lip, the RGB color of the pixel it is on is shown at the bottom of the program window as 170, 98, 84.
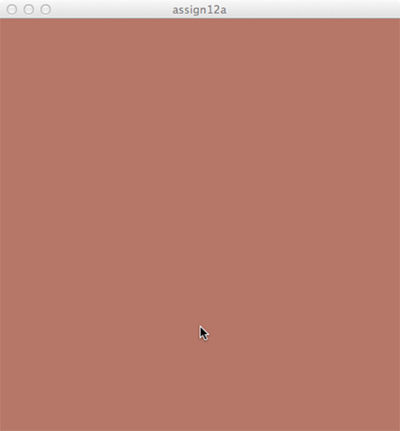
When the user clicks the mouse, the image is replaced entirely with that color as a new background color.
When the user clicks again, the canvas returns to the original picture with the RGB values displaying as my mouse moves around.
Video Example: https://vimeo.com/166744426
Step 1: Displaying a Photo
Below are the steps to get a photo onto your canvas:
- Create a new program (
.pdefile) and save it somewhere on your computer. - Choose any photo you want, but make sure it is of a smaller size.
- Put the photo in the same folder as the
.pdefile. - Determine the width and height of the photo.
- Declare an image variable of type
PImageat the top of your program. - In
setup(), set the drawing canvas size to be equal to the photo's width and height. - In
setup(), load the photo into your program and store it into a variable using something similar toloadImage("photo.jpg");(see image above for example). - In
draw(), position the image on the canvas starting in the upper-left corner using the statementimage(<baseIm>, 0, 0);where<baseIm>is replaced with your variable name. - Create a function called
updatePixels()that will be called indraw()to update the drawing canvas whenever you change it.
At this point, running your program should display the image. Test it out to verify!
Step 2: Linearizing a Picture
Next we need to read the RGB values from the individual pixels.
When you call the special built-in function loadPixels() it will automatically create an array called pixels[] and fill it with the image's pixel color data.
The ith pixel is referenced as pixels[i], with i starting from 0.
The curious thing about the array of pixels is that it is one-dimensional despite the fact that the picture is two-dimensional.
The pixel in the upper-left corner is pixels[0] and the pixel in the lower-right corner is pixels[width*height-1] (minus 1 because we start at 0).
If mouseX and mouseY contain the current position of the mouse, then its pixel is found at pixels[mouseX + mouseY*width].
![]()
In the example shown above, mouseX is 7, mouseY is 3, and width is 16.
Our formula evaluates to pixels[7 + 3*16], which is pixels[55].
Step 3: Extracting RGB
At the top of the program, declare a variable c of type color and assign it to the pixel under the mouse pointer in draw().
The RGB colors of this pixel can be extracted by the functions red(c), green(c), and blue(c).
These function calls will return floats, but we need them to be ints, so you should cast them to ints using the function int().
After assigning the pixel pointed at by the mouse to the c variable, write it to the console with a println statement:
println(int(red(c)) + " " + int(green(c)) + " " + int(blue(c)));
Here, the color values are converted to a string and spaces are positioned in-between using the concatenate operation (+).
You should now be able to move the mouse around and see the pixel RGB values printed at the bottom of your working window.
Step 4: Checking Color
Create a boolean variable at the top of your program named check, and set it to true.
Add a mousePressed() function that changes the value of check.
Now modify your program to match the desired behavior: if check is true, then show your image and display the RGB values of the current pixel; if check is false, then change the background color to c.
Note: how often do we need to change the background color? Based on your answer, in what part of the program does it make sense to change your background color?
Submission
- Make sure that your name is included in your file.
- Make sure that most of your lines of code have comments so that someone else can understand it.
- Make sure that you are using a custom image.
- Submit your finished
.pdefile from Step 4 as well as your image file to the Canvas assignments page. - (optional) Talk to your TA if you want to add this program to your portfolio.