FIT 100
More Microsoft Access and Relational
Databases
1. Query Construction in SQL View:
Introduction:
Today’s lab looks at an additional
component of the Data Services layer:
formulating queries that select, project and join up data from different
tables.
Access uses a GUI called the Query-By-Example so users can build queries
visually. In the background, Access
translates the visually represented query into SQL (Structured Query Language),
the standardized language used to communicate with a database. This SQL View can also be used to build
queries using straight SQL syntax.
Data Services
The main unit
of data services (data storage) is a Table.
Data storage allows for persistent data (the data stays even when
the power goes off). A table is a
collection of data about a specific topic.
Tables
organize that data in columns (called attributes) and rows (called
records). One of the attributes
(columns) of the table is almost always a number data type that is used as a
key. A key is used to uniquely identify
the data in a particular row. Key values must be unique and not null. A primary key is just the attribute(s) that
have been designated as the main key for the table.
Data
Services also includes the storage engine and the query engine which deal with
the saving, accessing and manipulation of the data. A Query is used to access and manipulate the data. Queries
are also called views because they are a user’s “view” of the data in the
database.
Objectives:
- To become familiar with graphical query method of QBE (Query-By-Example) that is used in Access.
- To create queries that view and/or manipulate data
from one or more tables.
The important points to remember when creating a query are:
- Always include any tables that hold the data you want
to see
- Always include any tables that are in the path to the
data you want to see.
- When using a join operation, always indicate where
the tables are related: Match the keys.
- When generating a query on more than one table,
always use table name qualifiers to distinctly identify the correct table
Example:
tblAdvisor.LName and tblStudent.LName refer to 2 distinct attributes.
If you simply use LName in a query on those 2 tables, Access will not
know which attribute you are referring to.
Download your database
- Download your lab database to the desktop and open it.
- Add 2 additional records to each table using the forms your produced last lab.
- Now that we have some seed data in our database, we can request the display of data from different tables.
1. Query
Construction in SQL View:
- To get to the SQL View, go to the Queries window and double click on the Create query in Design View option.
- When the Show Table window comes up, close it without
adding any of the tables you have created.
- From the top menu, go to View>SQL View or
click on the SQL icon on the tool bar.
SQL View:
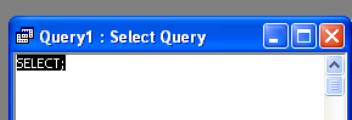
- Enter the SQL statement needed for query A from Assignment
4 into the window.
Example:
SELECT *
FROM tblAdvisor;
- When the SQL Clauses are in place, click on the
Datasheet view icon in the upper left hand or go to View>DataSheet
View to display your query results
For the first view, the number
of rows displayed should be the same number as the records in your student
table since you asked for all students.

- Save the query for review later. Repeat the process for B and C in Assignment 4.
Now let’s take a look at creating
a query using a GUI instead of just typing in commands.
QBE, or Query By Example,
is a graphical query language. This
tool allows a user to follow a "drag and drop" method of
constructing a query against a data store.
You can consider the QBE as a translation tool that takes user input
in graphical locations and generates SQL.
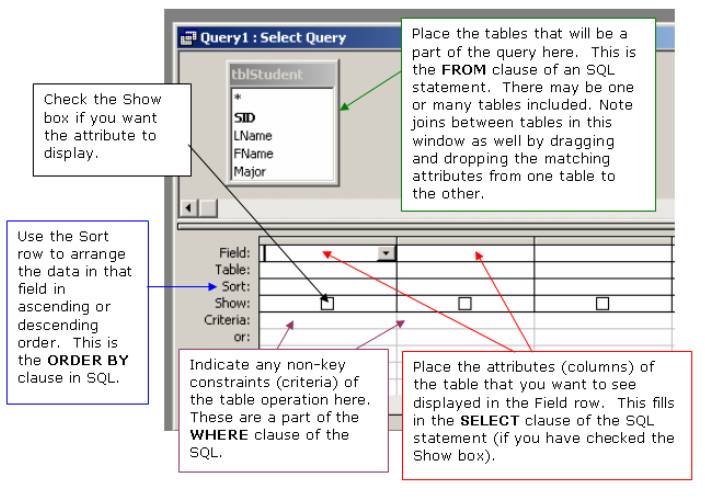
What goes
where in the QBE:
By breaking down the interface, a user can see how this tool is able to
construct SQL with the input provided.
2. Use the QBE:
- Go to the Queries window and double click on the Create
Query in Design View option.
- Construct the queries from Assignment 4 using the QBE. Add the table needed for the first view
from the Show Table window and then close it.
- Drag all the fields you wish to see displayed down
into the Select columns, or choose them from the Field combo box.
- View the results in Form View
- Go back to the Design View of the query. Can you figure out how to sort the
records and display them alphabetically by last name?
You shouldn’t have to double check to see if the query is correct, but if you aren’t sure of the join, look in your tables to see what information you should get.
3. Practice (use
the QBE):
Determine what information is necessary to show or what has been requested. Not all attributes used in a query need to be shown to the user.
Ø Show
me all students (just their first and last names) and the name of their Major.
Ø Show
all students (first name and last name), their major and their advisor. Sort by major.
Ø Show all students with an ART major OR a CSE Major. (Use two Majors you actually entered if you don’t have ART or CSE)
Ø Show who advises student number 4 (StudentID).
Ø Show all Students who have an Advisor from the certain department AND have a particular Major. Only show the student names.