FIT 100
More Microsoft Access and Relational
Databases
Table of Contents
1. Create a Form using the
Form Wizard
2. Creating a Form Using
Design View
4. Displaying Data from
One Table to Help Add Data to Another:
Adding Instances to tblStudent
6. Refreshing the Form and
Closing the Form
7. Lab Questions (use to
test your understanding, not turned in)
Reading
for Lab:
·
Review Chapter 13 of Fluency
with Information Technology:
Foundations and Fundamentals of Information Technology
·
Check
out the Database Definitions on the Web Reference page:
http://courses.washington.edu/fit100/au02/webref.shtml
Introduction:
In today’s lab we will look at the presentation layer: creating forms for users to input data and receive data output. (See the first database lab for a brief description of all three levels involved in a complete Relational Database Management System)
Presentation
Services
The interfaces
created to allow users of the Database system the ability to enter data and to
view output of data. A Form is
the typical interface used for input and output of data that is retrieved by a
Query. There are other interfaces in
Access such as Reports and Data Access Pages, but you will only be dealing with
Forms for the first part of Project 3.
Objectives:
- Understand the separation of data as it is stored (in tables) and as it is displayed for users for update or to disseminate.
- To create forms that will allow a user to add data to tables using a friendly interface.
TO BEGIN:
Download a copy of your YourName.mdb
database to the desktop from Dante and open it.
If your
database was not closed when you tried to ftp it after the last lab, you will
have an empty file. If this happened,
you will need to work through the first database lab to recreate it.
Today’s lab allows you to work
with a familiar object, the Form.
In Access forms are used for presentation in a manner similar to
their use in JavaScript. Both are intended as a way to present data of some
kind to a user or obtain data from a user in a way that is intuitive and
helpful (although not every form is successful in this endeavor!). The first form will be created
using a wizard. The second and third will be created just in design view.
In addition, you will add combo boxes on one form in order to view data
from two different tables as we add data to a third. You will also:
1.
Create a
Form using the Form Wizard
- Create a form to add Major instances (rows of data) to the Major table. Go to the Forms window and create a form for the Major table using the form wizard.
- Select Table: tblMajor from the available fields and move all the attributes over to the right to the selected fields.

- Choose a layout (Usually Columnar or Justified is the nicest looking)
· Click Next
· Choose a style
·
Click Next
- In the last window, give a name to the form. Call it frmMajor to distinguish
it from the table Major. Click
finish and the form will open up, ready for you to add data.
- Using frmMajor, add the following Majors:
MajorName School_Dept
INFO The Information School
CSE College of Engineering
BIOL The Biology Program
CHEM Chemistry Department
PHYS Physics Department
SPAN Romance Languages and Literature
ART Art Department
HIST History Department
- Save the form layout and close the form. Go to the Major table. Are the records you just added through the form in the table? Good!
2.
Creating a
Form Using Design View
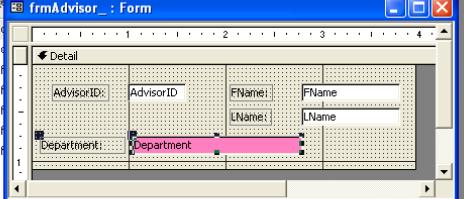
- Create a form in design view to add data to the Advisor
table. This allows you to place
all objects on the form and format it by hand. Name it frmAdvisor.
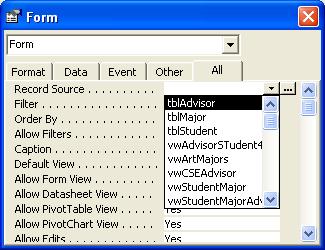
- To add the fields to the form, simply access the Form properties
· Right click on the form title bar, select Properties
· Make sure the Form object is selected in the window
· Select as the record source the tblAdvisor table from the list.
![]()


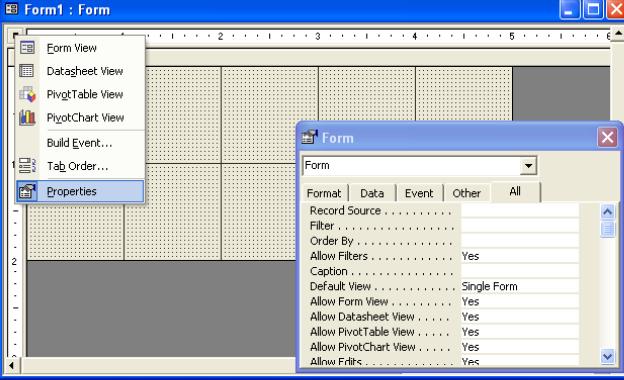
- A window with a list of the attributes for the Advisor table should pop up. If it doesn’t:
· Go to View>Fields List on the Menu bar
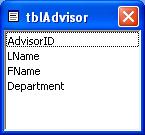
- Drag and drop the attributes onto the form in an arrangement that suits you.
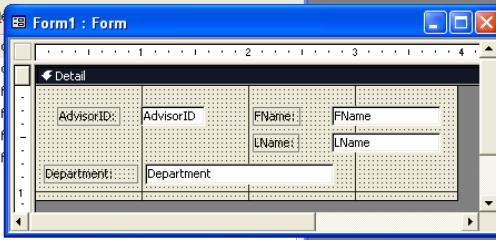
- Switch to Form View and see the how it looks.
3. Manipulate field properties in Design View
- Switch back to the design view and select one of the text
box fields shown in the form.
- Right click and go to the properties of that field.
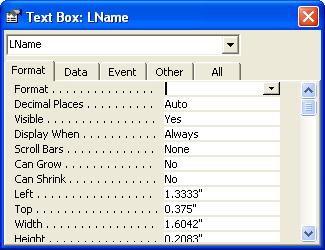
- Explore the properties and change a format based
property, such as Caption or BackColor.
![]()
![]()

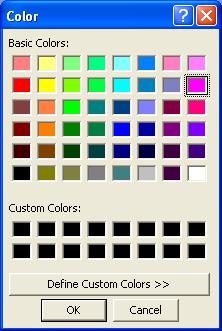
- Now adjust the back color of the Form, then look at it in Form View
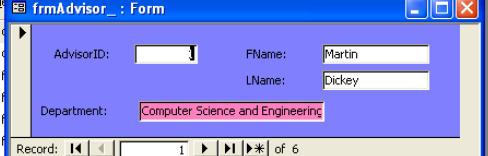
- Using frmAdvisor, add the following Advisor Names and
Department:
Mel Oyler from Informatics
Alan Borning from Engineering
John Cusak from Art
Vitoli Demetrio from Modern History
Garbonzo Bean from Physics
Go to the Advisor table. Look at the records you just added through
the data entry form.
4.
Displaying
Data from One Table to Help Add Data to Another: Adding Instances to tblStudent
Now we’ll do something a little
different: create a form that adds data
to the Student table, but it will display data from Major and Advisor tables.
- Go through step 3 again, but use the Table: tblStudent to add all the fields.
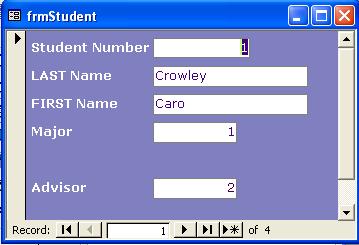
- Save the form as frmStudent. You now will have a form that may look
different from this, but all the attributes should be listed:
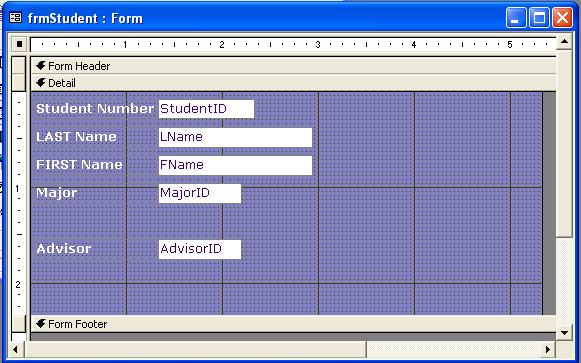
- Switch to the design view by clicking the icon in the upper left corner. In design view, extend the borders of the form and the form footer to give you some layout room.
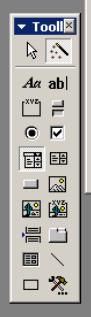
- Add two combo boxes to the form. One combo box will be used to display the contents of the Major table. The other will display the contents of the Advisor table.
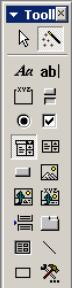
- From the tool box on your screen, select the combo box object.
· Add the first combo box to the form by clicking once on the tool.
· Move to the area of the form where you would like to have the combo box and use the “click and drag” action with your mouse to draw the combo box to the size you want on the form.
Once you place the combo box control on your form, a
combo box wizard window will come up to walk you through the process. Select the following options from each screen and then
click Next: You will return to design view. There is now a combo box and label in
the form. The label can be deleted
(the combo box should line up across from the other Major label and text
box).
![]()
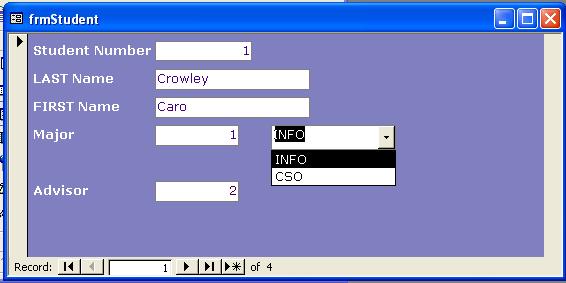
- Switch to Form view and look at the values that are
in the combo box. Tres cool, no?
- Return to Design View. Add another combo box just across from the AdvisorID text
box.
- Select the following options from each screen and then click Next:
· Have the combo box look up values from a table
· Select the tblAdvisor as the table that will provide values for the combo box.
· Move ONLY the AdvisorID, Lname and Department from the available fields over to the selected fields window.
· Make sure the “Hide key column” box is checked
· Store the value in the “AdvisorID” field of the Student table (those are the options in the drop down menu)
· Ignore the name option for the combo box and click Finish.
- Return to design view. There is now a combo box and label in the form. Delete the label not the text box! (Ask your TA if you aren’t sure)
- Start moving through the records you have already
created in Form View.
You
should see the number value of the Advisor in the text box for Advisor ID
and the name and department of the person that goes with that number
appears in the combo box on the right.
We
have set up the combo box so that it displays the text values for us to
see, but it will store the corresponding key value in the Student table in
the attribute AdvisorID. That
stored value will be referred to as a foreign key in the Student table.
- Since we deleted the original Major attribute and
that held text earlier in the lab, let’s now add a major for the students
in the table. Use the combo box to
select a Major. Notice the corresponding key value is stored to the left.
- Add a total of 6 student records using the form. Give the students a major and an advisor.
5.
Add a List
Box to the Form
- Add a list box to the form. This list box will be used to access a particular record using only the last name field
- From the tool box on your screen, select the list box object (also known as a control). Add the list box to the form here by clicking and dragging it to the size you want on the screen.
Once you place the list box control on your form, a
wizard window will come up to walk you through the process. Select the following options from each screen and then
click Next: You will return to design view. There is now a list box and label in the
form.
![]()
- Switch to Form view and look at the values that are in the combo box. Tres cool, no?
- Start moving through the records you have already
created by selecting a name from the list box.

6.
Refreshing
the Form and Closing the Form
- Go to design view and add two command buttons to the form. One will refresh the page and the other will close it when a user is done adding data.
- Select a command button control and place it on the form in the upper right hand corner.
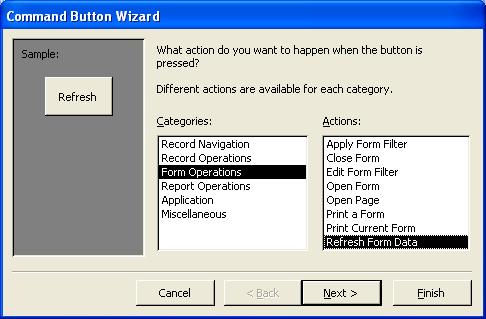
- When the Command Button Wizard comes up, select Form Operations from the Categories column and Refresh From Data from the Actions column and click next:
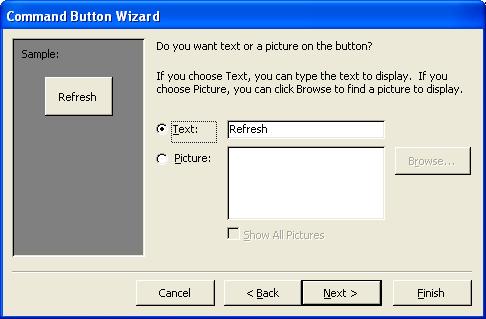
- Choose either a picture or text for display on the button and click next:
- Name the button cmdRefresh and Finish.
- Save your form. Switch to Form View, add an additional record and press the Refresh button.
· Does the list box get updated?
·
Are the names in the list box updated in alphabetical
order?
No, they are updated and displayed in the order they were entered to the
table. We’ll look at ways to sort data
alphabetically next lab.
- Now go through the same process but select the correct operation to close the form when the button is clicked.
- Save your form.
Switch to Form View and press the exit button. Does the form close?
Close your database and FTP it to your Dante account if you don’t already have it on disk. We will use it again for the next lab.
WHEW!!!! You’ve made it through another lab! Only a few more to go!!!!!
7.
Lab Questions
(use to test your understanding, not turned in)
- In Relational Databases, a table holds rows of data
about one particular entity, like student. Each row is uniquely identified by a key. In this lab we are using a tool in access
called autonumber to generate a unique key for us. If we weren’t using the autonumber
feature and we didn’t have student IDs for each student, what other
attribute(s) could be used as the key so that each row in our student
table is unique? (Hint: You
probably have to use a combination of attributes).
- Explain how your chosen key is ensures the row is unique.
- What is the form used for in this lab? In other words, what is the form doing as we enter data into it?
- How are we able to use the combo boxes on the Student form and have the database system “know” that a major name displayed in the combo box matches the number showing for MajorID on the Student Form?