FIT 100: Fluency with Information Technology
Lab 1: UW NetID, Email, Activating Student Web
Pages
Table of Contents:
Introduction:
This
is the first lab for “Fluency with Information Technology” or CSE/INFO 100 as
you know it. The goals are simple: to
assure that every student entering the course has a certain comfort level with
two of the tools used for communication and lab work: Email and Personal Web Page accessibility.
Objectives:
To
get all students up to speed on:
- Email with the UW
WebPine and the PINE email system
- An initial
understanding of email server space
- Enabling student
web pages
To Do:
In order
to insure that you and only you have access to your account space, your
password should be something easy to remember, but not easily
guessed. You should never give
your password out to others. The
UW requires that passwords be 8 to 20 characters long and include both
upper and lowercase letters as well as numbers. The password cannot be a common dictionary term. The
University of Washington Department of Computing and Communication
(C&C) has provided a series of help pages to establish and manage your
UW account.
1. Getting Started
Everyone should have a UW Net ID, since you needed
it to register for FIT100. You will reach the UW portal via the WWW.
A major example of a portal that you may have used is UW Libraries Information
Gateway. Another is Yahoo!
Portal:
- Enter this URL
(Uniform Resource Locator) in the address bar of a Web Browser to go to
the portal:
http://myuw.washington.edu/
and login with your UW Net ID and password.
- Explore the MyUW portal. Look at the text
called Web Pine Email for students (on the right side, midway down the
page).
For more help using the WWW, go to:
http://www.washington.edu/computing/web/
For working at home, you
will need specific software from the (UWICK)
UW Internet Connectivity Kit Information package:
Downloading the
Starter Set if you have an Internet connection at home
http://www.washington.edu/computing/software/uwick/starter/
This
text acts as a hyperlink [a direct jump to a particular web page,
image or other file on the web] and will take you to the login to access
your email account through a web page.
For more help using UW Email, go to:
http://www.washington.edu/computing/email/
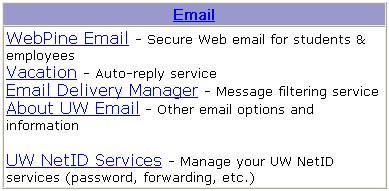
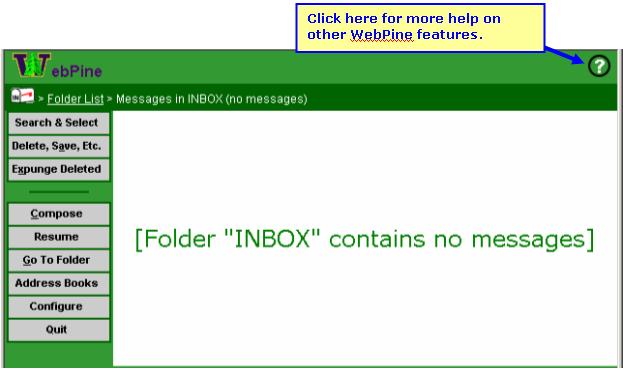
UW Email: WebPine
2. Send Email Using WebPine
There
are many different forms of web email you can use. To send mail from your UW Account using a web browser, you can
use WebPine. This email interface is graphical and works
slightly different from other graphical email applications such as
Hotmail.
Many
of you have used web email before (e.g. Hotmail, Yahoo Mail). For your account at the UW, one of the
easier ways to access your email from a browser is through WebPine.
- Go to WebPine from
the MyUW portal, or simply go
to the following link and log on (remember
why you have a user id AND a password):
http://webpine.washington.edu/
If you have your mail forwarded to another account from this one, you will have to go check that account OR turn off mail forwarding for the purpose of this lab.
- To send a message to someone, click on Compose.
- Send yourself an
email. Make sure you enter in your email address, a subject (“TEST
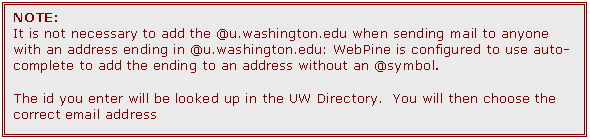
EMAIL”), and some text in the body of the message. Remember that your email is Your_UW_NETID@u.washington.edu.
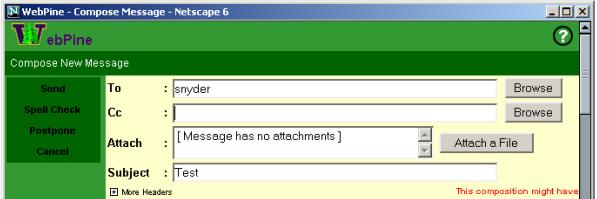
- Click Send.
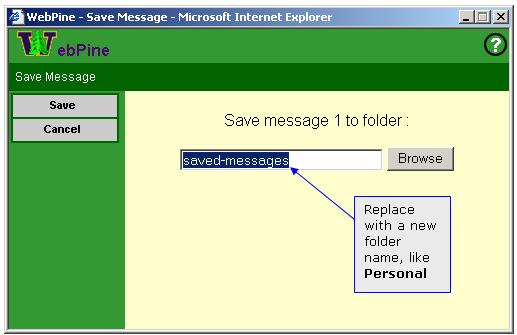
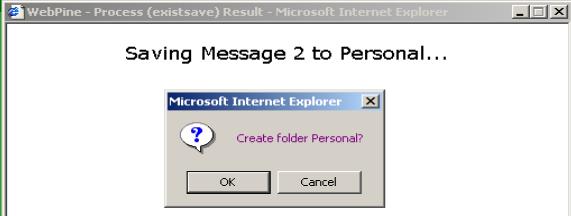
3.
Creating directories (folders)
using WebPine
A. Go to your inbox
B. Save the test message sent earlier by placing your
mouse over the Action Envelope and clicking on “Save” from the menu that pops
up
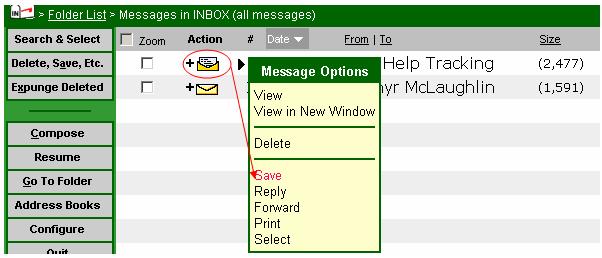
C. Type in a name for the folder in the place of the
one listed
Other functions of WebPine:
![Text Box: Why Pine?
Pine was created by the Department of Computing and Communications here at the UW. WebPine is the web browser based version of Pine, also developed by the Department of Computing and Communications. Pine and WebPine offer a different interface to email than other systems, so knowing WebPine and Pine makes you a more versatile user.
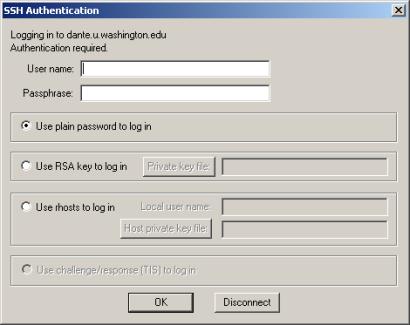
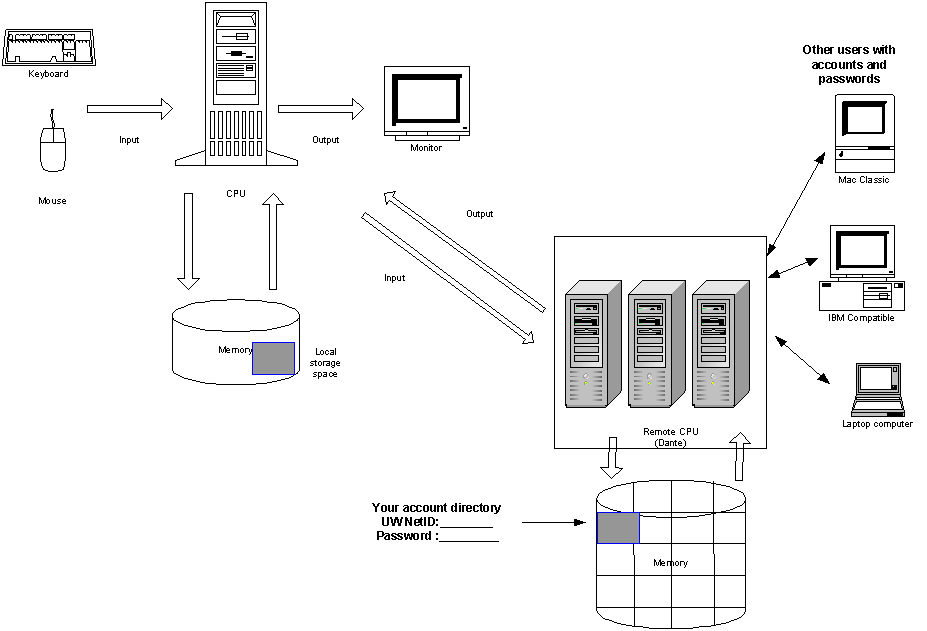
To access your Pine account when Web browsers are not available, you will need to establish a secure connection to the system.
SSH is a protocol that allows you to access your UW email account and file space. SSH is the replacement protocol now used instead of FTP and telnet. These original protocols allowed access to any host computer that you have been given permission to enter. [A host computer is a computer that has an account for you and space for your information in its memory]. SSH will do the same thing, but adds more encryption protection as you pass your user name and passwords back and forth across the Networks.
Through this protocol you can login to your account from any computer that has an Internet connection. You log on as a regular user with all the same permissions regardless of where you are located.
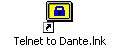
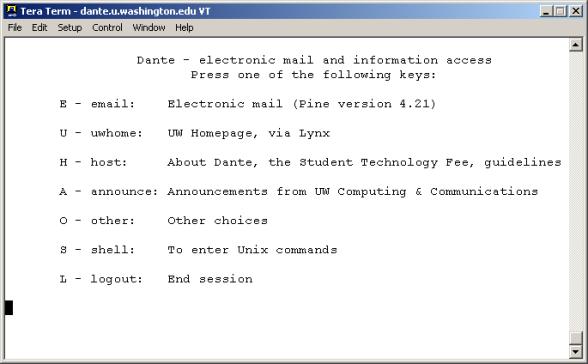
One of the pieces of software used on the UW campus to connect to the host computer, read email and work with remote files is called TeraTerm and is usually an option on the desktop or in the start menu. The location of this program depends on the lab. Ask your TA for the location of the Dante login [Dante is the name of the group of host computers for student email and file accounts here at the UW].](./Lab03.wi.01_files/image017.gif)
This is the email access you will probably be most
comfortable using. It is not the only
way to access your UW email, however, so let us introduce you to the Pine
environment.
Helpful
links:
WebPine
http://www.washington.edu/computing/email/webpine/
UW Email: Pine
4.
Log on to Pine and send email
A. Go to the Student Email (Dante) icon on the Start
Menu.
Start>Student Mail (Dante)
[Your TA will let you know if it is located elsewhere on the machines in
this lab]
Student email (Dante)
The
login screen below will appear. Enter
your UW ID and password.
Once you
log on you will be shown a menu with options to enter your email space,
your file or web space. This
environment doesn’t allow use of a mouse for most selections. This is a
command line interface; so in order to move from screen to screen, press
the correct command key.
B.
In the
screen shown below, press “e” for email.
You do not need to press the return button.
Often Pine
does not require you to hit the Return/Enter button after pressing the
letter that corresponds to a menu selection. However,
you can use the arrows to move up and down the menu selections. Press <Enter> when you have
highlighted your menu choice.
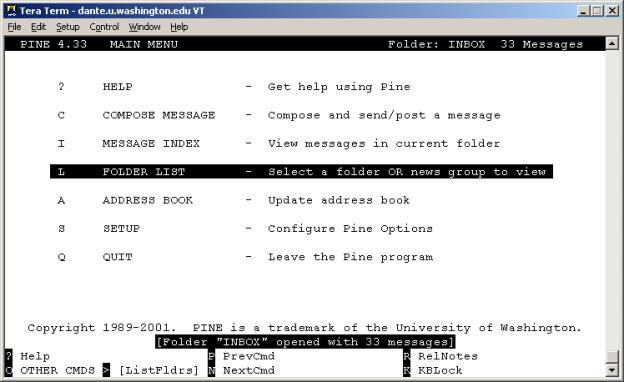
Main Menu for Email
5.
Send A Test Email
[See:
http://www.washington.edu/computing/email/pinedoc/ for detailed information on using Pine to send
mail]
Your email address is yourUWNetID@u.washington.edu
where yourUWNetID is
the name you use when you log in.
A.
Press C (Compose) to see the Compose Message
screen.
B.
In the
To: field, type your UWNetID and press <Enter>.
Note that the rest of the address is filled in for you. The assumption is that you are sending email
to someone whose address ends with “@u.washington.edu”.
C.
Use the
arrow buttons or the tab button to move through the other fields to the body of
the message
D.
Type
“This is a test” in the body of the message.
E.
Send
the message: Type <Control>X
(Send).
NOTE: The control button is indicated by the ^ character in the commands, so ^X is the send command.
You are asked: Send message?
F.
Press
y (yes) or press < Enter >.
The message is sent and a copy is saved to your sent-mail folder. (If you press
n (no) the message is not sent, and
you can continue to work on it.)
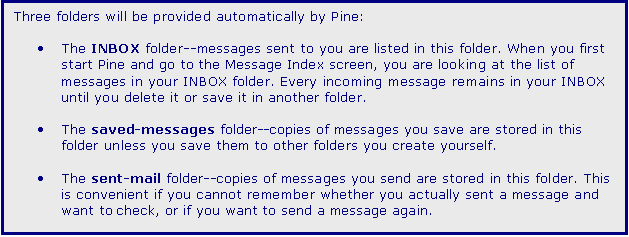
6.
Create a Directory for Email:
- Press L (List folders) to see the
Folders Collection.
B.
There are
two main folders. One is your account
space, called “Mail on your_UW_NetID.deskmail” and the other
holds newsgroup information. Your mail
folder is highlighted by default. Press
<Enter> to view the contents.
C. Press A to Add (create) a folder, give it a useful name (like FIT100). Press Enter to add the folder to your collection.
7.
Move Messages to other Folders
A. If you aren’t in the Main Menu, press M (Main Menu) to return to it.
B. Press I (Message Index) to go to your current folder. The current folder is your Inbox.
C. Using the arrows, move to the test message you sent to yourself.
D. Type O (Other Commands). The bottom menu will change slightly. You now have other commands to select from.
E. Press S (Save). The prompt at the bottom of the screen now asks for the folder you want to save the message in.
F. Press ^T (To Folders). A list of the folders in your account will come up. Use the arrow buttons to highlight the folder you created today.
G. Press S (Select). The folder you highlighted now appears as the selected folder to save your message to. Press <Enter> to move the message from your Inbox to the folder you created.
Be aware that the same keys you press in one screen may refer to
different commands in another screen.
Always read the command menu at the bottom of the screen to be sure.
Spend
time outside of the Workshop getting to know the commands available and
familiarize yourself with the environment.
- Go to the Main Menu
(M)
- Press Q to quit
Pine
You
are asked: “Really quit Pine?”
Press
y for “Yes”
You
will be taken to the main screen for Dante.
Press
(L) to “Logout”
Helpful links:
Pine tutorial
http://www.washington.edu/pine/tutorial.4/index.html
Starting Pine
http://www.washington.edu/computing/email/pinedoc/pstarting.html
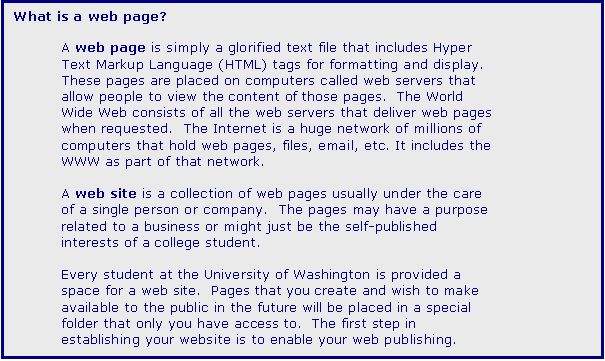
8. Enabling Student
Web Pages
A.
Using a browser (IE or Netscape), go to the following URL:
http://www.washington.edu/computing/
B.
Click on the “Manage Your UW NetID Resources” link.
C. You will be required to log in with your UW NetID and password.
D. Click on the link “Change your Services”
E. If you do not yet have the Basic Services activated, check each box with the Basic Services phrase next to it.
F.
Check on Student Web
Publishing under “Services that are off”
G. Click Continue when you are done.
H.
Ask your TA for help if you are unsure of any of the
directions.
I. When you are finished, you are shown the URL for your web page.
http://students.washington.edu/yourUWNetid/
This
lab will not go into the details of public_html. The folder is created in your Dante account when Student Web
Publishing is activated. The details of
public_html will be covered in upcoming labs.
For today, verify that your page is activated by visiting your web page
address. Your
URL address depends on your UW NetID:
Example:
If your UWNetId is boogyman, then your email address is:
boogyman@u.washington.edu
and your web page is at:
http://students.washington.edu/boogyman
Your web page will probably look similar to the figure below:

For further help Creating and
publishing web pages, go to:
http://www.washington.edu/computing/web/publishing/
We’re at the end. All of you now have:
·
A UWNetID
and an account on Dante
·
Accessed
the email portion of your Dante account in two different ways:
o
WebPine
o
Pine
·
Activated
your web page so that you are now able to start construction of a personal web
page.
The next labs will go forward with the assumption that you have accomplished all three of this lab’s objectives.

The Internet
A look at your remote file space at the UW
|
The Internet |